The Chronicles of Canary Sidings - the Tale of an Untidy Workbench

Herb Garden

Western Thunderer
So more progress!

If anyone was under the illusion that scratch building is a fast process sorry to disappoint it's not! But on the other hand it's very therapeutic and rewarding.

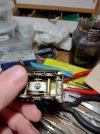
IMG_20230104_214758910.jpg

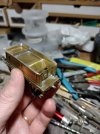
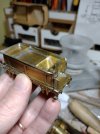
So the tender drawbar is now done excitingly!

IMG_20230104_214804347.jpg

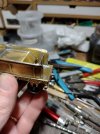
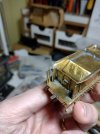
The buffers are old peco track pins if anyone was wondering.....

IMG_20230104_214821579.jpg

IMG_20230104_214830797.jpg

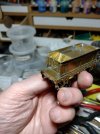
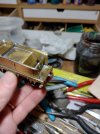
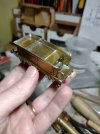
The fun bit is that the drawbar also locks the tender chassis in place. Which is very helpful

IMG_20230104_214843799.jpg

So that's all that's progressed since the last post. Not bad given the fact I'm trying to fit a full time job around the modelling

Until next time
 

James Spooner

Western Thunderer
Hi George

That is really inspiring! Looking really good and I love the way you have been tackling each challenge as it comes and worked on the old Robert the Bruce principle of ‘if at first you don’t succeed, try and try again’. I can’t wait to see the next instalment.

Cheers

Nigel
 

Herb Garden

Western Thunderer
So work is still progressing with the tender and I hope to be able to share progress on the fiddly front handrails soon.....

However thoughts have turned to another perennial problem with this project and I would like to get some help/advice or rather western thunder wisdom.... As I'm a little bit out of my comfort zone here....

Problem is that none of the wheel manufacturers in 4mm scale produce a 5'6" driver without a moulded in crank.... I'm told there's no much market for them

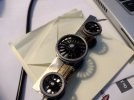
IMG_20230106_124907821.jpg
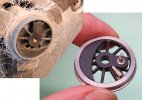
Initially I tried carving away the crank with a scalpel and removing as much material as could from my Gibson wheel.... Looks awful doesn't it and the frames don't cover the orrrible mess.... And not repeatable*

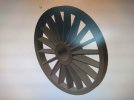
Now I've heard of people 3d printing wheel centres so I knocked up a quick CAD model**

IMG_20230106_124320622.jpg
Problem is I'm now not sure what to do next. I'm pretty sure I can use the lathe to centre the 2 bits together. But where to get it printed? What material? What should I adjust the tolerances to compensate for the manufacturing process? Although having worked with 3d printing most of my professional career I realise I've worked with the huge industrial variety so am out of my depth here.

So if anyone has any wisdom they can contribute or offers of help please do respond or message me direct all will be greatly received.

Herbie

*There are other locos I want to build that require the same style of wheel

**Quick CAD model only because I'm a professional design engineer.... I appreciate do not everyone it's as easy to master....
 

Brian McKenzie

Western Thunderer
Herbie,

Assuming your CAD can be output as an .STL file, upload it to https://craftcloud3d.com/ and view the many types of material offered for printing by a variety of vendors. Whether the prices are to your liking or not is another matter.

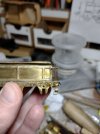
For some driving wheel spoked centres I have used:
"Somos® Taurus which has high thermal and mechanical properties along with superior strength, high accuracy, and exceptional surface finish."

Specify that 'supports' be attached to the rear side of the wheel (so as to leave the front of spokes unmarked).

Brian McK.

Stainless tyre+3D printed centre_4494a.jpg
 

Herb Garden

Western Thunderer
Herbie,

Assuming your CAD can be output as an .STL file, upload it to https://craftcloud3d.com/ and view the many types of material offered for printing by a variety of vendors. Whether the prices are to your liking or not is another matter.

For some driving wheel spoked centres I have used:
"Somos® Taurus which has high thermal and mechanical properties along with superior strength, high accuracy, and exceptional surface finish."

Specify that 'supports' be attached to the rear side of the wheel (so as to leave the front of spokes unmarked).

Brian McK.

View attachment 177494
Hi Brian,

Fantastic, that was just the kind of steer that I needed.... Yes I can export as an STL file so will take a look at what you suggest

Thanks for the tips!
 

Herb Garden

Western Thunderer
So I mentioned earlier about tender handrails....

Well here is the first side completed....

IMG_20230106_190430727.jpg
It was a bit of a faff to make which at one stage involved temporarily soldering the top bit of metal with the 4 holes to the tender footplate to use as a drilling jig ... But it paid off.

IMG_20230106_190439182.jpg

As usual it's just scrap wire and offcuts of etched fret to make the bits

IMG_20230106_190451110.jpg

I've found the resistance soldering unit I bought last year invaluable..... On previous models I would have had to glue bits together to get this kind of finesse.... Not any more!!!!

IMG_20230106_190457282.jpg

I don't know if it comes through but I'm really bouncing with how this came out as I expected I would make a dogs dinner out of it.... Just got to do the other side.... Wish me luck.
 
2023.02 - Experiments with paint

Herb Garden

Western Thunderer
Adventures with a split chassis.....
Well work has once again taken over.... The first week back lulls you into a false sense of security after the shutdown but then week 2.... It didn't help modelling progress this week particularly having to drive to Sheffield and back in a day for a customer meeting..... Long day......

However some progress has been made at the sidings.....

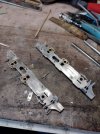
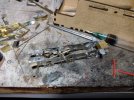
Firstly springs.... I've started the uneviable job of making the leaf springs for the class 73 (12 in total )

IMG_20230107_182146306.jpg

Starting with lots of fine stripwork cut to ever decreasing lengths (all tinned first)

IMG_20230107_183128196.jpg
The longest leaf is then solderd into position on two wires in a very 'hightech' jig

IMG_20230107_183528576_HDR.jpg

Then the leafs sweated together..... one spring done 11 to go
But then I got distracted......

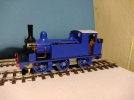
During the pandemic I turned 30 so as we couldn't all meet up my family clubbed together and bought me a locomotive kit....of a GER E22 class (J65 to those of you who only speak LNER).... Which I built later that year

IMG_20230108_101249065.jpg

It was a bit of a step up for me as it was the first time I had build a loco chassis that ran smoothly and the first time I had built anything with compensation..... I think the two are linked..... Anyways it ran for most of 2021 on my Skeetsmere mk2 layout until it was disassembled for painting..... And learning how to use an airbrush

Then I decided to move to EM gauge and the E22 was shelved pending conversion.....

So on Sunday I thought to escape from springs why not convert it to EM?

The easy thing to would be of course just put longer axles in and some spacer washers in and be done with but no.....

IMG_20230108_101217577.jpg

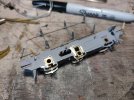
What I decided would be a great idea would be to literally spilt the chassis into 2 pieces then solder in some new frame spacers..... I must have been mad....IMG_20230108_130321271.jpg

Surprisingly when I put the pieces back it the jig it went together rather well... With a new front compensation beam

IMG_20230108_212837144.jpg

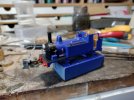
And now it is rolling perfectly and I've got the body to fit back on..... Chassis now needs the brake gear adjusted and painted before it rejoins the body.... And then somehow I need to tone down the garish blue.... It's the right shade but just too intense for a 4mm scale model....

IMG_20230113_074440935.jpg

So until next time.... Happy modelling!
 

James Spooner

Western Thunderer
Adventures with a split chassis.....
Well work has once again taken over.... The first week back lulls you into a false sense of security after the shutdown but then week 2.... It didn't help modelling progress this week particularly having to drive to Sheffield and back in a day for a customer meeting..... Long day......

However some progress has been made at the sidings.....

Firstly springs.... I've started the uneviable job of making the leaf springs for the class 73 (12 in total )

View attachment 177892

Starting with lots of fine stripwork cut to ever decreasing lengths (all tinned first)

View attachment 177893
The longest leaf is then solderd into position on two wires in a very 'hightech' jig

View attachment 177894

Then the leafs sweated together..... one spring done 11 to go
But then I got distracted......

During the pandemic I turned 30 so as we couldn't all meet up my family clubbed together and bought me a locomotive kit....of a GER E22 class (J65 to those of you who only speak LNER).... Which I built later that year

View attachment 177900

It was a bit of a step up for me as it was the first time I had build a loco chassis that ran smoothly and the first time I had built anything with compensation..... I think the two are linked..... Anyways it ran for most of 2021 on my Skeetsmere mk2 layout until it was disassembled for painting..... And learning how to use an airbrush

Then I decided to move to EM gauge and the E22 was shelved pending conversion.....

So on Sunday I thought to escape from springs why not convert it to EM?

The easy thing to would be of course just put longer axles in and some spacer washers in and be done with but no.....

View attachment 177906

What I decided would be a great idea would be to literally spilt the chassis into 2 pieces then solder in some new frame spacers..... I must have been mad....View attachment 177907

Surprisingly when I put the pieces back it the jig it went together rather well... With a new front compensation beam

View attachment 177908

And now it is rolling perfectly and I've got the body to fit back on..... Chassis now needs the brake gear adjusted and painted before it rejoins the body.... And then somehow I need to tone down the garish blue.... It's the right shade but just too intense for a 4mm scale model....

View attachment 177910

So until next time.... Happy modelling!
That’s a very brave move there George but you have done a great job on it! I’m glad it has come back together so well.

cheers

Nigel
 

Herb Garden

Western Thunderer
Nigel/Dave,

Yeah it was a risk but a calculated one. My theory was that if you split the frames you just put them back in the jig you used to build the chassis and it's as if you are building it from new again.

I think the risk was work it for the front end look and the stability. But yes very much a hear in mouth moment when I took the saw through the spacers
 

AJC

Western Thunderer
Well done on that: it was the right answer and, as you say, the jig helps. The closeness of wheels to frames is important, I think.

I’m sure the royal blue will tone down with lining, lettering and a bit of weathering!

Adam
 

Herb Garden

Western Thunderer
Oh dear that thought is going to give me nightmares for weeks.....

The thought of lining a locomotive scares me witless.... I know I've read a couple of excellent books done practice runs and got a couple of very nice bow pens to use..... Even so bringing myself to bring paint to model is something I shy away from every time I contemplate it....

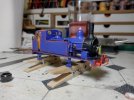
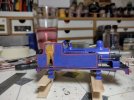
Not sure why cos it's GER blue.... That should be much easier that something like SECR green.....
 

AJC

Western Thunderer
Oh dear that thought is going to give me nightmares for weeks.....

The thought of lining a locomotive scares me witless.... I know I've read a couple of excellent books done practice runs and got a couple of very nice bow pens to use..... Even so bringing myself to bring paint to model is something I shy away from every time I contemplate it....

Not sure why cos it's GER blue.... That should be much easier that something like SECR green.....

I've always defaulted to transfers, I'm afraid, but like every other skill, it's down to practise (and lining is the bane of the pre-Nationalisation modeller's life). Like everything else, you can throw money at the problem, but obviously that isn't an option for everyone, me included.

Adam
 

Herb Garden

Western Thunderer
I completely agree with you that there is an easy way round the problem but like you say the solution is far from sustainable.... So the only way for a pregroupie like myself is to get the lining pen out ...

Probs need to pluck up the courage and go for it one day...

So on a related note I was at my local AG meeting on Sunday and someone said that enamel paints worked better at temperatures below 10degC and that he kept them in the fridge before use.... Not sure what other members of the household must think.... But is that a fact or an old wives tale....?
 

Herb Garden

Western Thunderer
Trial by bow pen.....

One thing I promised when I started writing this thread was I would share progress warts and all. It it is pleasantly humbling to recognise that although one may see ones skills in a favourable light in one area, it can all to often be balanced by a lack of skills in another.

As I have hinted earlier my Achilles heel is the painting of Locomotives and the use of enamel paints.

As seen in an earlier post I had successfully airbrush painted the E22 using PPP GER ultramarine blue. The results could only be described as garish... But given the fact that the loco had been painted I plucked up the courage this week and had a go at lining out the locomotive.

Now as a friend, who is convinced of his own authority on many a subject, informed me that the right way to paint a loco was gloss enamel spray then gloss enamel through a bow pen as lining so I dutifully re-read Ian Rathbones's book on the subject did lots of practice runs then finally on Thursday night had a go....

IMG_20230119_220527876_HDR.jpg


The results erm.... Speak for themselves and not in a good way.... In fact they are awful.... Very awful. So awfully awful that the gods of awfulness won't even touch them with a barge pole

IMG_20230119_220806024_HDR.jpg

Admittedly my hands were shaking and my heart was racing with nerves the whole way through the exercise..... 3 hours later and what I had done was made the loco look worse.

Colourful language was used.... But at 3am the next morning I had a small epiphany..... But that is a story for another post
 

James Spooner

Western Thunderer
George, I think you do yourself a disservice. I’m not sure I would even achieve that standard first time around. I am contemplating lining some crimson and cream carriages (having always used transfers to date) but have read that plenty of practice by spraying a sheet of plasticard and then practising lining a lot on that essentially disposable item helps you understand the pitfalls and work out how to overcome them in a safe environment.

cheers

Nigel
 
Top