paulhb

Active Member
Hi Adrian,

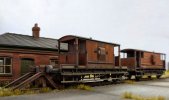
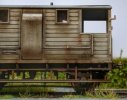
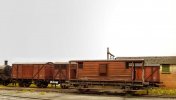
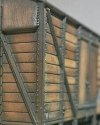
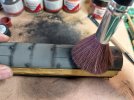
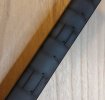
This was my first and so far only 7mm wagon weathering exercise. Bought as a dabble so unable to confirm ease of conversion or option.

I'm sure an email to Chris Basten at Minerva will elicit a response......or possibly a more knowledgeable type than me will provide the answer on here.

Rob

Marvellous Rob really instructive explanation. I assume the same techniques are used for your 4mm stock? Any variations?

Regards Paul
 

NHY 581

Western Thunderer
Marvellous Rob really instructive explanation. I assume the same techniques are used for your 4mm stock? Any variations?

Regards Paul


Thanks, Paul.

Pretty much, yes. I treat all wooden bodied wagons this way. A lighter touch produces less variation to the planks, perhaps representing a wagon in better condition. You can of course paint planks etc which is something I've been doing.

Van rooves are first given a blast of matt varnish then I add black to pre-shade around thd raised detail such as rain strips and ventilators etc.

I then use a large make up brush to "splodge" on a mix of dark earth and smoke. This is then sealed with a dusting of matt varnish.

The final application of the varnish is key. I spray from quite a distance so it's a fine spray that lands. Too close/wet will just cause the colours to be lost. Disappointing after probably a few hours work......I know this !

Air brush owners may be able to produce a finer spray but as I don't have one, I use the tools available to me.

Another thing is whilst inspired by photos of the real thing, these are not slavish copies. For some this will be a bad thing but it's how I work. Others have said my wagons, layouts have a particular 'look' about them, making my stock easy to spot. I never really considered that but it must be down to this "seat of one's pants" approach. Who knows ? I just find it relaxing.

Another key thing is time. Don't rush and be prepared to stop when you think it's about right. Put it down and walk away at that point. I tend to revisit wagons with a fresh pair of eyes days later, sometimes a week or so. I leave then on the layout amongst the background they'll be seen in.

Which brings me onto the final point I forgot to mention. As I'm working on the wagon, I'll hold it under the layout lightingvso I see things develop under the same lighting as the wagon will run on, if that makes sense. Helps with colour perception, I think. Anyway, it helps !

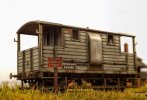
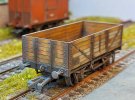
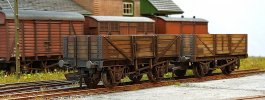
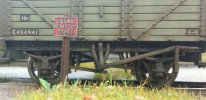
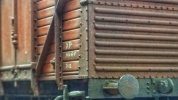
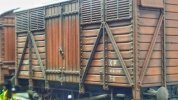
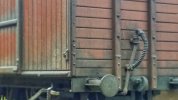
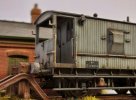
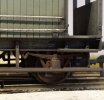
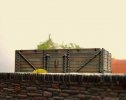
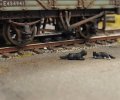
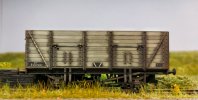
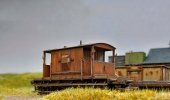
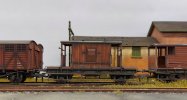
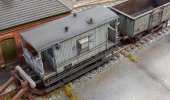
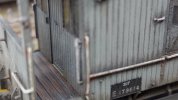
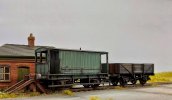
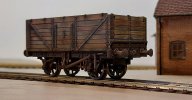
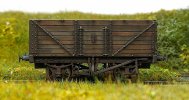
Here are a few, probably familiar photos for which I apologise for repeating. I hope they serve to show the variations possible using what is a very basic technique, if I can use that term.

20200125_182512-01.jpeg.465ed57ec02ea6491f4794f1fe429f9b.jpeg-01.jpeg


20210220_175634-01.jpeg

20210321_170336-01.jpeg

20180410_205353.jpg

20180414_082003.jpg

20191216_201312-02.jpeg-2.jpg

20191216_202720-01.jpeg-1.jpg

20191216_201541-01.jpeg-1.jpg

20211204_222017-01.jpeg.jpg

20210911_213432-01.jpeg.jpg

20200127_213037-01.jpeg.jpg

20191229_070844-01.jpeg.jpg

2017-03-06 22.23.32.jpg

2017-04-01 07.51.32-1.jpg

20230202_201551-02.jpeg

20221204_132857-01.jpeg


Rob.
 

NHY 581

Western Thunderer
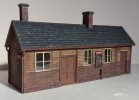
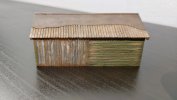
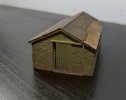
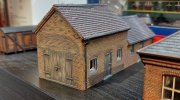
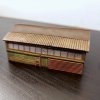
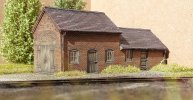
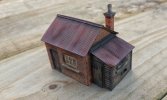
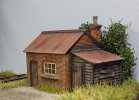
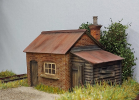
The same approach can be taken with wooden buildings of course but with these I use more paint to add relief to rooves, brickwork planking etc.

I'll do a break down on this building at some point of anyone's interested.

20210228_114857-01.jpeg

But for now, here are some repeated views of some of the wooden buildings or wooden parts to buildings I've done recently. All are ready to plant from either Hornby or Bachmann.


20220408_173156-02-01.jpeg

20220408_173148-01-01.jpeg

20220412_222626-01.jpeg

20220408_173123_06-01.jpeg

20220413_161026-01.jpeg

20220415_083227-01.jpeg

20220418_123408-01.jpeg
 

simond

Western Thunderer
Yes, I’m interested…


a question or several if I may. I’ve not had much experience/luck/success so far with powders.

Do you have pots of coloured powder open on the bench and dip in, or do you decant some into / onto a palette, or?
Do you use the same brush for each or different ones?
What do good brushes look like? Stiff or soft?
Do you do one colour per session on several vehicles, or do you do one vehicle/item with several colours or?

thx
Simon
 

NHY 581

Western Thunderer
Morning Simon,

Taking each Q in turn.


Do you have pots of coloured powder open on the bench and dip in, or do you decant some into / onto a palette, or?

Normally, I use one colour therefore one open pot at a time......less confusion. I know this. However, when doing a roof, I will have small quantities of say dark earth, smoke etc to blend then apply. Normally on a piece of paper. I splodge the big brush into each colour.


Do you use the same brush for each or different ones?

Some brushes are more used than others. When changing colours, I'll wipe off any colour remaining in the brush on a bit of toilet or kitchen paper before picking ip thd next colour.


What do good brushes look like? Stiff or soft?

I use cheap make up brushes from amazon. A pack is about £5.99.( or cheaper ! ) Various sizes and shapes can, with practice, give softer effects than others.

https://www.amazon.co.uk/ZHIYE-Prof...ix=make+up+brushes,aps,137&sr=8-29&th=1&psc=1


Do you do one colour per session on several vehicles, or do you do one vehicle/item with several colours or?

I generally do one vehicle at a time, start to finish. I don't do batches which is partly the reason I fail at the commercially viable aspect of it all......that and not really being interested in that side of things....

Hope this helps.


Rob.
 

76043

Western Thunderer
....I gather there were issues with the brake gear etc but that didn't, and still doesn't concern me....
I'm with you on this, it did make me laugh out loud.

Thanks very much for this thread, I've got a Bachmann RCH mineral lined up as a Guinea pig.

Cheers
Tony
 

paulhb

Active Member
Morning Simon,

Taking each Q in turn.


Do you have pots of coloured powder open on the bench and dip in, or do you decant some into / onto a palette, or?

Normally, I use one colour therefore one open pot at a time......less confusion. I know this. However, when doing a roof, I will have small quantities of say dark earth, smoke etc to blend then apply. Normally on a piece of paper. I splodge the big brush into each colour.


Do you use the same brush for each or different ones?

Some brushes are more used than others. When changing colours, I'll wipe off any colour remaining in the brush on a bit of toilet or kitchen paper before picking ip thd next colour.


What do good brushes look like? Stiff or soft?

I use cheap make up brushes from amazon. A pack is about £5.99.( or cheaper ! ) Various sizes and shapes can, with practice, give softer effects than others.

https://www.amazon.co.uk/ZHIYE-Professional-Foundation-Concealer-Eyeshadow/dp/B09F9ZB99J/ref=mp_s_a_1_29?crid=2QTNEJL6K6LUB&keywords=make+up+brushes+set&qid=1679987934&sprefix=make+up+brushes,aps,137&sr=8-29&th=1&psc=1


Do you do one colour per session on several vehicles, or do you do one vehicle/item with several colours or?

I generally do one vehicle at a time, start to finish. I don't do batches which is partly the reason I fail at the commercially viable aspect of it all......that and not really being interested in that side of things....

Hope this helps.


Rob.
Many thanks Rob, really useful stuff.

Regards Paul
 

michael mott

Western Thunderer
Thanks for sharing this information Rob, really appreciated your time to explain it. I like the simplicity of using just a couple of different mediums.
Michael
 

Dog Star

Western Thunderer
This is an example of my usual tool kit for this sort of job.
View attachment 183531
I like the appearance of what you are achieving here in regards to colouration and texture.... so much so that I intend to try your approach with some 7mm merchandise wagons (so no slosh black around for coal dust). What I cannot "read" in your photos is the name of the various powders - please post details of those products. Thank you.

regards, Graham
 

NHY 581

Western Thunderer
I like the appearance of what you are achieving here in regards to colouration and texture.... so much so that I intend to try your approach with some 7mm merchandise wagons (so no slosh black around for coal dust). What I cannot "read" in your photos is the name of the various powders - please post details of those products. Thank you.

regards, Graham


Hi Graham. Here's an enlarged view...

20220427_131949-01. Photo 1 .jpeg-01.jpeg


However, for clarity, the Humbrol powders I use are as follows....

Black.

White.

Sand

Smoke

Iron Oxide

Rust.

Dark rust

Dark Earth

The aerosols I use are...

Matt acrylic varnish No.49

Dark earth No. 29

Make up brushes as disclosed earlier.

4mm fibre brush.

2mm fibre brush.


There are "finer" powders such as mig but I've stuck with Humbrol as I've come to understand how their colours interact with each other. That said, one is always learning and tge future could well see me using mig powders and other non paint weathering mediums.

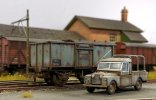
Here are a couple more views which I hope illustrate how weathering powders can be applied to add weathering effects to a variety of subjects.

20210509_105050-02.jpeg

20210328_194300-01-02.jpeg


Rob.
 

NHY 581

Western Thunderer
Good evening Rob,

I think the hedge behind the hut looks amazing, can you tell me where I can buy the product or is it something you have produced yourself.


View attachment 183645

Cheers, Martyn.


Hi Martyn,

It's produced by a Polish firm called MBR and is actually an offcut from a beech tree I used on EWE where the hut in your post is also located.

Their website is here.


I found them very good to deal with and I know others whose experience mirrors mine. Certainly go back to them.


Rob.
 

Captain Kernow

Western Thunderer
I think all this stuff is just fab, Rob and thanks again for sharing.

Just one question - I may have misunderstood something from ages ago, but do you give all wagons a spray-over with the Humbrol Matt Acrylic varnish before they ever see any powders, or is it just the van roofs?
 

NHY 581

Western Thunderer
I think all this stuff is just fab, Rob and thanks again for sharing.

Just one question - I may have misunderstood something from ages ago, but do you give all wagons a spray-over with the Humbrol Matt Acrylic varnish before they ever see any powders, or is it just the van roofs?


Hi Tim.

Good point which I should have made clear. For me, it depends on the surface/factory finish. Powders adhere best to a matt surface. If the wagon sides have a slight sheen, or worse, then I "prime" with a light dusting of matt varnish. Then the powder is added. If matt to start with then I don't bother .

Van rooves are slightly different. I varnish them regardless with said light dusting. This provides a bit of texture from the off, as it were.

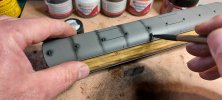
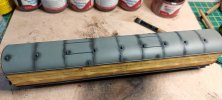
This coach roof was varnished then powders applied.

20220427_191145-01.jpeg

Black is used to "pre-shade" ribs, vetilators etc.

20220427_191654-01.jpeg

20220427_192314-01.jpeg

Large blusher brush applies mixture of dark earth and smoke.

20220427_200904-01-01.jpeg

End result.


Rob.
 

NHY 581

Western Thunderer
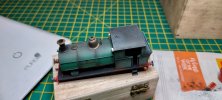
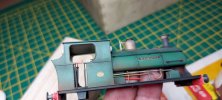
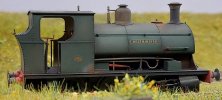
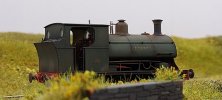
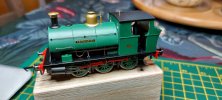
Here are a few photos of the stages in loco weathering. In this case, the victim was Hornby's Peckett B2 "Westminster".

Sadly the photos don't follow each step but I'll try to fill in the blanks.

As started....
20201024_123016-01.jpeg

I'd already decided Westminster was going to be quite distressed. Therefore the starting point was adding rust, especially around the tank filler. Prior to this, the loco was sprayed with matt varnish to act as a key. Iron oxide weathering powder was used to apply the base rust. Now, I would use dark rust.

Now, you may see there is some white on the body. This is "blooming' from the varnish. I didn't prepare the aerosol properly and I suspect I eitger hadn't shaken it enough, the can wasn't warmed ( I normally stand in a bowl of warm water until just before use ) or it was a damp day........or a combination of all three.
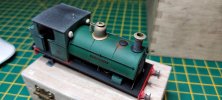
20201025_211940-01.jpeg

Next, pre-shading was added to the loco using black weathering powder. I applied this to the rivets on the tank and seams to the bunker etc.
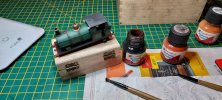
20201025_213241-01.jpeg

Rust was also added to the roof.

20201025_214059-01.jpeg

The bodywork was then coated in smoke weathering powder.
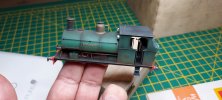
20201025_215101-01.jpeg

20201025_214949-01.jpeg

Also added is dark earth, applied mainly to the lower cab sides, bunker base and the underside of the saddle tank. This loco was weathered before I started using a quick blast of dark earth no 29 areosol, something I would now start with. The loco body would now be sprayed at "stage 1" from below to create a dusty appearance to these areas.

At this point, a light dusting of varnish was applied, to seal the work thus far.

I wanted a faded appearance to the paintwork. This was done using sand weathering powder applied in small quantities to the areas to be faded. I decided to work in "panels".
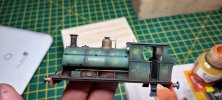
20201025_215612-01.jpeg

Sand powder, like white will go a long way so only use a little at a time, adding more if you don't arrive at the desired effect first time.

This stage takes time as you work from the centre of the "panel" out. This creates a lighter centre and dark edge..........or it should.
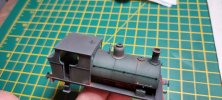
20201027_211711.jpg

You can also use a bit of white foe extra contrast but it needs careful use to avoid it jarring.
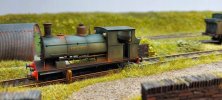
20201026_072718-01-01.jpeg

And this is how it ended up.....

20201027_215957.jpg

20201027_220051.jpg


Rob
 
Top