Rebuilt Crosti 9f

spikey faz

Western Thunderer
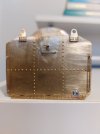
92021 appears to have had Western Region lamp irons, so I started assembling the supplied etched lamp irons. Fitted the first one along with the rear horizontal and vertical handrails. The lamp irons looked a bit big, but I thought they looked OK. Until I realised the top lamp iron is too high, the vertical hand rails are too tall and the horizontal hand rail is too high! :rant:

20220428_195222.jpg

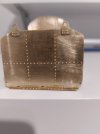
I consulted my swear-word compendium, but wasn't able to find suitable words! So I proceeded to remove offending items.
20220428_201128.jpg

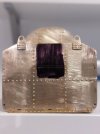
I've marked out new postion for vertical hand rails. I have a feeling the lower hole could come up a bit, but it's staying put. You should be able to see where I'm working out the correct position for the horizontal hand rail.
20220428_204450.jpg

I'm not keen now on using the etched lamp irons, so suggestions please for replacements (preferably cast). I know Laurie Griffin does some which I think might be OK, but I'm no expert.

Mike
 

mickoo

Western Thunderer
There's a couple of cross-members that need to be added to the tender chassis. Problem is that once they've in place it's no longer possible to unbolt the chassis from the running plate. Not ideal from a maintenance point of view. The cross-members are quite noticeable so I don't want to omit them. So I've soldered in some little brackets. These will allow the cross-members to sit on them aided with a small dab of glue or even blu-tak. This should allow easy removal should the occasion arise.

View attachment 161782
View attachment 161783
Mike
An alternative is to make brass wire stirrups that are attached to the inner chassis, it takes a bit of work to get them secured and lined up but once done you never have to worry about them again. You need to make the stirrups wide enough to not be seen through the side openings.

IMG_0995.jpg

IMG_0996.jpg

IMG_0997.jpg

Also be aware that both beams are not the same way up, you can tell by the rivets on the outside, the rear beam has the flanges facing down, the front beam has the flanges facing up. The Standard tenders follow the Stanier design quite closely in many respects, this being one of them.

I've made ledges before and tapped 12BA to secure the beams but the screws and threads are still just visible, it's all a faff to be honest, the stirrups are a one shot deal.
 

simond

Western Thunderer
It’s funny, I looked at those photos several times before something “clicked”, and now it has, I can’t see how I couldn’t see it before, if you see what I mean.
 

Rob Pulham

Western Thunderer
I have done the same on the Princess tender chassis but I have already managed to strip the threads on a couple of the holes. I may go back and retrofit some stirrups myself.

Nice one Mick:thumbs:
 

mickoo

Western Thunderer
It’s funny, I looked at those photos several times before something “clicked”, and now it has, I can’t see how I couldn’t see it before, if you see what I mean.
It's actually quite hard to take a photo that shows them well, they tend to just blend in with all the other stuff.

I think if it were sprayed in grey primer they might show better.
 

spikey faz

Western Thunderer
An alternative is to make brass wire stirrups that are attached to the inner chassis, it takes a bit of work to get them secured and lined up but once done you never have to worry about them again. You need to make the stirrups wide enough to not be seen through the side openings.

View attachment 162105

View attachment 162106

View attachment 162107

Also be aware that both beams are not the same way up, you can tell by the rivets on the outside, the rear beam has the flanges facing down, the front beam has the flanges facing up. The Standard tenders follow the Stanier design quite closely in many respects, this being one of them.

I've made ledges before and tapped 12BA to secure the beams but the screws and threads are still just visible, it's all a faff to be honest, the stirrups are a one shot deal.
That's a great idea. :thumbs: I may well copy that.

Thanks for the heads-up about the cross-member orientation - I didn't know about that.

Mike
 

spikey faz

Western Thunderer
Was there also a coal space spray pipe?
Dave.
Hmm. Not sure. Do you have any pictures I can check?

I have to say that some of the workings of steam locomotives do leave me mystified! Some of the bits I put together look interesting, but often I have little idea what they actually do! :eek:

Mike
 

Dave Holt

Western Thunderer
I have found a few photos in Pictorial Record of BR Standard Steam locos, Vol 2, by Talbot, pages 31, (Brit, BR1), 107 (9F, BR1B or C) and 114 (9F, BR1G modified for Lickey banker), all of which show the sprinkler pipe running across the coal space, just below the angle strip you've added. The pipe would be about 1" o/d.
It's interesting that you've gone for the 1G tender as these were only attached to three locos, 92021, 3 & 4, and then not till early 1965. All three locos were scrapped in 1967, so quite a short period with those tenders.
I suppose I'm lucky regarding knowledge of steam loco workings as I was a professional mechanical engineer, always interested in the engineering aspects of steam locos, and I am involved in full sized loco restoration and maintenance (though not with a BR standard) and have ready access on, over and under steam locos on a regular basis.
Good luck with your model.
Dave.
 

spikey faz

Western Thunderer
T
I have found a few photos in Pictorial Record of BR Standard Steam locos, Vol 2, by Talbot, pages 31, (Brit, BR1), 107 (9F, BR1B or C) and 114 (9F, BR1G modified for Lickey banker), all of which show the sprinkler pipe running across the coal space, just below the angle strip you've added. The pipe would be about 1" o/d.
It's interesting that you've gone for the 1G tender as these were only attached to three locos, 92021, 3 & 4, and then not till early 1965. All three locos were scrapped in 1967, so quite a short period with those tenders.
I suppose I'm lucky regarding knowledge of steam loco workings as I was a professional mechanical engineer, always interested in the engineering aspects of steam locos, and I am involved in full sized loco restoration and maintenance (though not with a BR standard) and have ready access on, over and under steam locos on a regular basis.
Good luck with your model.
Dave.
Thanks Dave. :thumbs: I'll have to track a copy of that book down.

Mike
 

spikey faz

Western Thunderer
While waiting for some parts for the tender I have been doing some work on the loco cylinders.

The instructions say to use these brass cylinder endplates.
20220508_182937.jpg
They fit fine, but I decided to use the nickel silver endplates which have a handy etched groove to accept a couple of reinforcing plates. The instructions say not to use these! :p

20220508_183019.jpg

The locating slots that allow the endplates to slide into the corresponding chassis slots needed quite a bit of easing, to stop the chassis spreading.

20220508_183426.jpg

20220508_183838.jpg

As usual I have gone for a nut and bolt method of locating the cylinder assembly into the chassis. This required a couple of squares of metal: one soldered into the chassis and the other into the cylinder assembly.

20220509_110451.jpg

20220509_110501.jpg

20220509_110715.jpg

Cylinder fittings are a mixture of the Seven Models and Ragstone.

20220509_201806.jpg

20220509_201916.jpg
Mike
 

simond

Western Thunderer
I recognise that “the instructions are just someone else’s idea of how it goes together”, but I presume there’s a reason why they say “don’t use these”?
 

Dave Holt

Western Thunderer
Any dimensional differences apart, the obvious difference is the lack of cut out for the pre-heater on the N/S version. However, since this is a modified loco, the pre-heater will not be present, so perhaps it doesn't matter?
With this type of construction, I always check the cylinder and valve centres give sufficient clearance for the rods, etc and also that the cylinder centre-line does align with the driving axle centre before finalising the fixings.
Dave.
 

spikey faz

Western Thunderer
I recognise that “the instructions are just someone else’s idea of how it goes together”, but I presume there’s a reason why they say “don’t use these”?
I think it's just an oversight on the designer's part. The brass endplates have a cutout for the pre-heater, and I guess most, if not all purchasers of the kit would have opted for the un-rebuilt version, hence the ammendment. I preferred the other option! :D

Mike
 
Top