Pete's own models.

Peter Cross

Western Thunderer
I managed a little work around the cab and bunker.

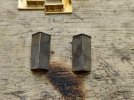
On the cab front I marked up and drill the vent holes just under the cab roof.
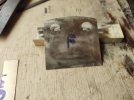
IMG_20220403_112131404_resize_0.jpg

I did the same with the rear spectacle plate, but, also formed the shelf at the bottom of it.

IMG_20220403_112051250_resize_15.jpg

The bunker front was then cut to height.
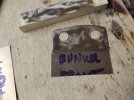
IMG_20220403_112113067_resize_1.jpg

The bunker rear has also been cut to height, and had the flare bent on it.
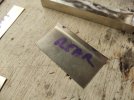
IMG_20220403_112058162_resize_2.jpg

The inner tanks were folded and soldered up.
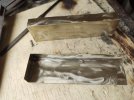
IMG_20220403_112154944_resize_4.jpg

I have made a start with some of the cab detail. I've marked out the two seat come tool boxes by the bunker, the cabinet for the rear spectacle plate, and the lower tank extensions. More on these next time I expect.
 

Peter Cross

Western Thunderer
Managed a couple of hours on this while paint was drying.
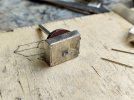
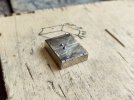
I'm sort of copying LSWR practice with the cab interior, mainly looking at O2's and G6's working on the principal they'll all be similar, as designed by the same man. Here are the two cab sandboxes, they go in the bunker, cab side corners. I presume as they seem to have wooden tops they lift off for filling. I need to add operating levers.


IMG_20220506_114059365_HDR_resize_59.jpg

Next is the locker that fits on the rear spectacle plate. This is ready for fixing in place. I made it as a simple box then added the door detail to the front.

[IMG_20220506_114211691_HDR_resize_45.jpgIMG_20220506_114143850_HDR_resize_28.jpg

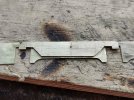
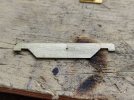
Now back to the frames. I needed to make the compensation beams that sit either side, against the frames. I cut out the basic shape from two pieces of nickel soldered together. When made I tacked them and the frames together, and drill a pilot hole for pivot point. I always on this wheel arrangement, put it a millimetre or so towards the outer end, to put just a little more weight on the leading wheel. I find this leads to less derailing due to it not lifting quite so easily. It works for me, whether the theory is correct or not I'm not sure.

IMG_20220506_114042419_HDR_resize_28.jpgIMG_20220506_114026817_HDR_resize_99.jpg


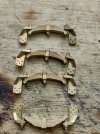
I also made a start on cleaning up the springs, I didn't get very far as they need more work than I first thought. The springs had more mould lines than I first saw, and the spring part is actually curved and in need of straightening. Then the usual task of getting the hangers inline and at the correct angle. The bottom one is almost complete, the others are patiently waiting their turn.

IMG_20220506_114125106_HDR_resize_58.jpg

Should be able to do more shortly.
 

Chas Levin

Western Thunderer
Nice work Peter - I love that locker, it's really cute looking!
Re. your comment about moving the beam's pivot point a little forward to put a little more weight on the leading wheels, from what I've read that's entirely in line with the theory and also the practice!
 

Peter Cross

Western Thunderer
Hopefully work will start again on this later in August. As at the moment all is packed away and waiting to put into storage, with a minimum traveling with us to the UK.
Don't expect fast progress as our main priority in the first six months are a job for me a form of transport and a roof over our heads, not sure how long it will take before our daughter wants her house free of three extras.
 

Peter Cross

Western Thunderer
Well, what a few months. No layout, no bench, no enthusiasm. But, we have, a new house, new car, new job, and a new school.
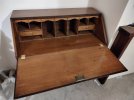
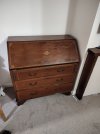
Trying to get my enthusiasm back, but workin in a cold garage was not going to do it. So with SWMBO's permission l purchased this.

IMG_20221124_172756511.jpgIMG_20221124_172732563.jpg

Now all I need to do is see what I brought with me and what I need to buy to start work again.
 

Peter Cross

Western Thunderer
Thanks for all the kind thoughts.

Even though I've not been modelling I have been buying the odd bits and pieces.
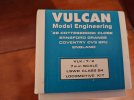
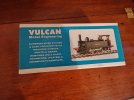
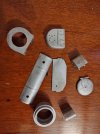
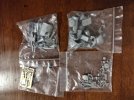
Recently I got an LSWR B4 kit by Vulcan, complete with wheels, motor and gears.

IMG_20221125_201255164~2_1600x1200.jpgIMG_20221125_201236769_1600x1200.jpg
IMG_20221125_201753829_1200x1600.jpgIMG_20221125_201716975_1600x1200.jpgIMG_20221125_201644235_1200x1600.jpgIMG_20221125_201500680_1600x1200.jpg

Now, I was really surprised to have won this on that well know auction site. So not sure if I keep it for me, or build and sell. It was by far the cheapest 7mm loco kit I've ever bought. In fact it is the cheapest of all time. Posted to me it was only £57. I was totally shocked. I am actually beginning to look forward to building this. Although I need to see which ones I can build with the kit. Unfortunately my Bradley LSWR books are still in Brasil. I remember say that about my books a few years ago, but the other way around.
 

Ressaldar

Western Thunderer
Hi Pete,

a bargain indeed. I have the same model ‘in abeyance’ with a part built chassis, waiting for the cross head/ piston rod/slide bar unit to be sorted due to the white metal crosshead being badly fractured and needed replacing. Laurie Griffin does a very nice cast replacement but the hole for the slide bar (which is already epoxied into the cylinder) Is more or less square in section and the slide bar is rectangular!!! A slipper of some sort seems to be the answer, but getting the mojo for such a fiddly fix is sadly lacking at present, hopefully, it will have returned by the New Year.

will be watching your build thread with interest.

kind regards and look after that bureau.

Mike
 
Top