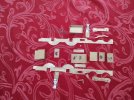
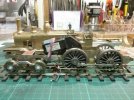
Pete's own models.

Peter Cross

Western Thunderer
Time to start cutting.
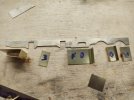
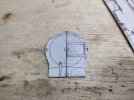
I cut out with my piercing saw the parts that were already blanked. I have decided to go with one of the Adam’s series, that have the square cut outs. It'll be double digit number.
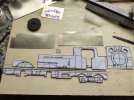
IMG_20220322_095211986_resize_62.jpg

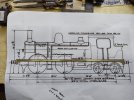
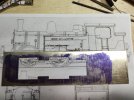
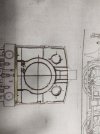
The front profile drawing is pretty poor. I will see if the other one is better. I did manage to use it to do the cab front and rear.
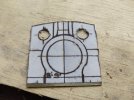
IMG_20220322_103818380_resize_42.jpg

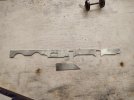
The footplate had the centre cut out, I did this with the saw and scrawker.
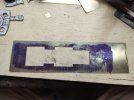
IMG_20220322_103743898_resize_21.jpg

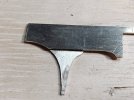
With a little time to spare I filed the sides. This came up quite nicely, checking all verticals were perpendicular to the bottom edge. the top of the cab will be lowered, later, there's not a lot of strength at the cab opening.
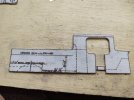
IMG_20220322_103758094_resize_88.jpg

Before anything gets soldered, I need to make some more bits, in no particular order, buffer planks, hanging irons, boiler, smoke box, and frame spacers that need to be about 2.5 millimetres wider than the ones I originally cut.
 

Peter Cross

Western Thunderer
Just a little more done, as you saw above the hanging iron has been completed.
But also the frames and splasher sand box sides previously cut out, have now been dressed ready for separating.

IMG_20220323_111647482_resize_31.jpg

Newly cut parts are the buffer planks, and step
back. The top of these have been left long, for probable mounting to the frames. I like doing this way now as they are less likely to be knocked and bent, you can also get the supporting bracket between them and the frame fixed. Also making them a lot stronger.

IMG_20220325_113216394_resize_10.jpg
IMG_20220325_113147580_resize_77.jpg

Hope to get more done this week end.
 

Peter Cross

Western Thunderer
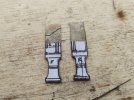
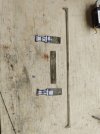
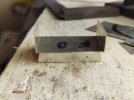
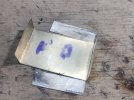
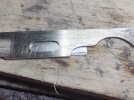
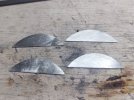
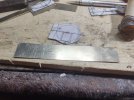
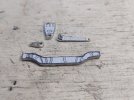
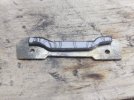
I made the frame spacers, and decided to show the process. Hopefully it will be of use to at least one person.


Here the finished items, I did realise a little later that one would be also needed above the leading bogie wheel, if it going to be pivoted there.

IMG_20220323_111757171_resize_48.jpg

Hope to do some later.
 

Peter Cross

Western Thunderer
So, I've been given another drawing. I resized it and tried a couple of bit to see whether I was some where close. Well, they nearly fitted, so, I was not to concerned. But a little later I was comparing another part. It's then, I realised I had not resized the new drawing properly, it was very slightly large. Tomorrow I'll make amends.

IMG_20220326_201949470_resize_47.jpgIMG_20220326_202054514_resize_52.jpg


I did actually get a little done, it's surprising what can be done in an hour, when you don't ponce about.

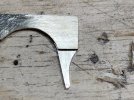
First up are the front and rear guard irons.

IMG_20220326_214929724_resize_15.jpgIMG_20220326_214959371_resize_12.jpg

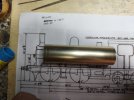
I also managed to cut and roll the boiler. I still need to make the end discs. I even managed to roll it the wrong way. The blank was almost square and I even marked which way around it was ment to go. I suppose there is no answer for stupidity.

IMG_20220326_215502309_resize_8.jpg

Hopefully s little time at the bench tomorrow. I may be tempted to do some lining on other things.
 

paulc

Western Thunderer
Pete , the beauty of scratch building is that if you stuff a piece up you can just make another one , its just a piece of brass or nickel silver . I have a bin full of bits that i have kept that could probaby make a Frankenstein of a loco .
 

Peter Cross

Western Thunderer
Managed little bits over the last few days. In amongst try to buy airline tickets to the UK. Big problems, the website, and app bounce the payments. The call centre is non existent. I spent nearly 3 hours in a queue to speak to an operator, when one came on about half way through, she couldn't sell me 3 tickets as she only did air miles. We lost our miles in January because we couldn't buy tickets online. In the end I had to hang up as I needed to go out.

Anyway to the important stuff. Some more cutting done, and I actually assembled a part. Due to it being easier to make as it went.

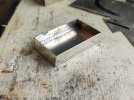
The ash pan. The first assembly.
IMG_20220329_111643075_resize_61.jpg

This will be attached to the dummy firebox bottom.
IMG_20220329_111609995_resize_63.jpg

But this way up.
IMG_20220329_111722111_resize_20.jpg

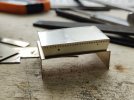
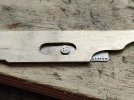
I then realised the dummy firebox would need some sides, as part of it stuck out from the frames, and there is also a cut out that needs covering too.
IMG_20220329_221144507_resize_64.jpg

This is how they'll look, there also needs to be a small circular riveted disc in the cut out.
IMG_20220329_221213799_resize_95.jpg

I'm rather annoyed with myself by making the frames flat at the top. So I decided to make some extension to go behind the wheels. The horn guides will help reinforce the joint as the are taller than the present frames.
IMG_20220329_221113677_resize_19.jpg

Next up, were the smoke box front and rear. Along with the wrapper. I still need to make the spacer to hold the ends in the right place and allow for lead to be cast inside.
IMG_20220328_222124048_resize_36.jpg
IMG_20220329_201112174_resize_97.jpg

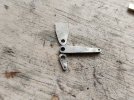
Finally for now, some brake parts. The levers for the hand brake, the mounting plates. The power brake lever for the other side will come later when I work out how long it needs to be. Also the compensation beams for the bogie. All these parts are just cut. Not filed as yet.
IMG_20220329_221041815_resize_57.jpg

Back to trying to give money to a company that is doing everything it can not to take it.
 

Peter Cross

Western Thunderer
Well, I'm glad I didn't set up for lining the 2p and the GW PBV. I had just start working on the cab parts and there was an almighty crash. I thought it was a curtain rail collapsing, we have metal double rails for curtains and blackouts. Went to our bedroom and found one balcony door had exploded. So most of the morning was spent clearing glass from every corner of the room. No idea why it decided that today was a good day, after being in the same place for 10 years. Fortunately had some ply to fill the space.

Enough of my troubles. Back to the T1.
Managed just a bit of cleaning up today. The bogie compensation beams were first.

Before
IMG_20220329_221252623_resize_20.jpg

And after
IMG_20220330_103758631_resize_9.jpg

The brake parts. I must drill 6 bolt holes in the mounting brackets.
IMG_20220330_103723011_resize_83.jpg

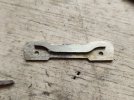
Then the discs for the firebox sides. I think it's a cover plat for a valve that was removed.
IMG_20220330_104229252_resize_74.jpg

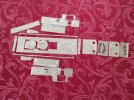
Because I've just been piling the parts in a box, I did a bit of s refresher to see what I still could do, and what I need to do once assembly has started. Like the cab tool boxes can be done, but the splasher tops will be done when the smokebox is in place.

The parts for the body made so far apart from the boiler.
IMG_20220331_085516309_resize_45.jpg

The parts fro the frames. I must stop putting off making the coupling rods. I can't really put anything together without them. Hopefully my silver solder paste is still usable.

IMG_20220331_085253777_resize_93.jpg
 

Pencarrow

Western Thunderer
Superb workmanship there Pete, love what you are able to make from sheet brass. This is going to be a lovely loco when complete.

We had an exploding window a few years back. Being a 1970s house it has the then trendy huge picture windows. The one in our bedroom is 11', 3.3m long with an opening section each end. The central 7', 2.1m inner pane one day went bang and turned itself in to millions of little crystals which slowly fell on to the floor. Bit of a mess!
 

Chas Levin

Western Thunderer
Full of admiration here too: scratchbuilding is a whole different level of work from kits, it seems to me, so my hat is permanently taken off!
Sorry to hear about the glass door - lucky no-one was beside it...
 

paulc

Western Thunderer
Hi Pete , any reason why the door exploded ? When i do a scratchbuild i usually start with the frames and the rods , no specific order but the last one was rods first . This one has been put away for a few years but i recently got it out and decided its time to finish it .16489497432001553697964.jpg
 

Peter Cross

Western Thunderer
Hi Pete , any reason why the door exploded ? When i do a scratchbuild i usually start with the frames and the rods , no specific order but the last one was rods first . This one has been put away for a few years but i recently got it out and decided its time to finish it .View attachment 159788
Paul, I agree when it comes to assembly I do the frames first. I haven't made the coupling rods yet, because I've been looking to see if I can find at least one photo with plain rods not fluted. As I cannot it looks like I've got to bit the bullet and make fluted ones.
I'm not going to get any wheels until June, so I'm just making parts at the moment. I might even start the body first just as a means to progress without parts.
 
Top