Still to do the pipework on the roof of the dining car, but pushed on with the interior and the maroon exterior. Reminds me I need to do the ends in black at some stage
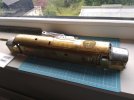
Meanwhile I got the Class 37 bogies built up and painted. I did as others have done and bolted the frames to the bearers soldered to the main bogie frame. It might not show well in the photo, but the loco then sits way too high on the bogie pivots
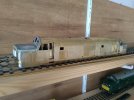
So out with the gas flame and remove the bogie mounts from the body. Turn them over and bend a few bits out of the way and they went back in good and solid
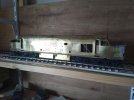
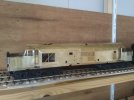
Too much glare from the window, but the tumblehome sits just above the bogie sideframes now. Also got the fuel tanks soldered together and now the clip up inside the bodywork so still allowing all the other bits to be fitted
The bodywork shows all the crippling from when I was trying to improve the overall shape, but hopefully when painted and on the move that will be less apparent. I did put two body formers inside as part of reshaping and I took the profile of them from the Peter Clark cab interiors that I intend to fit
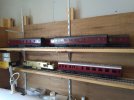
Finally all the collection assembled with test runs to do on the top four coaches before fitting the gangways. The dining car needs it's ends painting and the roof sorting then onto the Class 37 to try and get the bonnets, windscreens and cab roofs to look something like the prototype
Meanwhile might call in at the Heywood running day on Saturday and then the following Sunday 17th is take the Summers hoppers back over to Wirral for another run on their open day
Meanwhile I got the Class 37 bogies built up and painted. I did as others have done and bolted the frames to the bearers soldered to the main bogie frame. It might not show well in the photo, but the loco then sits way too high on the bogie pivots

So out with the gas flame and remove the bogie mounts from the body. Turn them over and bend a few bits out of the way and they went back in good and solid

Too much glare from the window, but the tumblehome sits just above the bogie sideframes now. Also got the fuel tanks soldered together and now the clip up inside the bodywork so still allowing all the other bits to be fitted
The bodywork shows all the crippling from when I was trying to improve the overall shape, but hopefully when painted and on the move that will be less apparent. I did put two body formers inside as part of reshaping and I took the profile of them from the Peter Clark cab interiors that I intend to fit

Finally all the collection assembled with test runs to do on the top four coaches before fitting the gangways. The dining car needs it's ends painting and the roof sorting then onto the Class 37 to try and get the bonnets, windscreens and cab roofs to look something like the prototype
Meanwhile might call in at the Heywood running day on Saturday and then the following Sunday 17th is take the Summers hoppers back over to Wirral for another run on their open day

