Nick Dunhill
Western Thunderer
So here we go on the next commission. The kit is an original Meteor Models kit now marketed by Alba Railway Models. It seems to be quite a decent kit, but comes from the era when we had Triang Hornby X04 motors sticking inside the cab of our Wills J39 on a Hornby 0-6-0 Jinty chassis. Very old school indeed, all very 1980s. The chassis frames are designed to be held apart by square bar spacers screwed in place. I dare say that it would make a running chassis but I didn't like the look of it and decided it would be more appropriate to make a new one.....with the consent of the client of course.

The model will be built to S7 gauge so I sent the wheels off to that nice Mr Dowling for an encounter with his wheel tyre S7 form tool, and in the meantime set off building the coupling rod and then the footplate. The first thing I noticed was that there's not much in the way of registration for the valences on the underside of the footplate. I cut some short bits of brass strip and tacked them to the underside of the footplate etch to butt the valence etch up to in the correct position. I noticed that the valences were slightly different lengths, and adjusted accordingly. This of course set an alarm ringing that, as with all old hand drawn etches, its a good idea to check measurements and for squareness.


I moved on to the cab and bunker. I checked the sides for the above and noticed that one was slightly longer than the other, and that both were too long for the etched registration slots in the top of the footplate. I adjusted accordingly. The bunker rear was etched in 0.45 mm sheet and I thought I'd have a better chance of forming a nice flare at the top if I cut a new one from 0.3 mm sheet. I repurposed the bunker rear etch as a cab floor as there wasn't one in the kit. I also decided to make a new cab rear as the pre etched holes for the window bars were in the wrong place. Pictures show that the bars are attached to the beading round the windows and the etched holes in the kit part are above and below the beading. I just thought that it would be quicker to make a new one than modifying the etch. I also made the cab front and roof and added all the handrails and lamp irons etc.

I didn't much like the coal rails etched onto the bunker sides and rear and made some new ones from half round brass rod.

The model will depict no 452 when new. If there are any CR buffs out there who could enlighten me as to the positions of lamp irons I'd be grateful. Some locos appeared to have more than others, particularly in the buffer beam area. Also I guess the loco had only Westinghouse air brakes when new, and didn't have any carriage heating pipes at that time. If anyone knows differently please let me know.
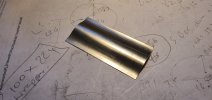
The next job was cutting out some new chassis frames.

You can see that I also started making a new bogie as the etched one in the kit is just too old school. More next week. Massive thanks to Martin Shaw, Robin McHugh and everyone else that has chipped in to help a Caledonian Railway novice.
The model will be built to S7 gauge so I sent the wheels off to that nice Mr Dowling for an encounter with his wheel tyre S7 form tool, and in the meantime set off building the coupling rod and then the footplate. The first thing I noticed was that there's not much in the way of registration for the valences on the underside of the footplate. I cut some short bits of brass strip and tacked them to the underside of the footplate etch to butt the valence etch up to in the correct position. I noticed that the valences were slightly different lengths, and adjusted accordingly. This of course set an alarm ringing that, as with all old hand drawn etches, its a good idea to check measurements and for squareness.
I moved on to the cab and bunker. I checked the sides for the above and noticed that one was slightly longer than the other, and that both were too long for the etched registration slots in the top of the footplate. I adjusted accordingly. The bunker rear was etched in 0.45 mm sheet and I thought I'd have a better chance of forming a nice flare at the top if I cut a new one from 0.3 mm sheet. I repurposed the bunker rear etch as a cab floor as there wasn't one in the kit. I also decided to make a new cab rear as the pre etched holes for the window bars were in the wrong place. Pictures show that the bars are attached to the beading round the windows and the etched holes in the kit part are above and below the beading. I just thought that it would be quicker to make a new one than modifying the etch. I also made the cab front and roof and added all the handrails and lamp irons etc.
I didn't much like the coal rails etched onto the bunker sides and rear and made some new ones from half round brass rod.
The model will depict no 452 when new. If there are any CR buffs out there who could enlighten me as to the positions of lamp irons I'd be grateful. Some locos appeared to have more than others, particularly in the buffer beam area. Also I guess the loco had only Westinghouse air brakes when new, and didn't have any carriage heating pipes at that time. If anyone knows differently please let me know.
The next job was cutting out some new chassis frames.
You can see that I also started making a new bogie as the etched one in the kit is just too old school. More next week. Massive thanks to Martin Shaw, Robin McHugh and everyone else that has chipped in to help a Caledonian Railway novice.