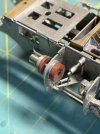
7mm Mickoo's Commercial Workbench

OzzyO

Western Thunderer
Hello Mick,

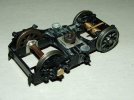
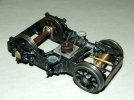
you may want to look at 3D printing the inserts in the frames for the front bogie wheels. At about 6' rad. the wheels can touch the frames in this area.

ATB

OzzyO.
 

mickoo

Western Thunderer
Hello Mick,

you may want to look at 3D printing the inserts in the frames for the front bogie wheels. At about 6' rad. the wheels can touch the frames in this area.

ATB

OzzyO.
Yes, I had thought that may be the case so I've left all the metal work off for the dished frames so far.

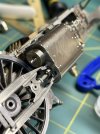
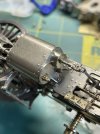
The plan is a 3D cylinder block (base and front...leaving the rear as the etched plate work) onto which I'll add the dished frame areas to fill that big void up.

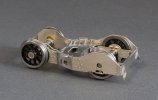
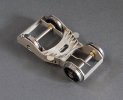
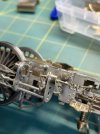
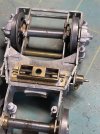
I've also change the bogie from the rear extended pivot point to central to try and limit swing at the front and give it some rotational action as opposed to it being a four wheel pony truck. Side control is today's current puzzle to work through.
 

simond

Western Thunderer
Does this help?

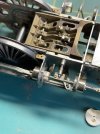
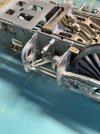
Mitchell / JLTRT King. Frame infills laminated from kit bits with plasticard frame. Did have “working” inside motion but unreliable so removed. Does 6’ curves ok.

I made a “bridge“ between the frames below where the slide bars would be, rather like the real thing, it supports the lower slide bars, and the bogie pivot is mounted on that. It’s a while ago, but I don't recall anything being provided, I think the intent was to treat the bogie like a pony truck, but with a slotted pivot somewhere near the front driving axle.

The “bridge“ is three bits of NS, two very shallow U shapes across the frames and the piece that joins them with the pivot on it. They’re screwed to two bits of brass soldered inside the frames.

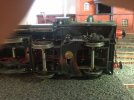
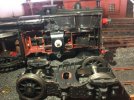
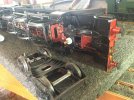
image.jpgimage.jpgimage.jpg

The bogie flanges have obviously been touching the underneath of the “dishing” - if I were doing it now, I’d 3DP the dishes.

must get round to finishing the final details…

atb
Simon
 
Last edited:

OzzyO

Western Thunderer
Hello Mick,
all of the kings that I built I never used the rear pivot and used the central pivot with a bush running in it.
517.jpg

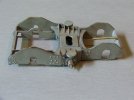
I also used a full tube bearing on the rear axle with oil holes in it. The strap was used for two purposes 1 the pivot and 2 to keep the bearing in the centre.
520.jpg


The front bearings are just soldered in place.521.jpg
ATB

OzzyO.
 

mickoo

Western Thunderer
Cheers chaps, interesting to see how others cut their cake to solve the same issues.

I was adamant there would be no step between the front and rear bogie frame sections, I get the idea behind the design but I did not want it. I picked the widest rear end I could and then trimmed the rear of the front section where it bends in to match.

That has two negative effects, the middle bearing section now doesn't fit so needs to be tapered to suit, the outside side control bearing plates are no longer parallel with the rail so need new ones therein.

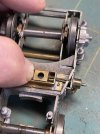
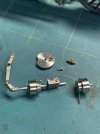
I was mystified by the rear bearing holes, it specifies 5/32" axles but has slots for 3/16" bearings so I bored out the 3/16" bearings and inserted the 5/32" top hats from the rear, then I filed flats on the 3/16" bearings to stop them turning in the frame slots. The wide frames required the bearings to have the 'top' hat section to be trimmed so that there's only about 0.5 mm side float, I don't want any more as sloppy wheels have a habit of wandering around and shorting. Once I'm happy with the ride height at the rear I'll add a small flange plate to the rear of the bogie to just above the wire and solder it solid and give it a bit more strength.

IMG_2286.jpg

IMG_2288.jpg

There's still a few seams and gaps to flood fill with solder and cut back. All the chassis NS etches have been massively over etched which has caused frustration and more than once the whole lot has nearly been thrown over the fence.

Regarding the working motion, I've heard/read several folks say it's unworkable/unreliable, I'll try the best I can and see how we get on and I've still got no idea how to put it all in and make it removable for paint, just can't see a way around that other than leaving the cylinder wrappers off and sending it back for paint once those are on. Either way it's already added days to the build and probably several more truth be told.
 

simond

Western Thunderer
My bridge was screwed on to make it removeable.

I know the inside motion can work, but I wasn’t prepared to put up with it and couldn’t be bothered to engineer something better.
 

mickoo

Western Thunderer
My bridge was screwed on to make it removeable.

I know the inside motion can work, but I wasn’t prepared to put up with it and couldn’t be bothered to engineer something better.
Yeah spotted that, failed to acknowledge ;)

I'll probably make mine fixed and then maybe add a 3D overlay over the top (underneath real terms) that has all the bolster, bearing and webbing on for eye candy, I'll leave the middle hollow with a diameter large enough for the track holding spring and securing spring. There's also a transverse bridging beam under the valve rocker arm spindles, it has no function other that to keep the frames rigid I believe (so has no load), I'll add that to bulk out the area and give a bit more light blocking mass to the area in there.

I'm sure the motion can be made to work, my problem is time/budget and who do you upset the most, me, painter or client.

If I engineer something removable it'll upset me (time and shed load of extra work) and the clients budget, if I make it all fixed in place it'll make me and the client happy and upset the painter. If I make it in a traditional non working sense it'll make me and the painter happy and the client unhappy.

Ideally I want a cheap option one (there may be many bottoms of beers glasses observed before the answer presents itself) with respect to time and expense; problem is, as soon as you solder anything to the valve stems or piston rods inside the casing they stuck there forever and that also means the rocking levers, crossheads and anything attached to them.

It's an essential working feature of the King class so ideally needs to be achieved....the 'how....is taking some time to germinate :cool:
 

Pencarrow

Western Thunderer
Yeah spotted that, failed to acknowledge ;)

I'll probably make mine fixed and then maybe add a 3D overlay over the top (underneath real terms) that has all the bolster, bearing and webbing on for eye candy, I'll leave the middle hollow with a diameter large enough for the track holding spring and securing spring. There's also a transverse bridging beam under the valve rocker arm spindles, it has no function other that to keep the frames rigid I believe (so has no load), I'll add that to bulk out the area and give a bit more light blocking mass to the area in there.

I'm sure the motion can be made to work, my problem is time/budget and who do you upset the most, me, painter or client.

If I engineer something removable it'll upset me (time and shed load of extra work) and the clients budget, if I make it all fixed in place it'll make me and the client happy and upset the painter. If I make it in a traditional non working sense it'll make me and the painter happy and the client unhappy.

Ideally I want a cheap option one (there may be many bottoms of beers glasses observed before the answer presents itself) with respect to time and expense; problem is, as soon as you solder anything to the valve stems or piston rods inside the casing they stuck there forever and that also means the rocking levers, crossheads and anything attached to them.

It's an essential working feature of the King class so ideally needs to be achieved....the 'how....is taking some time to germinate :cool:

In summary, I think what you're saying Mick is that prefer working on nicer Southern Bulleids.
 

mickoo

Western Thunderer
In summary, I think what you're saying Mick is that prefer working on nicer Southern Bulleids.
Not necessarily, with commercial work there can be no favourites, you have to treat them all equal, to not do so is unfair on the clients.

I prefer building kits where the castings are fit for purpose and the etches all fit, that is surprisingly not the norm I'm finding.

However, I have to be careful and almost constantly remind myself that my viewpoint is far from what most kits are/were designed for, they're designed for hobbyists who have all the time in the world to amble along, take in the scenery and make good where necessary.

Another growing factor is expectations, people now want more (no harm in that at all) but many kits do not enable the 'more' so easily, in fact some older designs are counter productive and a hindrance to 'more'.

You do get the odd little Easter eggs, the recent 2P 0-4-4T was one, not an engine I've ever paid much attention to, but once finished I had a greater admiration for.

If I had to aim for a region then it'd be LMR/ER, the Scot was nice and possibly the only model I've built commercially that I'd personally keep.
 
Last edited:

simond

Western Thunderer
I have a dear pal, known him 60 years or more, who is, for reasons that escape me, a very keen road cyclist. He views bicycles much as I view panniers, you have one less than you need.

As he observed, you can have good, cheap, or light. Choose any two.
 

Yorkshire Dave

Western Thunderer
I prefer building kits where the castings are fit for purpose and the etches all fit, that is surprisingly not the norm I'm finding.

However, I have to be careful and almost constantly remind myself that my viewpoint is far from what most kits are/were designed for, they're designed for hobbyists who have all the time in the world to amble along, take in the scenery and make good where necessary.

Not surprising really. Given the majority of the kits (etches and castings) were designed 20, 30, 40 or 50 years ago and have probably never been re-tooled or re-designed as technology evolved and more prototype data becoming available to correct earlier mis-interpretations. Likewise with the castings - probably have not been re-tooled nor new crisper production moulds made to replace life expired existing production moulds.

Another growing factor is expectations, people now want more (no harm in that at all) but many kits do not enable the 'more' so easily, in fact some older designs are counter productive and a hindrance to 'more'.

This in part - in my view - has been led by discerning clients and modellers who pay attention to and require the detail for an accurate model of the prototype rather than the generic representation a kit may produce. And more latterly the RTR market who have the resources (and budget) to use the current technology to build in the detail refinements at the design stage.
 
Last edited:

Dodger

Member
Hello Mick, here is may take on the King the cylinder vale gear on mine it can be removed through the front. It can be fitted with a pin once painted. You are more than welcome to use the jig I made to fit the ring on the inside, if you choose to use this method.
The bogie swing needed to have a notch in the frame to allow enough float.
Another fine build by you I must say, can’t wait to see the result.
Roger4471AE9A-2643-4F47-9394-8C7115D13339.jpeg
A08CB2AE-C791-4F74-96A6-B529FA8ED8EC.jpegDE3661A5-4E9D-4586-B6BE-0748804591E2.jpeg5ECEC748-F67F-4765-ABDB-C0BF65C1E377.jpegCAB4B16C-C835-4BBF-AF83-9FB3A5A8F7B1.jpeg45230B83-0830-4CE5-9DFE-3273792E853A.jpegB73A8872-15CF-4BBB-9428-C1ABC0E65EC1.jpegC10C507D-09F6-4487-8B27-D01CF7A3DEDD.jpegE32B9F04-7E6D-419A-A125-02C9F0EC200B.jpeg
 
Last edited:

Richard Gawler

Western Thunderer
Not necessarily, with commercial work there can be no favourites, you have to treat them all equal, to not do so is unfair on the clients.

I prefer building kits where the castings are fit for purpose and the etches all fit, that is surprisingly not the norm I'm finding.

However, I have to be careful and almost constantly remind myself that my viewpoint is far from what most kits are/were designed for, they're designed for hobbyists who have all the time in the world to amble along, take in the scenery and make good where necessary.

Another growing factor is expectations, people now want more (no harm in that at all) but many kits do not enable the 'more' so easily, in fact some older designs are counter productive and a hindrance to 'more'.

You do get the odd little Easter eggs, the recent 2P 0-4-4T was one, not an engine I've ever paid much attention to, but once finished I had a greater admiration for.

If I had to aim for a region then it'd be LMR/ER, the Scot was nice and possibly the only model I've built commercially that I'd personally keep.

Mick, I am thinking about what is "fit for purpose" and purchase by "hobbyists".

I have just built a kit supplied with three alternative chimneys and two designs of safety valves, all provided as fairly basic white metal castings. I spent a couple of hours fettling my chosen chimney and I am happy with the result I obtained. I am happier than I would have been if I had paid for three turned brass chimneys and discarded two of them.

Conversely, as a professional builder I expect you value your time higher than the cost of a turned brass chimney. So what you think is "fit for purpose" is probably different to what I think, not because there is something fundamentally wrong with the production of the kit but because we are looking at its contents from different points of view.

I agree, the etched parts ought to fit together. This is surely fundamental to any kit. I count myself fortunate to have sought and listened to advice from yourself and many others, to have steered myself away from temptation, and bought kits which are known to go together.
 

Yorkshire Dave

Western Thunderer
Conversely, as a professional builder I expect you value your time higher than the cost of a turned brass chimney. So what you think is "fit for purpose" is probably different to what I think, not because there is something fundamentally wrong with the production of the kit but because we are looking at its contents from different points of view.

I think you've hit the nail on the head here and it all hinges on our individual interpretation of the term 'fit for purpose' for cast parts.

My feeling is Mickoos useage here as a professional kit builder is probably the same as mine as an amateur. I would expect all cast parts, irrespective of the material used, to be accurate and perfectly formed. Then drop or fit into place with the minimim of cleaning and little or no fettling, tweaking, packing, etc. Personally I wouldn't want to spend any more than a few minutes per item doing this.
 

mickoo

Western Thunderer
Before you can define fit for purpose you have to define costs, time and situation/location.

The last is probably the most important, parts fit for purpose on a sprawling garden railway may not be for a depot layout where the model is the main focal point, for simplicity we'll stick with the latter.

Time is the big killer, people like to spend two hours fettling and cleaning up castings. I don't get that, especially when the issue was caused by someone else. If your chimney has been cast correctly and quality controlled then you would have spent maybe 20-30 mins cleaning it up; I've had cast chimneys that have been cast so well they take half that time, even more annoyingly, they've come from kits far cheaper than those cast poorly. To my mind that's 90 minutes of my time wasted resolving someone else's shoddy work, I'd rather spend that time doing something more important.

Cost, you paid for these parts in the first place, if they're not fit then you have to buy more or spend more time/money sorting what you do have.

Being pro does have an impact your time, but in all honesty you're on someone else's clock, it's their money you're wasting, rightly or wrongly I can't abide that. I feel you have a duty of care to ensure the clients money is well spent and he get's value for money, yes it's a shockingly poor business model.

Lets say the hourly rate is £20/hr (that's a fair middle of the ground rate) then you're fettling of the chimney cost the client £40, you can buy a 3rd party one that is cast correctly for what? £10 then half an hour to clean and fit, total cost is £20, half of the cost of cleaning the poorly cast one.

Put another way, you just saved the client £20, better yet you just saved yourself 90 minutes which you can either spend on the model doing something more productive or go down the pub earlier; that works for pro or hobbyist. That's just one chimney, now multiply that by all the other castings in the box.

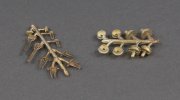
By unfit I mean something like this and I fully accept I may be in a majority of one.
IMG_2293.jpg

On the left all the oil lines are merged and riddled with flash and the oil pots malformed with poor lugs and fixing detail.

On the right we have the valve chest covers at the front between the frame extensions (primary viewing eye catching focal point) and the bearing cups for the bogie, the cups are not round and if turned would then be undersized. The covers have a split line right across the faced and deformed rims, the time spent cleaning them up would be better spent starting again and turning new ones up....but why should you, you paid good cash for this, why should you spend your time sorting this out?

If you were forced to use those parts and had to clean them up (cut all the oil lines off, redrill and fit new ones and clean the pots) then you're easily looking at four, maybe six hours work; that's one of those really difficult conversations you end up having with clients.

Conversely here's a crop of the tender from the same kit, those handbrake and water scoop up stands were perfect, five minutes to clean up, I opted to remove the handles, drill and fit nickel silver wire as it's more robust that the cast brass and the brass ones were a bit oval in cross section. Same for the intermediate buffers, these are good castings, fit for purpose from workable moulds and acceptable quality control.
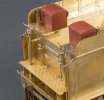
Image2.jpg
 

mickoo

Western Thunderer
I think you've hit the nail on the head here and it all hinges on our individual interpretation of the term 'fit for purpose' for cast parts.

My feeling is Mickoos useage here as a professional kit builder is probably the same as mine as an amateur. I would expect all cast parts, irrespective of the material used, to be accurate and perfectly formed. Then drop or fit into place with the minimim of cleaning and little or no fettling, tweaking, packing, etc. Personally I wouldn't want to spend any more than a few minutes per item doing this.
Yup, that's about the level of it, either pro or if it were for myself, then parts should take a modicum of cleaning before fitting.

Both you and I know full well it can be done and there are many good examples out there where castings are very good; so there is no legitimate reason for castings to be anything other than that. Tired moulds, squeezing the last life out of moulds, poor material and poor quality control are the biggest factors in poor castings and frankly given the price of some of these kits, not acceptable.
 

simond

Western Thunderer
Whilst I wholeheartedly agree, were it not for the recent & growing availability of 3DP, a refusal of the market to accept the less-good castings you showed would lead to a dearth of kits, and fairly rapidly thereafter to no kit makers.

and as we have previously discussed, 3DP is not a panacea. Some things need to be metal for appearance, strength or stiffness.

I fear the dodgy castings issue will be around for a while yet.
 

Pencarrow

Western Thunderer
I think for me the "fit for purpose" criteria would be:

1. The etched parts fit and are the right dimensions
2. Castings are reasonably clean and right size and shape
3. The overall model when built matches the dimensions and appearance of the prototype
4. The kit instructions identify the parts and where they go

I've not included ease of build as that's quite dependant on the skill of the builder and could be offset by kits being described as easy/medium/hard.
 
Top