Mickoo's BR modelling

dibateg

Western Thunderer
When I built my pair of JLTRT Derbys, I thought it was a nonsense that you couldnt get the wheelsets out, so I drilled and pinned them:-
DSCF1568.JPG


Obvs wont work with your model Mick - but in the future...

For some reason - I have a couple of right hand 25 frames if you need them...

Cheers
Tony
 

mickoo

Western Thunderer
When I built my pair of JLTRT Derbys, I thought it was a nonsense that you couldnt get the wheelsets out, so I drilled and pinned them:-
View attachment 266051


Obvs wont work with your model Mick - but in the future...

For some reason - I have a couple of right hand 25 frames if you need them...

Cheers
Tony

What a spiffingly good idea, I have another unbuilt 25 to do, a 26 and a brace of 47's so will explore that method on those :thumbs:

I'm alright for side frames at the moment.........but duly noted :cool:
 

SimonT

Western Thunderer
Mick,
I did a similar trick on all the locos on Aberbig. A strap and pin bonded to the bogie outside casting; a 10BA screw attaches the strap to the top surface of the bogie inner. Two pins to locate the outside correctly. Photos if you want ;)
 

john lewsey

Western Thunderer
Mick,
I did a similar trick on all the locos on Aberbig. A strap and pin bonded to the bogie outside casting; a 10BA screw attaches the strap to the top surface of the bogie inner. Two pins to locate the outside correctly. Photos if you want ;)
Hiya Simon ,did you ever do a video of Abberbig ?
 

mickoo

Western Thunderer
A little BR blue time this afternoon, I had to get a supplementary sheets done for the Urie S15 so added a rad grill and step blanks (not fitted) for the 25. quick waft with a file and some dabs of solder and the big hole now has a grill.

For some odd reason the boiler vent had been hacked off, not sure what's here on the virgin kit roof or why it was taken off bu a new 3D one was whizzed up and fitted, for the anoraks it has a slotted intake where it meets the hatches right near the centre line, it's a little nick nack but it ticked my boxes.

IMG_8750.jpg

IMG_8751.jpg
 

mickoo

Western Thunderer
Yes, I think you're probably right, bollox..... :))

I'll see if I can pry it off and shuffle it out a fraction or print a new one with a wider lip and fit. Your shot confirms it pretty much follows the headcode box profile :thumbs:
 

mickoo

Western Thunderer
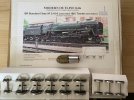
Pat and his black and white cat delivered these today.

Although I already have two on back order with MOK, this one turned up on Ebay earlier in the week with metal wheels and requisite motor/gearbox, it was rude not to make it a trio.

I do have a plan for one of the three to rebuild but just need to check some drawings. These three will all be mine on top of two commissions later in the year, one full and one engine only.

IMG_5591.JPEG
 

mickoo

Western Thunderer
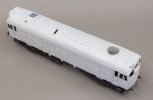
Class 25 body already for top coats, finally got around to filling the water hatch filler steps and add etched blanking overlays and fit a slightly larger 3D boiler vent, also filled some joint gaps and pre-shaded.

I may go back before I do the blue and preshade the covered panels at the #2 end by the doors and a bit more around the headcode boxes around the gutter area.

IMG_8772.jpg

IMG_8773.jpg
 
Last edited:

Yorkshire Dave

Western Thunderer
I may go back before I do the blue and preshade the covered panels at the #2 end by the doors and a bit more around the headcode boxes around the gutter area.

I would also give a light coating of ivory (or off white) a few degrees from the vertical - but not directly over - from the top so it hits the top edges, cab fronts and corners as they would have been prone to more wet weather attrition by being driven into it.

Ideally you would spray the 'pre-shading' black upwards (or downwards if the body is upside down) so the shading sits under the raised panels, window frames, gutter, panel joins, light housings, etc.
 
Last edited:

SouthernFan Ian

Western Thunderer
Class 25 body already for top coats, finally got around to filling the water hatch filler steps and add etched blanking overlays and fit a slightly larger 3D boiler vent, also filled some joint gaps and pre-shaded.

I may go back before I do the blue and preshade the covered panels at the #2 end by the doors and a bit more around the headcode boxes around the gutter area.

View attachment 268081

View attachment 268082
This is the first time I’ve seen pre shading on a railway model. Aircraft and military modellers use pre shading with great effect. Cannot wait to see the end result. Well done on pushing the boundaries Mick.
 

adrian

Flying Squad
This is the first time I’ve seen pre shading on a railway model. Aircraft and military modellers use pre shading with great effect. Cannot wait to see the end result. Well done on pushing the boundaries Mick.
The Guv'nor started it more than a few years ago, which Mick picked up on pretty quickly in the replies.


mickoo

Western Thunderer
The Guv'nor started it more than a few years ago, which Mick picked up on pretty quickly in the replies.

Blimey I'd forgotten the Guv's work, possibly one of the first to apply it to model railways, I can't recall seeing it before or since to be fair, except in military circles of course.
 

SimonT

Western Thunderer
This is the first time I’ve seen pre shading on a railway model
You obviously didn't see Laramie! The technique was used on most of the vehicles on the layout. AK do a boxed set of Panzer crew paints that are perfect for the next coats on black locomotives.
 

mickoo

Western Thunderer
This is the first time I’ve seen pre shading on a railway model. Aircraft and military modellers use pre shading with great effect. Cannot wait to see the end result. Well done on pushing the boundaries Mick.
It is very common in military modeling, which is where I returned from way back yonder having migrated there from OO via girls, wife, kids, flight sim CAD work, war-gaming (Napoleonic) and 1:35/1:48 military modeling.

It works best with light colours for larger areas but the grills and recesses will be the biggest gain as you don't have to worry or struggle to get the top coat (blue) into all the grooves (to then later pin wash them for definition).

Dave is right, it also need some lighter areas, specifically the headcode box top and cab corners and maybe a bit along the can't rail.

A large portion of the 25 roof is fiberglass panels and being rougher than the surrounding smooth metal work really hold the dirt much better, in many cases they're almost pure black so pre-shading doesn't work there, in which case I'll have to cut back the weathering up there and have a semi grubby 25.

 

mickoo

Western Thunderer
You obviously didn't see Laramie! The technique was used on most of the vehicles on the layout. AK do a boxed set of Panzer crew paints that are perfect for the next coats on black locomotives.
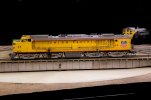
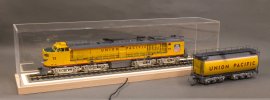
I wasn't sure if the Veranda had been pre-shaded, but looking now the harder/deeper shadow under the walkway lip suggests it had been.

IMG_6353.jpg

I'm not a big fan of heavily weathered models and my Veranda has had some done in the past by a previous owner but it really needs more like the Laramie one to be fair. I can't pre-shade mine as it's already painted and decalled so it'd all be on top which will be much harder work.

IMG_7721.jpg
 
Last edited:

SimonT

Western Thunderer
I'm not sure that Pete did it to the Veranda but he did do the Big Boys and the freight vehicles that sat on the spur. The Veranda was just good weathering.
 
Top