Hayfields 7mm 3D Printed Turnouts

martin_wynne

Western Thunderer
Hi Martin,
Peco OO Bullhead 75 measures 3.91+-0.01
Steve
@Steve Cornford @Hayfield1

Many thanks Steve.

I'm calling that the "medium" option for 4mm COT track:


4mm_cot_options..pngIt's doable, just, on a Neptune 4 with a standard 0.4mm nozzle, but requires a lot of changed settings.

In addition to COT track, FDM plug-in 4mm chairs could be used instead of resin chairs with laser-cut timbers or with FDM-printed timbering bases. But not with loose jaws, for FDM they need the glue-on stub jaws if not solid-jaw.

cheers,

Martin.
 
Last edited:

John_B

Western Thunderer
a different slicer.
Can I ask which one, or would that be opening a can of worms? I've got pretty good results in 7mm with Orca Slicer on my Qidi Q1 Pro with Sunlu PLA+, but life got in the way of getting very far with it. I'm curious about 4mm too.
 

martin_wynne

Western Thunderer
Can I ask which one, or would that be opening a can of worms? I've got pretty good results in 7mm with Orca Slicer on my Qidi Q1 Pro with Sunlu PLA+, but life got in the way of getting very far with it. I'm curious about 4mm too.
@John_B

Hi John,

Let's not hijack John's constructional topic with 3D printer stuff. Ask me again on Templot Club.

edit: After going all round the houses on numerous slicers, I have now reverted to Cura.

cheers,

Martin.
 
Last edited:

Hayfield1

Western Thunderer
Martin

Good to see Templot Club back on line (hope you have had a fruitful time) and that COT track is back.

Its also very good to see work going on with 4mm scale COT track, hopefully we will see progress this year

I see nothing wrong with COT track at the moment only being able to do basic requirements, eg: turnouts. Yes Templot is capable of doing so much more, but for the average modeler, that's all they need

In 7 mm scale I have the ability to design and print the most detailed turnouts on the market, no manufacturer of professional track builder comes anyway near with commercial products available. That's before we even think about them being bespoke !! The level of detail is second to none. That's before we look at how easy they are to build !! Nothing in 7mm comes close. Plus I have not mentioned the plain/flexi track

As I have said for me the biggest benefit is the detail, but with ever rising prices, my turnouts cost me a fraction of both the RTR and kits available. My Neptune4 has paid for its self in months

We may still be in the Chinese year of the Dragon, but for railway modelers 2025 is the year of the COT (track)
 

Hayfield1

Western Thunderer
Now this is still very much experimental, but Martin Wynne has not been resting over the Christmas period


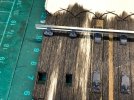
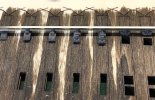
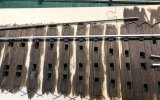
4mm scale FDM printed Plug track
index.php

Photo Martin Wynn


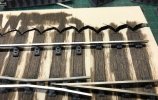
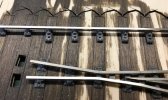
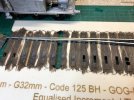
4mm COT track

index.php

Photo Martin Wynne
Now please read what Martin has written in Templot club


Please accept this is Martin experimenting and it is the early start of developing a system
Light years ahead of my own experiment, which failed miserably prior to Scaleforum
The detail of FDM printing is a bit basic and nothing as crisp as resin printing for the chairs, but Martin is using a basic/starter FDM printer (Neptune4 ) and the standard filament.

But its a huge step forward

Lets face it even in its raw state, far better than copperclad construction, and will be a lot cheaper

Martin I hope you don't mind me using your photos, but what a start to the new year. I know its very much at the experimental stage, but something to look forward to in the future
 

Hayfield1

Western Thunderer
I am sorry I have not updated the Templot plug track build sooner, in honesty I needed a break from track as I have been neglecting my loco building, plus like most we both had the bug between Christmas and new year. Anyway I am back on track for want of a better pun

Before going on I am in a real quandary, as I love COT track, but it has it limitations, but unlike my previous experience with plug track, today has been a positive eye opener with plug track

271.jpeg

As I planned I changed the common crossing chairs from solid jaws to loose jaws, the base units fitted well

272.jpeg

As with the solid jaws, I slid the first vee rail in place

273.jpeg

Then added the second vee rail and put in place the first wing rail, please note the first two chairs have solid jaws.

274.jpeg

The second vee rail added and I have shown the loose jaws which will be used to fix the wing rails in position

275.jpeg

A tail of 3 chairs, right with the loose jaw fully fitted, middle partially fitted right chair no jaw

This process is very easy to do, infact a doddle, an excellent solution to avoid a tricky maneuver

276.jpeg

All 3/6 chairs and jaws fitted

277.jpeg

Overall view and I fitted the spacers

278.jpeg

The beginnings of fitting the stock rails, the slide chairs fitted in place

As I said earlier, my view of plug track is altering, however that's not to say I am loosing my enthuasm for COT track
 

Hayfield1

Western Thunderer
279.jpeg

I have started off in the middle fitting the S1 chairs

280.jpeg

Next up are the check rail chairs, don't for to fit the check chair left and right in the correct places and the right way round. Using loose jaw chairs will make fitting the check rails much easier. No track gauges are required or waiting for solvent to dry

281.jpeg

The last two S1 and a S1J chairs are fitted

282.jpeg

Now comes the turn of the L1 (bridge chairs) and P1 to P4 slide chairs fitted. I should have requested loose jaws for these p! to P4 chairs to make life a bit easier

283.jpeg

The final S1 & S1J chairs fitted.

Had I gone for loose jaws the stock rail could be pushed in place, but as I chose solid jaws I now need to add the switch rail

All in all plain sailing for a first time build
 

Attachments

  • 283.jpeg
    283.jpeg
    135.4 KB · Views: 2
  • 282.jpeg
    282.jpeg
    122.6 KB · Views: 2
  • 281.jpeg
    281.jpeg
    105.9 KB · Views: 2
  • 280.jpeg
    280.jpeg
    104.5 KB · Views: 2
  • 279.jpeg
    279.jpeg
    104 KB · Views: 3

Osgood

Western Thunderer
Sorry I've forgotten if the answer to this has been covered in previous posts, but:

Can you get away with loose fitting vee rails or is there an advisory to glue / otherwise secure them together?
 

Hayfield1

Western Thunderer
Tony

Thank you for your question, no idea if I have answered it. The coconscious is that a spot of super glue will hold the rails in place, but I solder a bonding wire across the common crossing, which not only holds all rails in place but then can act as a dropper wire for electrical continuity
 

martin_wynne

Western Thunderer
Sorry I've forgotten if the answer to this has been covered in previous posts, but:

Can you get away with loose fitting vee rails or is there an advisory to glue / otherwise secure them together?
@Osgood

Hi Tony,

If you use the Templot 3D-printed filing jigs the vee rails will fit together very snugly and do not strictly need fixing. In the FDM-printed bases with loose-jaw chairs the dropper wires (24swg TCW) are attached to the rails before assembling them, and the rails are effectively fixed by pushing the dropper wire into the dropper wire retaining ridges:

index.php


And if necessary retained there with some suitable sealant, such as children's modelling clay from the pound shop. This handy stuff looks and feels like brightly coloured Blu-Tack, with the difference that if left for a few days it loses its stickiness and dries out to a blob of rubbery material. Which is ideal for sealing things but can be removed easily if necessary.

Dropper wire: RS PRO 0.56mm Tinned Copper Wire, 24 AWG 91.3m Reel | RS

Here is my provisional jig for soldering dropper wires to the underside of rail, where they will be almost invisible. As you can see no expense has been spared:

index.php


index.php


Four 2p coins glued to a bit of wood with a gap between them for the rail. A 1p coin glued on top to support the dropper wire. A blob of Blu-Tack to stop the rail sliding, and another blob to hold the wire while it is soldered. The ink marks on the rail show the chair positions which must be avoided, and also confirm you have the rail upside down. It works fine, but I'm intending to create a proper resin-printed equivalent.

But if preferred the vee can be fixed solid after assembly:

Resin chairs: these will resist soldering temperatures briefly, so the vee can be soldered in situ. The neatest result is using low-temperature SMT paste (138degC). It's expensive, but a tub lasts forever if kept in the fridge, and it is useful for lots of modelling jobs:

SMDLTLFP50T3 | CHIPQUIK SMD LTLF Lead Free Solder Paste, 50g Tub | RS

Just a smear with a cocktail stick into the web of the (cleaned) point rail after inserting it in place. Slide the splice rail up to it and touch the rails with a dry soldering iron. The SMT paste will flash and lock the vee rails together invisibly.

FDM (COT) chairs: same process but using epoxy adhesive instead. FDM filament won't resist soldering temperatures.

cheers,

Martin.
 
Last edited:

Hayfield1

Western Thunderer
I would like to add, certainly with COT track and I cannot see plug track will not be any different and in 7mm scale, if you are reasonably proficient with soldering, you can solder both bonding wires and dropper wires to the rails in situ without damaging the chairs, exactly the same as we do now with both flexi track and plastic hand built track.

Of course excessive prolonged heat will damage any chair whether its 3D printed of injection moulded, if you are concerned use a lower melting point solder and the appropriate flux. For wiring I use standard old fashioned 60/40. The trick is clean and pre-tin both surfaces, flux them again and in and out with the soldering iron quickly. I have a decent soldering iron and a selection of different size tips, Don't use a big iron with a massive tip, you are asking for trouble. The advice is the same for RTR track as it is for 3D printed track.

I do not use resin cored solder !! But I have not changed my soldering techniques from building hand build track with injection moulded plastic to COT track in 7mm scale, I assume in 4mm scale you may need to be a bit more careful.

If you misuse any parts during the build you run the risk of damaging them, personally I think the risk of damage is greater threading chairs than using an approprate soldering iron
 

Stephen Freeman

Western Thunderer
@Osgood

Hi Tony,

If you use the Templot 3D-printed filing jigs the vee rails will fit together very snugly and do not strictly need fixing. In the FDM-printed bases with loose-jaw chairs the dropper wires (24swg TCW) are attached to the rails before assembling them, and the rails are effectively fixed by pushing the dropper wire into the dropper wire retaining ridges:

index.php


And if necessary retained there with some suitable sealant, such as children's modelling clay from the pound shop. This handy stuff looks and feels like brightly coloured Blu-Tack, with the difference that if left for a few days it loses its stickiness and dries out to a blob of rubbery material. Which is ideal for sealing things but can be removed easily if necessary.

Dropper wire: RS PRO 0.56mm Tinned Copper Wire, 24 AWG 91.3m Reel | RS

Here is my provisional jig for soldering dropper wires to the underside of rail, where they will be almost invisible. As you can see no expense has been spared:

index.php


index.php


Four 2p coins glued to a bit of wood with a gap between them for the rail. A 1p coin glued on top to support the dropper wire. A blob of Blu-Tack to stop the rail sliding, and another blob to hold the wire while it is soldered. The ink marks on the rail show the chair positions which must be avoided, and also confirm you have the rail upside down. It works fine, but I'm intending to create a proper resin-printed equivalent.

But if preferred the vee can be fixed solid after assembly:

Resin chairs: these will resist soldering temperatures briefly, so the vee can be soldered in situ. The neatest result is using low-temperature SMT paste (138degC). It's expensive, but a tub lasts forever if kept in the fridge, and it is useful for lots of modelling jobs:

SMDLTLFP50T3 | CHIPQUIK SMD LTLF Lead Free Solder Paste, 50g Tub | RS

Just a smear with a cocktail stick into the web of the (cleaned) point rail after inserting it in place. Slide the splice rail up to it and touch the rails with a dry soldering iron. The SMT paste will flash and lock the vee rails together invisibly.

FDM (COT) chairs: same process but using epoxy adhesive instead. FDM filament won't resist soldering temperatures.

cheers,

Martin.
Of course for a belt and braces approach there are always heat sinks which can be employed.
 

Hayfield1

Western Thunderer
To some extent this is a preproduction kit and after producing it Terry has made some revisions, also its partly my fault in that I should have been a bit more specific with my order

284.jpeg


Using the switch rail filing rear jig, I easily filed the rear of the curved switch rail

285.jpeg

Followed by filing the left hand inside of the switch rail. These jigs are designed to be cramped to the work bench, not for being held in a vice

Anyway a very easy system to use

286.jpeg

After curving the rail then cutting to length, I fitted the chairs from the L1 onwards

287.jpeg

Now this was my mistake in ordering. I should have ordered loose jaws for the chairs P1 to P4, as it took a bit of effort to slide the switch rail through these 4 chairs which were ob the stock rail already. Loose jaw chairs would have been so much easier

At this point I would highly recommend ordering the kit with loose jaws !!

288.jpeg

The process ended up with both rails fitting nicely in place and I used an Exactoscale H section fishplate to join the switch rail to the common crossing

290.jpeg

A close up of the rail join which is larger than life

I now need to do the same for the other half. So far a very enjoyable build, far easier than traditional methods and at a third of the cost of traditional kits and as you can see the bolt head detail is extremely crisp, in fact crying out for an artist to paint. I think you could go to town painting these
 

Attachments

  • 289.jpeg
    289.jpeg
    107.2 KB · Views: 1

Hayfield1

Western Thunderer
291.jpeg

A check rail has been formed and placed in position(dry run)

292.jpeg

Check rail chair loose jaws loosely fitted byt not pushed home

293.jpeg

Pushed home, but for some reason not fitting perfectly

After the photo after I tried fitting 3 new jaws, it solved the issue in one position. I slightly trimmed the remaining 2 loose jaws and they fitted perfectly and the rail is held much more firmly.
 

martin_wynne

Western Thunderer
@Hayfield1
Pushed home, but for some reason not fitting perfectly
@Hayfield1

Hi John,

Using the wrong loose jaws. Those are S1 / S1J jaws (with 2 ribs to fit around a single chair screw).

For check rails they should be SC jaws (with a single rib to fit between 2 chair screws). Note also that the loose jaws for the check rail flared ends are handed, use the correct one at each end.

For reference the loose jaws are colour-coded in the Templot dialog:


colour_coded_check_chairs.png


Excellent 3D prints from Terry with the heads on the chair screws obviously square, with random rotations. Have you got a spanner to fit them? :)

These jigs are designed to be cramped to the work bench, not for being held in a vice

They are intended to be used either way.

cheers,

Martin.
 
Last edited:

Phil O

Western Thunderer
Most of the ballasting has been done, waiting for it to dry now. The platform track will be done after the platform itself is completed and fixed down (after checking and double checking clearances, then check again).


@Hayfield1

@Hayfield1

Hi John,

Using the wrong loose jaws. Those are S1 / S1J jaws (with 2 ribs to fit around a single chair screw).

For check rails they should be SC jaws (with a single rib to fit between 2 chair screws). Note also that the loose jaws for the check rail flared ends are handed, use the correct one at each end.

For reference the loose jaws are colour-coded in the Templot dialog:


View attachment 231172


Excellent 3D prints from Terry with the heads on the chair screws obviously square. Have you got a spanner to fit them? :)

cheers,

Martin.

From memory 1 inch or 1 1/8th AF, my memory is not infallible these days.
 
Top