You are using an out of date browser. It may not display this or other websites correctly.
You should upgrade or use an alternative browser.
You should upgrade or use an alternative browser.
Hayfields 7mm 3D Printed Turnouts
- Thread starter Hayfield1
- Start date
daifly
Western Thunderer
Much better to copy & paste a URL. Then, after posting, test it as a courtesy to others!Sorry Typo which I am known for
Dave
Hayfield1
Western Thunderer
Much better to copy & paste a URL. Then, after posting, test it as a courtesy to others!
Dave
Dave
Had a problem with my Google browser this morning, after taking a screen print it would not allow me to copy and paste
I have an old desk top converted from Windows 7 to 10, its reaching the end of its natural life as it takes ages to wake up when opened etc
Now have a decent laptop (its a year old now) I like its speed, so will get something in one of the sales. Given we are heading for a recession might be worth waiting till prices start falling again.
Looking forward to the Postie arriving tomorrow, whilst I am a COT track convert, plug track interests me
Hayfield1
Western Thunderer
I’m perplexed!
I copied the link, (with an K) and it now works, but I couldn’t see anything wrong with it at lunchtime.
The links were mended on Tuesday night, I managed to both open the 7mm part and pay. I was able to test and use the system yesterday.
I have been having emails from Terry and now the system is working. I think though other may have a slightly different journey, as its designed for Terry to be able to supply bespoke designs from templates provided by the customer. But he has the facility to accept an order for a specific sized turnout, this I think is a good way to go for those who just want to analyze/peruse the system/product prior to using it
As for jigs, for the moment they are on hold, I have offered to assist with these as I have experience of printing them in both 4mm & 7mm scales
In short I think its a good thing to drip feed into the model railway market these items if only to get some additional user feed back, and perhaps something either I or someone else can assist with COT track in a very small and non commercial way. I think in computing its called Alpha testing
John
Hayfield1
Western Thunderer

I have been toying with painting and weathering the track and thought I would practice on some teat prints made some time ago
I have tried for the base coat both Revell leather brown and Humbrol 173 Brown for the sleepers and Revell rust, all matt acrylic paints.
Then dry brushing Humbrol Grey (106) for the sleepers and sand (63) for the rails and chairs. probably need a bit of orange added to it
I think I need to ballast the track and give it a wash of very weak blackish brown, looks better in real life under artificial light, rather than photo in daylight. Still anything looks better than nude grey plastic, and weathering better than base colours
Hayfield1
Western Thunderer

As per the email when I ordered the kit, the turnout kit arrived at lunchtime, very well packed

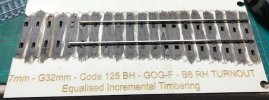
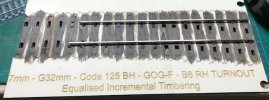
The turnout ply fret arrived in 2 parts

All seems nicely cut, I forgot to photo it but a Templot template (plan) was included which has the chair codes on it

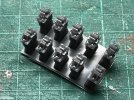
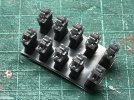
The chairs are nicely printed, in tis case with fixed jaws except where chairs with loose jaws are required ( common crossing and checkrail chairs)
First impressions are very pleasing and hopefully will give me the most detailed (chair wise) turnout currently available in either kit or RTR. But more importantly show what can be achieved in 4mm scale as well, something COT track cannot do at the moment with the printers we are using
Now I will stain the frets and contemplate my first steps
John
Hayfield1
Western Thunderer

Templot template with chair type identification printed on it
A list of what is included
This sample kit contains the following items:
1 x Laser cut Ply timber base (2 pieces)
1 x set of 3D printed Resin Chairs comprising of:
- 30 x S1 Fixed Jaw
- 10 x S1 slotted for loose jaw
- 10 x S1J Fixed Jaws
- 10 + 2 x L1 Fixed Jaws
- 12 x P Fixed Jaw
- 10 x CC Running Rail Fixed Jaw & Check Rail slotted for loose jaws
- 5 x CCL Running Rail Fixed Jaw & Check Rail slotted for loose jaws
- 5 x CCR Running Rail Fixed Jaw & Check Rail slotted for loose jaws
- 30 x Loose Jaws
- 1 set of x8 Heel Chairs + 8 L1 chairs Solid Jaws
- 1 set of x4 vee crossing chairs - solid jaws
- 1 set of x4 vee crossing chairs - slotted for loose jaws
- 1 set of loose jaws for above
martin_wynne
Western Thunderer
Hi, what region are these turnouts based on, they look like 3 bolt chairs ?
REA-pattern bullhead chairs, used on all regions of BR, although not very much on BR(W). Not used on GWR pre-nationalisation. The plain track chairs have 3 screws, not bolts. All special chairs for pointwork have 4 screws.
Martin.
3 LINK
Western Thunderer
Cheers Martin,REA-pattern bullhead chairs, used on all regions of BR, although not very much on BR(W). Not used on GWR pre-nationalisation. The plain track chairs have 3 screws, not bolts. All special chairs for pointwork have 4 screws.
Martin.
I thought if anyone would know, you would know. The P/way is such a vast subject on its own.
ATB,
Martyn.
Geoff
Western Thunderer
View attachment 229488
As per the email when I ordered the kit, the turnout kit arrived at lunchtime, very well packed
View attachment 229489
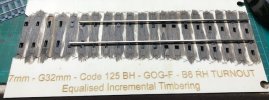
The turnout ply fret arrived in 2 parts
View attachment 229490
All seems nicely cut, I forgot to photo it but a Templot template (plan) was included which has the chair codes on it
View attachment 229491
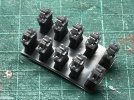
The chairs are nicely printed, in tis case with fixed jaws except where chairs with loose jaws are required ( common crossing and checkrail chairs)
First impressions are very pleasing and hopefully will give me the most detailed (chair wise) turnout currently available in either kit or RTR. But more importantly show what can be achieved in 4mm scale as well, something COT track cannot do at the moment with the printers we are using
Now I will stain the frets and contemplate my first steps
John
Thanks for the update John, I've been in touch with Terry myself over the past couple of days and have ordered a B6 RH curved turnout to 31.5mm gauge 0-MF standards.
Geoff
Hayfield1
Western Thunderer

Both ply bases were stained and have dried, but before I proceed I will explain the two different chair styles you can choose from

The first style is fixed jaws, you simply just slide the chairs on the rail (as you would do with ABS chairs) then plug the rail and chairs into the timber fret

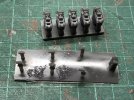
The second style is called loose jaws, as you can see the outer jaws are separate, the chairs are plugged into the base first, rail laid into the chairs and the jaws are pushed into their sockets
Back to the two styles of chairs again.
Does the fixed jaw turnout need some loose jaw chairs? The answer is yes, in certain places due to acute bends in the rail its much easier to use loose jaws

These are check rail chairs, the chairs slide on to the stock rail and fitted into the fret, the check rail is fitted in place and the loose jaws secure it in place. A similar method is used to fit the wing rail
Now some uses of the loose jaw method slide a few solid jaw chairs on to the rail so when the rail is put in place it is held in place, others just use a couple of cocktail sticks to temporary hold the rail in place until enough loose jaws have been fitted
Don't worry about this last part complicating matters, it all becomes clear in the end as you use the system

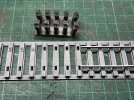
This last photo shows the size of 7mm chairs against a 4mm piece of track bed
John
Attachments
martin_wynne
Western Thunderer
@Hayfield1Does the fixed jaw turnout need some loose jaw chairs? The answer is yes, in certain places due to acute bends in the rail its much easier to use loose jaws
Hi John,
What thickness ply is Terry supplying for the 7mm kits? To use the loose jaws you need a minimum depth of 5.5mm in 7mm scale. This can be achieved with thinner timbers by building track on battens in the old fashioned way.
If you shorten the pins on the loose jaws for thinner plugs/timbers it is almost impossible to assemble them. It would be better to change to the glued outer jaws as on the COT track.
cheers,
Martin.
Hayfield1
Western Thunderer
Martin
The kit I have has a 6mm ply base and I now know after your explanation
" It is essential that the jaw pin is long enough to be able to start the pin in the slot with the key well above the rail top. It then flexes past the rail head and clips into place as you push it down."
and solution to get round it
"A possible solution with thinner timbers would be to build them on battens in the old fashioned way, to create a clearance for the full-depth plugs/pins to project below the underside of the timbers." then cut the pins off under the fret once built
Some of us use build jigs when assembling loco kits to keep the footplate straight, like wise I believe those who can build track will be able to make a build board, which I always advise when track building.
I understand this may restrict those who build directly in situ on the board, but I think this is against the ethos of simple build that Templot 3D track systems encourage
John
martin_wynne
Western Thunderer
@Hayfield1The kit I have has a 6mm ply base
Hi John,
Thanks for answering that. They looked thinner in your photos.
6mm thick timbers will be fine with loose-jaw chairs.
If folks order the kits with thinner timbers they will need to devise some means of raising them above the trackbed:
Above dimensions for 4mm/ft scale. For 7mm/ft use 3mm ply, 3mm battens.
cheers,
Martin.
Last edited:
Hayfield1
Western Thunderer
Sorry I have been a bit quiet lately, just family and the festive season getting underway
I have an interesting chat with Terry yesterday, firstly so we could catchup on first impressions and with Terry being a 4mm modeler 7mm scale has been a bit of a learning curve for him. He has and will continue to develop his website and continuing to develop his products.
I will be starting the build, but torn between to whom I am aiming the thread at. What would be wrong will be giving too little information and those who are unfamiliar with the system going off half cocked and making an unnecessary mess of it.
Martin has developed a superb system, but it has to be used in a certain way to get the best from it. From past experience I have seen car crashes in track building by folk who have all the gear but no idea. No system is idiot proof so I am sorry if I just keep this thread at beginner level
More later as I am now off to ferry a few to the local WI monthly lunch

