7mm G&SWR Paisley Canal

One Step Forward
  • Intercity126

    Western Thunderer
    One step forward...
    Two steps back.

    This is a rule that seems to hold hard and fast for me, therefore (logically) the only way to progress is to go back....

    One thing I have been wanting to redo for some years is the scenic treatment of the layout. The original idea for setting the layout in autumn came to me during a trip to the UK for a family wedding. We took the train from Glasgow to Leeds with a short diversion to Cumbria. The autumn colours were spectacular and any further idea of spring greens were shelved.

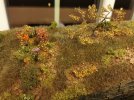
    The scenic treatment originally applied was unfortunately rushed in an effort to get the layout complete (enough) for the RMWeb 2010 challenge deadline but the desired effect was just about achieved when I took the layout outside in late 2010 for the Challenge Entry photos.

    IMG_4576.jpg

    I was never really happy with the final effect, though - the matted static grass applied with the "puffer bottle" being particularly unsatisfactory. I have recently been watching some videos on YouTube by Luke Towan that (although based on Australian scenery) give an excellent step by step guide to use of modern scenic materials.

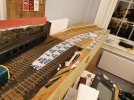
    It was clear however that to move forward, I needed to take the two steps back.... Yesterday I "bit the bullet" and moved the layout into the middle of the working area, stripped away as much as I could of the old static grass and painted the area in a dark brown, ready for further treatment.

    IMG_20200111_221609.jpg

    I also decided to tidy up the back side of the scenery with a coat of the same brown, down to the plywood baseboard sides. Masking tape for a nice edge.

    It all seemed to go OK and should be a good substrate for further scenic treatments, the worst bit being making the leap of faith and tearing down the existing work. There is no going back now....
    IMG_20200111_221515.jpg
     
    Last edited:
    You must bring us.....another shrubbery!
  • Intercity126

    Western Thunderer
    A bit of a delay since the last report, but I have been making some progress - backwards and (a little bit) forward.

    As a boy, I used to love doing scenic work on model railways. Progress could be so rapid when all you had to do was glue down acres of vividly dyed sawdust and top it off with some equally colourful rubberised lichen, but unfortunately the trend nowadays seems to be towards realism, hence my decision to strip off all the old scenic material and start again.

    As I mentioned in an earlier post I have been watching some videos on YouTube by Luke Towan to get an understanding of the use of modern scenic materials. I wanted to make some adjustments to the scenery and noted his use of a lightweight filler for the top layer. On further study the product he was using seemed to be a lightweight paper pulp and plaster mix. I duly decided to make my own and enthusiastically started ripping up newspapers and immersing them in a bucket of water. A few days and some further mashing later, I was rewarded with a bucket of finest papier mache. Yum, yum!
    IMG_20200116_191252.jpg
    The volume I had produced was quite a bit more than I was requiring, but I decided to press on. To act as a binder, I added some PVA glue to a couple of handfuls of the disgusting mix. It worked more or less as intended, but in retrospect the addition of a plaster or cement based material that would bind the moisture would have been better as the the stuff took an age to dry.

    IMG_20200125_104845.jpg
    I have started construction of a new fill-in section out of corrugated cardboard to bring the ground level up to the level of Causeyside Street and form the basis for the walling. Shown here is the papier mache being used to adjust the ground level up to the required level

    Luke recommends real dirt as a good base layer for subsequent treatment and I duly dug up a small container of finest garden dirt for drying, sifting and gluing down as my base layer. It took only a short inspection, however before I noticed that the container was teeming with life, and I completely bottled it - not because I'm afraid of a few creepy crawlies, but because Mrs Intercity126 caught me in the act and made enquiries....
    IMG_20200116_191027.jpg
    (Movement not shown)

    I wish I had persisted with the dirt method as I took a complete wrong turning here and decided to substitute wood ash from the fire. The texture was OK, but the colour was far too light.IMG_20200126_201139.jpg

    It took another couple of days of dying the ash with watered down poster paints before I was happy to move on and start applying the intermediate layers - I have gone for a combination of Faller "turf" for the areas that will later get static grass.

    Areas which are planned to be under deciduous bushes, trees and miscellaneous shrubbery have received a layer or two of minced beech leaves from the garden, with a scattering of Woodland Scenics and Faller foliage to represent undergrowth.
    IMG_20200202_182348.jpg

    IMG_20200202_185855.jpg

    It's starting to look a little bit more like I intended.

    I was certain that I had purchased static grass at the local model railway show, but in my ignorance I had purchased 2mm fibres... Fine for a bowling green. Several packets of longer static grass are currently in transit from the UK.

    In the meantime I cobbled together this fairly lethal looking static grass applicator from a high voltage generator, a tea strainer and gaffer tape. Tests with the 2mm fibres seems to indicate that it works, but I'm going to have to make something a just little bit more professional looking....IMG_20200202_185945.jpg
     
    Danger, danger.... High voltage!
  • Intercity126

    Western Thunderer
    Experimentation with the static grass generator were not proving to be as successful as I had hoped and I began to notice that the body of the 9V battery was attracting the grass fibres much more strongly than the tea strainer electrode. I also noticed that I was receiving a lot of unexpected shocks when connecting up the battery to my power leads....

    I began to suspect a wiring error: I could not find any connection diagram with for the generator I had purchased and had assumed that red and black were wired to the battery + and - (which was correct) and the two white wires were the high voltage leads. A bit of Googling later led me to believe that the two white wires were in fact both high voltage (+) and the black wire was a common negative to the high and low voltage sides. A little bit of re-connection later and my static grass fibres suddenly started getting very interested in the new toy.
    IMG_20200209_132110_1.jpg
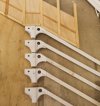
    I pressed on and gutted an ancient plastic torch to provide the body, switch, etc. The base trimmed from a yoghurt container and (lots of) hot melt glue separates the fibre holder and electrical sections. The trimmed down tea strainer fitted neatly in the space vacated by the torch glass and the probe from an old multimeter provides the electrode. The fibre capacity is a bit small (but so is my layout).

    The device does seem to be quite effective when fed with well loosened fibres. Ironically recovered fibres are better in this respect than fibres fresh from the manufacturer's packets. Excess fibres are recovered using a vacuum cleaner with a sock held over the nozzle, being careful to keep a very tight grip on the sock. The vacuum cleaner's initial excitement and subsequent sock-disappointment is palpable...

    I'm finished the first few passes on the rear of the layout. As I complete one area I rework the next-worst areas and a fairly random arrangement starting to emerge. Still a way to go, but I think its an improvement to the 1st version.
    IMG_20200209_211710.jpg

    Areas with leaves shall be covered by bushes, etc in the next step.
    IMG_20200209_211731.jpg
     
    New Year's Resolution - work on the train set
  • Intercity126

    Western Thunderer
    New Year's Resolution? More like two-years' resolution. I seem to have completely hopped over 2021.... Progress on the railway more or less ground to a complete halt during the first wave of COVID and the working from home that ensued. Model railways didn't really seem like a priority.

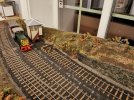
    I made occasional progress, but nothing of any great significance until the recent Christmas & New Year holidays when I managed to motivate myself to get down to the railway room and spend some days working on the scenery on the "new" board at the right hand side. The prototype station is enclosed by substantial retaining walls and I had attempted to replicate this on both sides, but the near side just wasn't working - It was just functioning as a substantial view blocker.
    IMG_20220104_195412.jpg

    I agonised for days about whether or not to follow prototype or "Rule 1", but in the end I decided to open this end up, and remove the wall and terrain cross section. The area looks a lot better for this change and I have been cracking on with building the platforms. I decided to make the nearside platform removable for now until the track is ballasted, etc, so some parcel tape provided a PVA-resistant temporary base whilst I glued cardboard together to make a surprisingly robust assembly
    IMG_20220103_222137.jpg

    IMG_20220114_213043.jpg

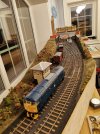
    I covered the side walls in some embossed Faller stone paper - it'll need toned down but was a quick win for texture and a base colour. I gauged the platform edge clearances with an Easybuild Mk1, but subsequent tests showed that I seem to have overfed my Deltic...

    It will be going on a strict diet when I get round to dismantling it to install the DCC sound chip.
    IMG_20220103_201154.jpg

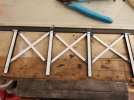
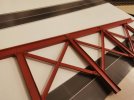
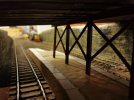
    Finally for this update, I added rivet detail and attachment brackets to the bridge supports - a quick squirt of automotive red oxide primer will have to suffice until I get round to recommissioning my airbrush
    IMG_20220116_142503.jpg
    IMG_20220116_164446.jpg
    IMG_20220116_193056.jpg
     
    You must bring us.....another shrubbery (continued)
  • Intercity126

    Western Thunderer
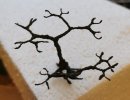
    Time to restart work on the skeletal trees I produced a couple of years ago - these have been waiting patiently on a pizza box lid, generally getting in the way and making the Railway Room look untidy for far too long. I first needed to produce a thick paint mixture to disguise the twisted wires. I mixed together fairly random quantities of white, black and sienna acrylic paint to give a nondescript grey/brown colour. A handy 15kg bag of cement left over from last summer's home improvements added bulk and texture to the mix. A generous glob of PVA white glue could conceivably provide resilience in case the completed trees get knocked. I slopped the mixture over the skeletons more in hope than expectation, but it seemed to work well enough.
    IMG_20220129_124742.jpg

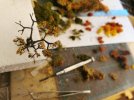
    After a little experimentation I found that small clumps of MiniNatur foliage glued to the tips og the branches gave a much better result than the huge clumps I had previously used as bushes.
    IMG_20220129_140738.jpg

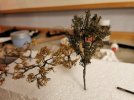
    I was quite pleased with the results, but it was not quick - An afternoon saw just 5 bushes completed.
    IMG_20220129_154701.jpg IMG_20220129_182235.jpg
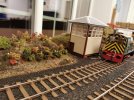
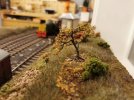
    Random planting of other shrubbery around the signal box area was carried out - I liked the effect when various species were competing for space. I likethe MiniNatur foliage, but the Woodland Scenics product seems a little bit vivid. You can probably guess which ones are which... IMG_20220129_182437.jpgIMG_20220129_182534.jpg

    I made the decision to set the season depicted on the layout as autumn during a train journey over the G&SWR main line many years ago. The autumn colours I saw during the trip were stunning and it seemed appropriate to reproduce what I had seen. Consequently I bought just about every scenic product labelled "autumn" at the next model railway show I attended, but the bright orange colours of the Woodland Scenics "Late and Early Fall" foliage is eyeball-searingly bright.... Might have to give these a blast with the airbrush at a later date. Can you weather plants?
    IMG_20220131_231920.jpg

    IMG_20220129_182400.jpg
     
    I'm only halfway... to Paradise...
  • Intercity126

    Western Thunderer
    After printing out and assembling the Robertsons jam factory I remained unconvinced. The positioning is too close to the lines and I'm now thinking along the lines of trying out some forced perspective low relief. Will need to mull this over for a while and a few more mock ups are in order before I decide on the final build for this area.

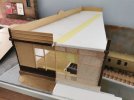
    There was no alternative but to get on with a job that I have very successfully put off for many years - namely that I had built only half of the station building. When I originally came up with the ridiculous idea of a double track mainline micro layout in O Gauge, the right hand board was built as a traverser and I had not planned to build the full depth of the station - this omission would be conveniently hidden behind a backscene.
    Layout progress 2022-3.jpg
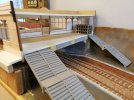
    The plan was to finally model the full width of the building (a mirror image basically) and the covered footsteps down to the platforms - these would be between the cutting walls. This unfortunately meant that most of the stairs would be boxed in by the cutting. After much trial and error I decided that "Rule 1" would have to take precedence - I would open up the cutting on the viewing side and build the footsteps with full timber walls and windows. Given the enormous liberties I have taken elsewhere, this seemed to be a minor transgression.

    Layout progress 2022-4.jpg
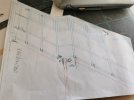
    Many years ago I made CAD drawings scaled from the best of the photos I could find on t'internet, but some additional photos subsequently came to light which provided better detail. Scribbled corrections pending a proper redraw.

    Layout progress 2022-5.jpg
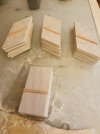
    Cutting out and assembling panels from scribed miniature plywood.

    Layout progress 2022-6.jpg
    Assembling panels on backing card.

    Layout progress 2022-7.jpg
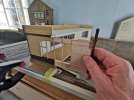
    Trial fit

    Layout progress 2022-8.jpg
    After rebuilding and patching.
    Layout progress 2022-11.jpg
    Trial fitting of the sides - I eventually cut back the ground at the right even more as it just got in the way and didn't add anything to the scene.

    Layout progress 2022-10.jpg
    Testing clearances. One of my new Tower Brass coaches making an appearance - a "Big Birthday" present.

    Layout progress 2022-17.jpg
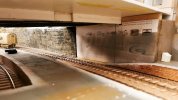
    Adjusting final heights under the bridge - Now that this is nearing completion I can think about continuing the stonework through to the new board. There have been many times during the build that I rued the fact that Causeyside Street is both skew and on a gradient - the angles are a nightmare - especially if you start at the wrong place.....

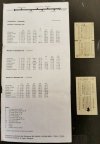
    Final photo for this update is some nostalgia - whilst looking through my archive material recently I came across a timetable and my ticket for the last timetabled train over the line - almost exactly 40 years ago. The line reopened as a single track branch: the BG in the previous photo being close to the location of the current platform.

    Layout progress 2022-1.jpg
     
    Stairway to Heaven...
  • Intercity126

    Western Thunderer
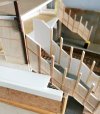
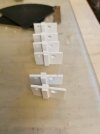
    With the side walls of the stairway complete, my attention turned to the supporting structure and the steps. As mentioned in my last update, some detail photos of the stairs had come to light and it would have seemed rude not to try to give these a red hot go. The side members seemed to be cast in two parts - an upper and a lower section bolted together and supported by cast columns under the landing. Plasticard was the material of choice on this occasion.
    Layout progress 2022-12.jpg
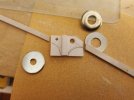
    Making a start on the centre section - I drilled asymetric holes sized by eye and, as usual, made one more than required with the intention to use the best ones.

    Layout progress 2022-13.jpg
    I raided my collection of washers to find some of suitable size to draw the curves which I hacked out using a selection of cutters, knives and files. (I've just remembered - this was my second attempt at making these brackets - the first 6 went in the bin at about this stage after an abortive attempt to cut these curves using a hole saw)

    Layout progress 2022-14.jpg
    Rough shaping complete and the side webs glued on - looking promising at this stage - I decided to press on.

    Layout progress 2022-15.jpg
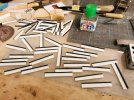
    I made the treads using black and white plastikard to give my tired old eyes a chance to gauge if they were being assembled consistently. Schoolboy trigonometry suggested that if i made these sub-assemblies consistent, and had calculated the heights correctly, things should fall into place on final assembly (which i did with the stairs upside down on a sheet of glass)

    Layout progress 2022-16.jpg
    Vast quantities of solvent were sloshed around and I had to assemble a restricted number of treads per day to allow the solvent to flash off enough to prevent the lot dissolving into a grey blob.

    Layout progress 2022-18.jpg
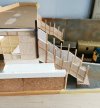
    Trial fitting - the Glasgow bound platform was clearly the more important and had 2 x 6' wide sections, I estimated the Greenock bound stair to be a single 8' wide section from photos. It's a bit wide in relation to my (under-width) platform, but I will just have to live with that.

    Layout progress 2022-19.jpg
    I finessed the shape an added flanges all around with plastikard strips, but forgot to take any photos before I sprayed the lot with primer. This shot also shows the supporting girder - I'll cover that in a later update.

    Very evident in this shot is that I don't have any interior as yet - I have no details or memory of the interior arrangement apart from the position of the two windows overlooking the tracks. I am a member of the G&SWR association so will try to find out something via them, but if no details are forthcoming, some sort of generic booking office will be produced.

    Layout progress 2022-20.jpg
    Couldn't resist bodging things together with masking tape and blu-tac to get an impression of how things were progressing.
     
    Ooops! I did it again
  • Intercity126

    Western Thunderer
    If I had been planning annual progress reports, this one would be right on time...

    I have got a little bit behind with posting. I've actually managed to make measurable progress on the layout, so much so that I'll probably split my photos over a few separate posts to try and keep these somewhat organised

    The first of these will deal with the girder to support the booking office that actually creeps into the last couple of photos from January 2023. I had been loaned a number of photos of the station, including a few that showed the construction of the girder in detail.
    Girder detail.png
    Rivets. Lots of rivets.

    The photos showed that the girders are fabricated from plate section riveted together. Maybe there is a commercial embossed rivet strip product that would be suitable, but on a Saturday evening in Norway, the chances of next day delivery of said product is about as close to zero as it is possible to imagine. I decided therefore to bodge a most amateurish form of "rivet press tool".
    IMG_20230121_215956.jpg
    Don't laugh....

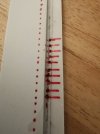
    A brief inspection of the photos should hopefully reveal the cunning secrets: A series of shallow dimples, as equally spaced as i could manage, were drilled in plastikard, half the strip width away from a guide piece. The idea being that these dimples would help to support the strip material when embossing the rivets with a sharp pointy tool. The timestamp on the photos shows that I made these in the middle of "Dry January 2023", although the apparently drunken, wobbly execution might suggest otherwise…
    IMG_20230121_220006.jpg

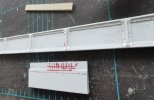
    The riveted strips were than glued in place on an otherwise unremarkable plastikard fabrication and tidied up with a file when everything had set hard. The red stains show where I over-enthusiastically punched the tool right through... I'll fudge the holes up with some thick 'rust' paint at some future date.
    IMG_20230122_112653.jpg


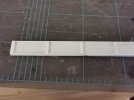
    I put some 60 'thou strip flat against the girder to land the steps against. IMG_20230122_133614.jpg

    Once I cleaned everything up and covered with a squirt of grey primer I built it into the structure, seen here with the staircases in place. The 3:2:1 blocks are being used to weight things down - don't be fooled into thinking any sort of engineering precision is involved here...
    IMG_20230122_141310.jpg
     
    Top