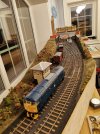
7mm G&SWR Paisley Canal

New Year's Resolution - work on the train set

Intercity126

Western Thunderer
New Year's Resolution? More like two-years' resolution. I seem to have completely hopped over 2021.... Progress on the railway more or less ground to a complete halt during the first wave of COVID and the working from home that ensued. Model railways didn't really seem like a priority.

I made occasional progress, but nothing of any great significance until the recent Christmas & New Year holidays when I managed to motivate myself to get down to the railway room and spend some days working on the scenery on the "new" board at the right hand side. The prototype station is enclosed by substantial retaining walls and I had attempted to replicate this on both sides, but the near side just wasn't working - It was just functioning as a substantial view blocker.
IMG_20220104_195412.jpg

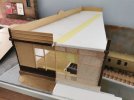
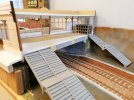
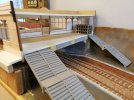
I agonised for days about whether or not to follow prototype or "Rule 1", but in the end I decided to open this end up, and remove the wall and terrain cross section. The area looks a lot better for this change and I have been cracking on with building the platforms. I decided to make the nearside platform removable for now until the track is ballasted, etc, so some parcel tape provided a PVA-resistant temporary base whilst I glued cardboard together to make a surprisingly robust assembly
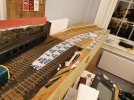
IMG_20220103_222137.jpg

IMG_20220114_213043.jpg

I covered the side walls in some embossed Faller stone paper - it'll need toned down but was a quick win for texture and a base colour. I gauged the platform edge clearances with an Easybuild Mk1, but subsequent tests showed that I seem to have overfed my Deltic...

It will be going on a strict diet when I get round to dismantling it to install the DCC sound chip.
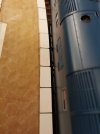
IMG_20220103_201154.jpg

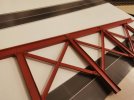
Finally for this update, I added rivet detail and attachment brackets to the bridge supports - a quick squirt of automotive red oxide primer will have to suffice until I get round to recommissioning my airbrush
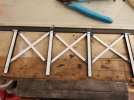
IMG_20220116_142503.jpg
IMG_20220116_164446.jpg
IMG_20220116_193056.jpg
 
You must bring us.....another shrubbery (continued)

Intercity126

Western Thunderer
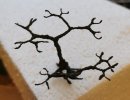
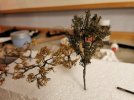
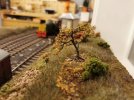
Time to restart work on the skeletal trees I produced a couple of years ago - these have been waiting patiently on a pizza box lid, generally getting in the way and making the Railway Room look untidy for far too long. I first needed to produce a thick paint mixture to disguise the twisted wires. I mixed together fairly random quantities of white, black and sienna acrylic paint to give a nondescript grey/brown colour. A handy 15kg bag of cement left over from last summer's home improvements added bulk and texture to the mix. A generous glob of PVA white glue could conceivably provide resilience in case the completed trees get knocked. I slopped the mixture over the skeletons more in hope than expectation, but it seemed to work well enough.
IMG_20220129_124742.jpg

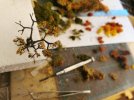
After a little experimentation I found that small clumps of MiniNatur foliage glued to the tips og the branches gave a much better result than the huge clumps I had previously used as bushes.
IMG_20220129_140738.jpg

I was quite pleased with the results, but it was not quick - An afternoon saw just 5 bushes completed.
IMG_20220129_154701.jpg IMG_20220129_182235.jpg
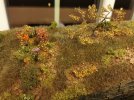
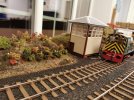
Random planting of other shrubbery around the signal box area was carried out - I liked the effect when various species were competing for space. I likethe MiniNatur foliage, but the Woodland Scenics product seems a little bit vivid. You can probably guess which ones are which... IMG_20220129_182437.jpgIMG_20220129_182534.jpg

I made the decision to set the season depicted on the layout as autumn during a train journey over the G&SWR main line many years ago. The autumn colours I saw during the trip were stunning and it seemed appropriate to reproduce what I had seen. Consequently I bought just about every scenic product labelled "autumn" at the next model railway show I attended, but the bright orange colours of the Woodland Scenics "Late and Early Fall" foliage is eyeball-searingly bright.... Might have to give these a blast with the airbrush at a later date. Can you weather plants?
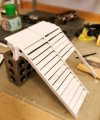
IMG_20220131_231920.jpg

IMG_20220129_182400.jpg
 

Intercity126

Western Thunderer
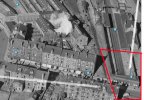
I have a thin triangle of real estate above the retaining wall on the right hand side that is begging for something to fill it. As can be seen in the aerophoto from post #18, there is a wide strip of land between the retaining wall and the nearest corner of James Robertson's (jam) factory. Attached marked-up aerial photo from Britain From Above used here under their terms and conditions shows the extent of the modelled area outlined in red: SAW046355 SCOTLAND (1952). James Robertson, Paisley, Renfrewshire, Scotland, 1952. An oblique aerial photograph taken facing West . | Britain From Above
Paisley Canal - Arial W3-Edit.jpg

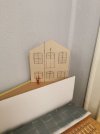
I wondered if perhaps some judicious compression and dimension mashing might allow the nearest gable end of the factory to be included. I tried at first making a mock up with all dimensions reduced to the minimum to allow the building to remain at the correct angle to the running lines, but this resulted in a building that was just too small to fill the space - more like a garden shed than an industrial building.
IMG_20220208_222226.jpg

My current plan is to place a larger representation of the gable end parallel with the top or the retaining wall. Scaling off of various maps and the aerophoto above, I came up with the attached representation. Once I work out if/how TurboCAD can print out at 1:43 I'll try it in place to find the most convincing placing.


Screenshot 2022-02-21 200808.png


Screenshot 2022-02-21 201109.png
 
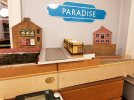
I'm only halfway... to Paradise...

Intercity126

Western Thunderer
After printing out and assembling the Robertsons jam factory I remained unconvinced. The positioning is too close to the lines and I'm now thinking along the lines of trying out some forced perspective low relief. Will need to mull this over for a while and a few more mock ups are in order before I decide on the final build for this area.

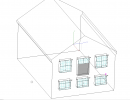
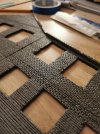
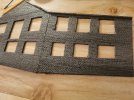
There was no alternative but to get on with a job that I have very successfully put off for many years - namely that I had built only half of the station building. When I originally came up with the ridiculous idea of a double track mainline micro layout in O Gauge, the right hand board was built as a traverser and I had not planned to build the full depth of the station - this omission would be conveniently hidden behind a backscene.
Layout progress 2022-3.jpg
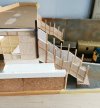
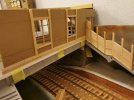
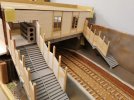
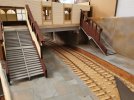
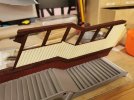
The plan was to finally model the full width of the building (a mirror image basically) and the covered footsteps down to the platforms - these would be between the cutting walls. This unfortunately meant that most of the stairs would be boxed in by the cutting. After much trial and error I decided that "Rule 1" would have to take precedence - I would open up the cutting on the viewing side and build the footsteps with full timber walls and windows. Given the enormous liberties I have taken elsewhere, this seemed to be a minor transgression.

Layout progress 2022-4.jpg
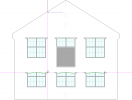
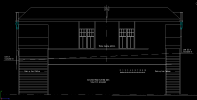
Many years ago I made CAD drawings scaled from the best of the photos I could find on t'internet, but some additional photos subsequently came to light which provided better detail. Scribbled corrections pending a proper redraw.

Layout progress 2022-5.jpg
Cutting out and assembling panels from scribed miniature plywood.

Layout progress 2022-6.jpg
Assembling panels on backing card.

Layout progress 2022-7.jpg
Trial fit

Layout progress 2022-8.jpg
After rebuilding and patching.
Layout progress 2022-11.jpg
Trial fitting of the sides - I eventually cut back the ground at the right even more as it just got in the way and didn't add anything to the scene.

Layout progress 2022-10.jpg
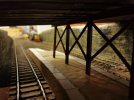
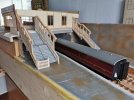
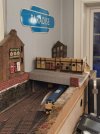
Testing clearances. One of my new Tower Brass coaches making an appearance - a "Big Birthday" present.

Layout progress 2022-17.jpg
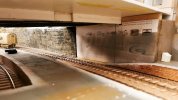
Adjusting final heights under the bridge - Now that this is nearing completion I can think about continuing the stonework through to the new board. There have been many times during the build that I rued the fact that Causeyside Street is both skew and on a gradient - the angles are a nightmare - especially if you start at the wrong place.....

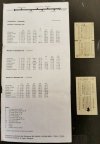
Final photo for this update is some nostalgia - whilst looking through my archive material recently I came across a timetable and my ticket for the last timetabled train over the line - almost exactly 40 years ago. The line reopened as a single track branch: the BG in the previous photo being close to the location of the current platform.

Layout progress 2022-1.jpg
 
Stairway to Heaven...

Intercity126

Western Thunderer
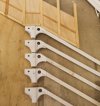
With the side walls of the stairway complete, my attention turned to the supporting structure and the steps. As mentioned in my last update, some detail photos of the stairs had come to light and it would have seemed rude not to try to give these a red hot go. The side members seemed to be cast in two parts - an upper and a lower section bolted together and supported by cast columns under the landing. Plasticard was the material of choice on this occasion.
Layout progress 2022-12.jpg
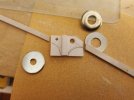
Making a start on the centre section - I drilled asymetric holes sized by eye and, as usual, made one more than required with the intention to use the best ones.

Layout progress 2022-13.jpg
I raided my collection of washers to find some of suitable size to draw the curves which I hacked out using a selection of cutters, knives and files. (I've just remembered - this was my second attempt at making these brackets - the first 6 went in the bin at about this stage after an abortive attempt to cut these curves using a hole saw)

Layout progress 2022-14.jpg
Rough shaping complete and the side webs glued on - looking promising at this stage - I decided to press on.

Layout progress 2022-15.jpg
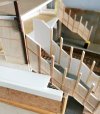
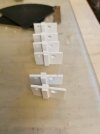
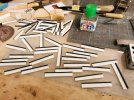
I made the treads using black and white plastikard to give my tired old eyes a chance to gauge if they were being assembled consistently. Schoolboy trigonometry suggested that if i made these sub-assemblies consistent, and had calculated the heights correctly, things should fall into place on final assembly (which i did with the stairs upside down on a sheet of glass)

Layout progress 2022-16.jpg
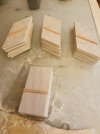
Vast quantities of solvent were sloshed around and I had to assemble a restricted number of treads per day to allow the solvent to flash off enough to prevent the lot dissolving into a grey blob.
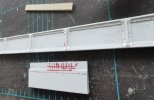
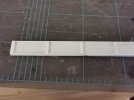
Layout progress 2022-18.jpg
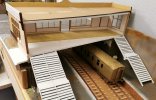
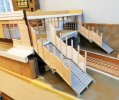
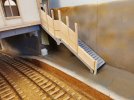
Trial fitting - the Glasgow bound platform was clearly the more important and had 2 x 6' wide sections, I estimated the Greenock bound stair to be a single 8' wide section from photos. It's a bit wide in relation to my (under-width) platform, but I will just have to live with that.

Layout progress 2022-19.jpg
I finessed the shape an added flanges all around with plastikard strips, but forgot to take any photos before I sprayed the lot with primer. This shot also shows the supporting girder - I'll cover that in a later update.

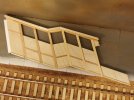
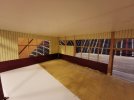
Very evident in this shot is that I don't have any interior as yet - I have no details or memory of the interior arrangement apart from the position of the two windows overlooking the tracks. I am a member of the G&SWR association so will try to find out something via them, but if no details are forthcoming, some sort of generic booking office will be produced.

Layout progress 2022-20.jpg
Couldn't resist bodging things together with masking tape and blu-tac to get an impression of how things were progressing.
 

David Waite

Western Thunderer
Hi Iintrcity126
You have a very nice shape to your track plan, the flowers you have next to the signal box look lovely I would very much like them for my garden.
I don't know if this helps, but regarding your brackets that you drew with the washers, I find when trying to file curves with round files sometimes its not easy to get a true radius but if you collect a selection of round dowel about 150 mm long of different diameters and stick some sand paper around them with PVA they give you a perfect radius the first time with little effort.
David.
 

Intercity126

Western Thunderer
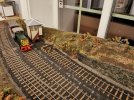
Hi David - glad you like the layout. The S curve of the track does give some nice views of the trains as you get to see all four sides of a loco as it traverses the layout - Front/left at the signal box, then front/right over the trailing crossover and finally rear/right as it passes the main viewing position at the control panel.

The acoustics are also changing as the locos drift past - becoming muffled as they pass under the bridge. It's more by accident than design, but it definitely adds something to the experience.
 
Ooops! I did it again

Intercity126

Western Thunderer
If I had been planning annual progress reports, this one would be right on time...

I have got a little bit behind with posting. I've actually managed to make measurable progress on the layout, so much so that I'll probably split my photos over a few separate posts to try and keep these somewhat organised

The first of these will deal with the girder to support the booking office that actually creeps into the last couple of photos from January 2023. I had been loaned a number of photos of the station, including a few that showed the construction of the girder in detail.
Girder detail.png
Rivets. Lots of rivets.

The photos showed that the girders are fabricated from plate section riveted together. Maybe there is a commercial embossed rivet strip product that would be suitable, but on a Saturday evening in Norway, the chances of next day delivery of said product is about as close to zero as it is possible to imagine. I decided therefore to bodge a most amateurish form of "rivet press tool".
IMG_20230121_215956.jpg
Don't laugh....

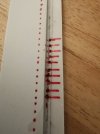
A brief inspection of the photos should hopefully reveal the cunning secrets: A series of shallow dimples, as equally spaced as i could manage, were drilled in plastikard, half the strip width away from a guide piece. The idea being that these dimples would help to support the strip material when embossing the rivets with a sharp pointy tool. The timestamp on the photos shows that I made these in the middle of "Dry January 2023", although the apparently drunken, wobbly execution might suggest otherwise…
IMG_20230121_220006.jpg

The riveted strips were than glued in place on an otherwise unremarkable plastikard fabrication and tidied up with a file when everything had set hard. The red stains show where I over-enthusiastically punched the tool right through... I'll fudge the holes up with some thick 'rust' paint at some future date.
IMG_20230122_112653.jpg


I put some 60 'thou strip flat against the girder to land the steps against. IMG_20230122_133614.jpg

Once I cleaned everything up and covered with a squirt of grey primer I built it into the structure, seen here with the staircases in place. The 3:2:1 blocks are being used to weight things down - don't be fooled into thinking any sort of engineering precision is involved here...
IMG_20230122_141310.jpg
 

Intercity126

Western Thunderer
Enthused by my progress I pressed on with the rear wall of the booking office.
Platform elevation.png


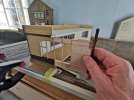
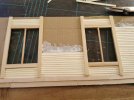
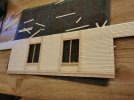
I had made some 7mm scale drawings for this many years ago, so it was a relatively simple task to hack some holes out of a sheet of card and build the details up with coffee stirrer framing and manila card overlapped 'planking'. I'll build up the window washing platform later.
IMG_20230123_184613.jpg

IMG_20230124_200158.jpg

IMG_20230124_213056.jpg

IMG_20230124_225951.jpgThe biggest problem here will be during the final fitting, but that's a problem for the future. It's held in place with masking tape until such time as I am ready to commit - but this will have to be after I am finished with the interior*.


*As I was getting the photos for this post together I remembered that I have a little stock of neodymium magnets that might provide a solution to this issue.
IMG_20230125_210904.jpg
Finally having the rear wall on this structure makes a big difference to the look of the layout from this end.

Looking at these now old photos, I see that I must have completed the half height panels at the foot of the stairs around about this time. I was probably waiting for the ground levels to be finalised before I cut these to size. I find these exposed stairs a bit strange on the prototype and have often wondered if this part of the platform was originally intended to be covered by the main platform canopies? I can't find any evidence showing this though.
IMG_20230206_200139.jpg


IMG_20230129_133559.jpg

You can see here I have also made the gate that closes off the left hand stair.
IMG_20230325_122226.jpg

February saw my annual "Winter Woollies Work Week" to Bo'ness to work on the Class 126 DMU, and visit Model Rail Scotland at the SECC for some shopping. As I plan to use the bay platform for parcels, an Ellis Clark Thompson BG seems fully justified and joined my collection. A lovely model.
 
Last edited:

Intercity126

Western Thunderer
Summertime saw builders move into the house to rebuild the bathroom. I included reconnecting of an existing radiator in the railway room to the main heating water supply as part of the plumbing scope of work. This will hopefully ensure a more comfortable temperature in the room during the long Norwegian winters, but I had to cover up the layout with polythene during the execution of the work.
IMG_20231125_134331.jpg

Of course the work took much longer than anticipated and my railway room didn't seem to be the highest priority job for the plumber, so I was left without my Railway Room for much of the latter half of the year, however while this work was going on I managed to progress a little side project.

I posted some pictures of the Robertson's factory in a previous post and two mockups had been made. This was a bit of a "Goldilocks and the Three Bears" story - the first one was too small, the second one was too large, so logically the third attempt should be just right, however I decided to go off at a tangent and experiment with something a little bit risky.
IMG_20220918_121024.jpg

I've been very impressed by the results that the military modelers on YouTube are getting by using scribed building foam. I had some leftover foam parquet flooring underlay from a project the previous year and decided to give this technique a go, but with a twist.

I've also being very impressed by some of the forced perspective work that Michael Scott has been doing on his fabulous N-gauge layout "Chandwell" on YouTube. The distant tower block in this video particularly impressed.

I wondered if the principles could work for the Robertson's factory. I decided as an experiment to try to make this building using a combination of forced perspective and scribed texture.

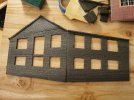
I estimated a suitable position for the two vanishing points using a photo as reference, about which I pivoted a long ruler to score the horizontal brick courses. The vertical lines I fudged in by eye. You can tell here that it's all very hit and miss, I have no particular advice beyond "give it a go" if you think a similar technique might work for you.IMG_20231029_224518.jpg

IMG_20231105_221207.jpg

IMG_20231109_222753.jpgI toyed with the idea of using the warp functions in Photoshop Elements to print out a perspective version of my previous mock-up, but this was taking me far outside my normal Photoshop comfort zone and in the end I went for the scribed foam.

A little bit of painting later and this is how it looks. I'm thinking that this might work out ok. I didn't spend too much time on it at this stage as it is primarily still an experiment so I haven't bothered yet with windows or the clerestory roof.

IMG_20231202_161829_1.jpg

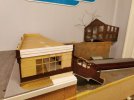
IMG_20231212_202355.jpgI put the building on the layout and played about with the positioning and angles. It looked pretty weird at first in comparison to the conventionally modelled station building, but I decided to let it settle in before I made a final decision. Now that the shock is beginning to wear off, I'm thinking it might just work out OK if I put some trees and bushes in the foreground and build up the level of the scenery. In some ways it works better than the conventionally modelled elements, I'm thinking primarily here about the transition of the Causeyside Street bridge to the backscene, of which more in the next post....
 

Intercity126

Western Thunderer
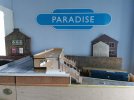
As I mentioned in a previous post, the station building was originally modelled in half relief, with a traverser in the place where the station platforms now are. With the added elements approaching some sort of completion, it was time to bring everything together and start painting to unify the look of the whole building.

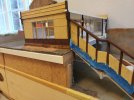
Contemporary photos show that the wall panels on the stairs down to the platforms were painted brown, as was the rear wall of the booking office. After a trial I decided I would be best to just use this scheme on the platform side walls and paint the exterior wall in the same LMS building cream and brown colour scheme that the station frontage was in.
IMG_20240121_211716.jpg

IMG_20240113_110431.jpg

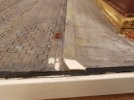
I am not happy with the station platforms. I had intended these to be to replicate concrete panels, but the base colour I had chosen was not good at all - not surprising as it was just something left over from another job. I decided to paint these individually in the hope of giving variation, and add some cracks in the concrete using a sharp pencil. It's still far from ready, but it's going in the right direction. I will need to unify everything under a few more coats of weathering and maybe some colour filters. The previous layers need to harden fully before I put any more paint on, though. I left out a few panels of concrete and have filled them with texture which will be painted to look like a tarred surface. The painting effects on the platform are still a long way from being complete, but I am encouraged that this looking better than it did a couple of months ago. I can probably achieve the effect I'm looking for (eventually).

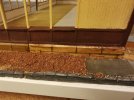
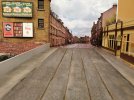
I also applied some grey and brown washes to the street scene and the cobblestones are beginning to look a little bit better. I also rounded the kerb on the corner of the street going down past the side of the station building. It's a small change, but this has been irking me for years.
IMG_20231231_174032.jpg
The patch of wasteland outside the station building was extended. Whether this eventually ends up as waste ground or carefully tended flower bed is to be decided. Probably the ubiquitous Buddleia might be an acceptable compromise as this plant seems particularly fond of railway terrain. I also added another "concrete" patch at the end for a telephone kiosk to help give a visual break between the street scene and the station platform. I also scraped in the outline of the building foundation stones. Some further experimentation with paint and weathering required.
IMG_20231231_174042.jpg

I used printed paper for the timber panel inside the building. I actually made this as Microsoft "Excel" spreadsheet to get the panel lines and filled with light cream for the upper panels and dark brown for the lower ones. The colour was just judged by eye on the computer and printed out on an A3 laser printer. I cut out and wallpapered sections onto the inside faces of the appropriate panels and I'm thinking that they look OK. I'm going to matt varnish them to unify the printed/painted sections. I'll print out some period signs, timetables, posters, etc to help add character and establish the time period.
IMG_20240121_191129.jpg


IMG_20240120_190029.jpg

For the backscene I took some screenshots from Google street view of the real Causeyside Street and then used Photoshop to edit out any cars, signage, etc that give away the period. I decided against using the photographic image directly and instead used an effect in Photoshop to provide a "painterly" effect. I'll spend some more time on this, maybe add some blue haze towards the end of the street. I will also need to further adjust the size and perhaps the aspect ratio slightly so that it blends and as well as possible with the street scene.
IMG_20240121_211053.jpg
The right hand side tenement end and will be covered by a textured flat at some point. This will hopefully make a smoother transition between the various elements.

And that is more or less up to date for the first time in a couple of years.
 

Lyndhurstman

Western Thunderer
That’s some lovely work, and realisation. The rivet solution is neat, and I like your approach to perspective. And well done for getting stuff done around the challenges of reworked accommodation!

Cheers

Jan
 

Intercity126

Western Thunderer
The end tenement building to the left of Causeyside St. was sadly lacking in detail - This was originally constructed as a "space filler" for the layout's only public exhibition until I made something better, but eventually this just got absorbed into the layout... I needed to add detail to the back side of the building to try to make up for the inadequacies of the "temporary" building.

I well remember reading a "Top Tip" in a late 1970's Railway Modeller magazine to use broken umbrella spokes to simulate gutters. That brilliant idea has been rolling, unfulfilled, in my head for about 45 years - you can imagine my joy when I found my wife's broken umbrella in the bin recently... The chance to fulfil the dream of a lifetime!

After rinsing off some fragments of potato peelings, I scuttled off to secrete my new found hoard of "gutters" in a secure location...

Reality strikes...
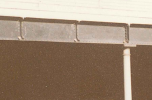
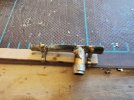
It turns out that actually the umbrella spoke shape was not a very good representation of a gutter, so I had to adjust the profile of the spokes with some solid brass rod former and some enthusiastic bashing with a hammer. I then soldered on various end caps, down tubes, brackets and all sorts of things that probably have names I'm not familiar with. Umbrella spokes are also not particularly keen to be soldered to, so be sure to tin first. I lost count of how many attempts it took to get the brackets to play nicely with the barge boards. When things were nearing completion, I drilled a hole to suggest that the West Coast rain might actually reach the gutter/sea, via the downspouts.
IMG_20240331_184346.jpg

The photo shows the (near) completed article before painting. I did some tidying up of the comedy soldering before giving up for the day. I could probably have ordered some 3D printed items with greater fidelity, and (given my glacial work speed) faster delivery. No matter, a pleasant Sunday afternoon modelling, and some minor progress on the layout. Styrene downspouts next.
 
Top