Peter Insole
Western Thunderer
The brief outage notwithstanding, I'm afraid I have been doing more worrying brass and solder rather than writing again!
A little bit late in the day, I have collected a fair few photographs of progress to share now:
The straight connector and one of the nuts previously mentioned would prove to be almost perfect for the task...
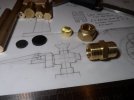
A couple of small, rubber discs from some pipe end stops will hopefully provide material for the valve seals later too?!
I have shifted from the original design slightly, in that the thread for the lever cap is on the exterior of the barrel, instead of being on a narrowed section. Using the existing nut and leaving a remnant of the matching thread seemed to be a slightly easier option, as well as providing a bit more clear access for later operations?
While I was still considering the best way to proceed, a start was made on the cap itself by filing down the nut and chopping a bit more off a remaining stub of another old donor 10mm coupler:
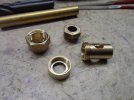
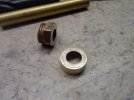
I have left the inner ring section rough cut for the time being, as I want to solder that, whatever I can find for a hollow centre fitting, and the operating lever clevis in a single, messy operation!
The symmetrical coupler barrel has a reduced diameter pipe stop section in the centre, beneath the former hex, which I felt could be handy for pressing a separating barrier plug into - but that turned out to be a bit of a fiddle:
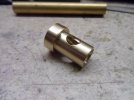
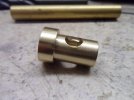
It did make drilling the apertures for the two vertical tube connections rather a nether clenching exercise... but I got away without any serious mishaps, or missing bodily bits!!
Making a really tight, press fitting plug to fit a hole with an unspecified, and difficult to accurately measure internal diameter required an amount of trial and error... plus a fair wind blowing in the end.
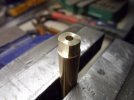
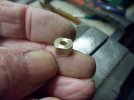
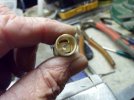
It might not look like it in the last image above, but the plug was sufficiently snug to require a bit of gentle "persuasion" before it settled in the correct position.
I wanted this essential barrier section to hold firmly in place during subsequent soldering up of the two, vertical branches and the front end fitting to come later.
Not only was working out the appropriate order of shaping down, drilling, tapping and cutting the branches tricky and troubling enough...

but on the lower, feed section, I was down to my very last bit of brass hex of the right size in the box...!
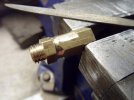
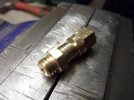
Wow! There really was just enough length to spin the shaft to shape when the piece was held in the chuck jaws - so not a millimetre to spare for any errors there!
I will admit that I am somewhat reluctant to order any more brass sections, particularly bearing in mind that I am now so close to completing all the plumbing jobs, that it would a shame to end up with any new lengths of odd size materials. for the sake of a single part!
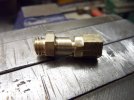
By the way, the vee shaped cuts filed in before separating the pieces from the stock bar are necessary to fit with the sections left open above and below the centre plug - and having those angles inside the barrel would also provide a flat surface to commence drilling the connecting airways.
I felt it was preferable to drill those airways after soldering up, rather than finding that the angle might be slightly too steep, and then having difficulty trying to clear the tiny holes again of any runaway solder?!
There are more pics and words to bring this bit up to date, but I will save them for later!
Pete.
A little bit late in the day, I have collected a fair few photographs of progress to share now:
The straight connector and one of the nuts previously mentioned would prove to be almost perfect for the task...

A couple of small, rubber discs from some pipe end stops will hopefully provide material for the valve seals later too?!
I have shifted from the original design slightly, in that the thread for the lever cap is on the exterior of the barrel, instead of being on a narrowed section. Using the existing nut and leaving a remnant of the matching thread seemed to be a slightly easier option, as well as providing a bit more clear access for later operations?
While I was still considering the best way to proceed, a start was made on the cap itself by filing down the nut and chopping a bit more off a remaining stub of another old donor 10mm coupler:


I have left the inner ring section rough cut for the time being, as I want to solder that, whatever I can find for a hollow centre fitting, and the operating lever clevis in a single, messy operation!
The symmetrical coupler barrel has a reduced diameter pipe stop section in the centre, beneath the former hex, which I felt could be handy for pressing a separating barrier plug into - but that turned out to be a bit of a fiddle:


It did make drilling the apertures for the two vertical tube connections rather a nether clenching exercise... but I got away without any serious mishaps, or missing bodily bits!!
Making a really tight, press fitting plug to fit a hole with an unspecified, and difficult to accurately measure internal diameter required an amount of trial and error... plus a fair wind blowing in the end.


It might not look like it in the last image above, but the plug was sufficiently snug to require a bit of gentle "persuasion" before it settled in the correct position.
I wanted this essential barrier section to hold firmly in place during subsequent soldering up of the two, vertical branches and the front end fitting to come later.
Not only was working out the appropriate order of shaping down, drilling, tapping and cutting the branches tricky and troubling enough...

but on the lower, feed section, I was down to my very last bit of brass hex of the right size in the box...!


Wow! There really was just enough length to spin the shaft to shape when the piece was held in the chuck jaws - so not a millimetre to spare for any errors there!
I will admit that I am somewhat reluctant to order any more brass sections, particularly bearing in mind that I am now so close to completing all the plumbing jobs, that it would a shame to end up with any new lengths of odd size materials. for the sake of a single part!

By the way, the vee shaped cuts filed in before separating the pieces from the stock bar are necessary to fit with the sections left open above and below the centre plug - and having those angles inside the barrel would also provide a flat surface to commence drilling the connecting airways.
I felt it was preferable to drill those airways after soldering up, rather than finding that the angle might be slightly too steep, and then having difficulty trying to clear the tiny holes again of any runaway solder?!
There are more pics and words to bring this bit up to date, but I will save them for later!
Pete.
Last edited:


 .
.