Dave's 4mm scale Industrial Loco Workshop.

Dave

Western Thunderer
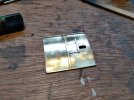
The last of the sheet brass work has been completed.
20240605_134544.jpg
The hole in the roof is for the safety valves, which were on top of the firebox on the majority of Mannings.

I still need to make another injector and the chassis still needs pickups but after those little jobs it's all down to paint and final assembly.

I have ordered some rivet transfers and will practice before applying them to the loco. I also want to see if they will remain in place if masking tape is used over them as I want to mask various panels of cab and tank for the two-tone colours. I briefly considered enquiring with one of the professional painters about lining it as in the ex-works livery, shown in my first post, but I think they'll be way above my league.
 

Daddyman

Western Thunderer
I have ordered some rivet transfers and will practice before applying them to the loco. I also want to see if they will remain in place if masking tape is used over them
I would do: primer, gloss varnish on areas to take rivets; then rivet transfers, varnish, leave a week, top coat.
 

Dave

Western Thunderer
It's almost finished now. It needs a final spray of matt varnish, details such as oil cans and fire irons to be added, coal in the bunker, weathering and the fitting of DCC gear.

In my 4mm world 1814 wasn't scrapped in 1962. It was sold to the NCB, who had it refurbished at Hudswell Clarke's works in Leeds. It is seen here about to undergo a steam test in the yard at Jack Lane.
DSCF1039.JPG
There we have it, in cruel close up. Weathering will hide the worst of the bad bits. The finished weight is 321g, which should be good to pull 90 wagons. Not that I can fit a 90 wagon train on my layout. More pictures to follow once it is weathered and in use on the layout.

I have already started to make drawings for the next build.
 

Dave

Western Thunderer
Bad bits? What bad bits? She is a stunner!

Looking forward to the next one
The next one is also to be a Manning Wardle. I really like the style of their engines and, like this one, the next isn't something I've seen modelled before.

If you like this one you may like a few past glories, also scratchbuilt in brass.

1871 vintage Robert Stephenson 4-4-0 box tank.
stephenson440n5.jpg

stephenson440n7.jpg

1892 vintage W.G. Bagnall 0-4-0 wing tank.
Operating-the-CVMR-011.jpg

1918 vintage Manning Wardle Class H.
MWparts-024.jpg

1897 vintage Manning Wardle Class H.
Chaldrons-013.jpg

Hercules. James Cross & Co. of St. Helens, 1862. I started building this with the expectation that no one would have made a model of such an obscure engine, only to discover that Iain Rice had built one about 30 years before!
HerculesFramenRP.jpg

LotL-062.jpg
This is powered by an N20 gearmotor, weighs 323g and has pulled 90 mineral wagons on a test. I don't know just how much it can pull because the test was done on a layout at an exhibition. We kept hanging wagons on until the layout ran out of wagons. It did start to slip on starting the train by then, so was getting very near the limit.
 

Herb Garden

Western Thunderer
If you like this one you may like a few past glories, also scratchbuilt in brass.
Oh I do like them very much indeed, the Victorian ones especially! Fantastic workmanship. There is something so pleasing about a scratch build because even in the unlikely event that someone else is mad enough to also build a model of that obscure prototype they will never build it in the same way.

My one and only humble contribution to the scratch building world is this 1870 rebuild of an 1846 sharps single

IMG_20240614_213750262_HDR.jpg
 

Dave

Western Thunderer
My one and only humble contribution to the scratch building world is this 1870 rebuild of an 1846 sharps single

IMG_20240614_213750262_HDR.jpg
Oh, that's lovely!

I built a model of I.W. Boulton's rebuilt Sharpie 2-2-2ST , No.11, using my own chassis and a combination of scratch built parts and cast whitemetal from a 5&9 Models kit.
11-007.jpg
It can barely pull itself along even though all the weight is taken on the leading and driving axles. I intended to revise the chassis but I doubt I ever will now, so it's nothing more than an ornament.
 

Herb Garden

Western Thunderer
Oh, that's lovely!

I built a model of I.W. Boulton's rebuilt Sharpie 2-2-2ST , No.11, using my own chassis and a combination of scratch built parts and cast whitemetal from a 5&9 Models kit.
View attachment 217703
It can barely pull itself along even though all the weight is taken on the leading and driving axles. I intended to revise the chassis but I doubt I ever will now, so it's nothing more than an ornament.
Oh the joys of Bolton's sidings.... Some real wacky prototypes.

2-2-2 tank locos are really difficult to balance . I relied heavily on the tender on my Sharpie to help Ballance all the weight onto the driving wheels but you don't have the advantage here. I assume the motor is connected to the driving wheels? I've no idea how the chassis is designed but could a bit of slop fire and aft be created with some springing to give better traction on the driving wheel? Forgive me if I'm talking nonsense.

As an ornament is a very lovely one
 

Dave

Western Thunderer
Oh the joys of Bolton's sidings.... Some real wacky prototypes.

2-2-2 tank locos are really difficult to balance . I relied heavily on the tender on my Sharpie to help Ballance all the weight onto the driving wheels but you don't have the advantage here. I assume the motor is connected to the driving wheels? I've no idea how the chassis is designed but could a bit of slop fire and aft be created with some springing to give better traction on the driving wheel? Forgive me if I'm talking nonsense.

As an ornament is a very lovely one
The motor is almost vertical inside the boiler and tank and drives the drivers. The front wheelset rides on a pivot to give 3-point compensation. The rear wheelset just goes along for the ride and doesn't bear any weight. I went over to DCC control not long after building it and as there is absolutely nowhere to fit a decoder, let alone a Stay Alive, it couldn't be used even if it was able to pull a useful load. I like to put a SA in every engine that I run these days.
 

Herb Garden

Western Thunderer
The motor is almost vertical inside the boiler and tank and drives the drivers. The front wheelset rides on a pivot to give 3-point compensation. The rear wheelset just goes along for the ride and doesn't bear any weight. I went over to DCC control not long after building it and as there is absolutely nowhere to fit a decoder, let alone a Stay Alive, it couldn't be used even if it was able to pull a useful load. I like to put a SA in every engine that I run these days.
Yeah I agree with you there a stay alive just takes away all of the bumps and stutters, ironic that the locos that need them most are the hardest to fit them in.... I feel your pain there!
 

Dave

Western Thunderer
I'll call this one finished. I fitted the DCC sound gear, yesterday (Zimo MS500, Youchoos Limo 6 speaker and Lais Stay Alive) and gave it a quick test run, which went well. Today I added the detailing and did the weathering and have been running it on Blacker Lane. I haven't gone overboard with the weathering, I wanted it to look hard-worked but cared for, not a wreck.

I am really happy with how smoothly it runs and how it now looks.
DSCF1061.JPG

DSCF1057.JPG

DSCF1054.JPG
I had forgotten just how satisfying scratchbuilding an engine is. I'm going to run this for a while and then make a start on the next one.
 

Daddyman

Western Thunderer
They did but what a faff! The next build will have either a welded or flush-riveted tank.
Yes! I apply D-limonene over the top of them - it doesn't help much, but maybe a little bit. I also apply them with watered-down PVA rather than plain water in the first place.
 

Dave

Western Thunderer
The next one to be built is another Manning Wardle. For an 0-4-0 this is big. The frame length is the same as the previous build.
Cyclops.jpg
Cyclops was a 16x24" engine, W/n 1802, built in 1912 for Vickers at Barrow in Furness. In 1919 it was exported to Australia, where it continued to work in the steel industry until 1967 when it was presented to the Lithgow District Historical Society and displayed stuffed and mounted at Eskbank House Museum.

Three more of the same design, but with detail differences, were built. Jupiter, W/n 1880 of 1915, was also built for Vickers, 1888, also of 1915, was built for the Ministry of Munitions and the final one was 1967 of 1918, which was for the South Durham Steel & Iron Co. Ltd. for their West Hartlepool works.

1965_PORT_KEMBLA_(3570060666)sml.jpg
Cyclops after export and renaming, seen at Port Kembla in 1965. (Photo from Wikipedia. Copying and distribution is permitted).
 

Dave

Western Thunderer
I have changed the title of the thread to reflect that it isn't just the one build.

The frame for Cyclops is progressing rapidly. I have used 1.5mm thick brass, which gives a lot of weight and strength. This frame isn't going to flex r warp!
20240618_185442.jpg
The power unit is an N20 gearmotor. It's a tight fit and I had to make a carrier for the nylon crownwheel as after cutting off the boss to get it to fit it could barely grip the axle. I used Loctite to fix the crownwheel to the carrier but as nylon doesn't take well to being glued there are a pair of 1mm dia. brass pins that pass through the wheel and into the carrier to transmit the torque.
20240618_185453.jpg
It would have been easier to use a High Level gearbox but I would have had to buy one and a motor. The N20 I already had in stock and it cost only £5.50. I scrounged the brass for the best Yorkshire price, so £5.50 is all the project stands me at so far.
 

michael mott

Western Thunderer
Nice I like the simplicity of the design of the frame even so the recessed crown wheel is a clever solution.
Michael
 
Top