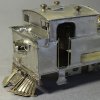
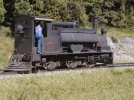
7mm Connoisseur Models LNER N10 Tank Engine

Rob Pulham

Western Thunderer
It was at this point that I permanently fitted the boiler in place. Tom Burham had kindly shared some photos of how the brass transition cover was retained by cladding band clamps so I endeavoured to add those. I managed it but I confess that the front one that is fitted to the transition ring is barely visible when you turn it upside down let alone from normal viewing angles.

55388065827_c277642a43_h.jpg

55388999636_4819437ba8_c.jpg

55389184539_d56e442f41_c.jpg

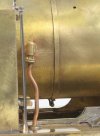
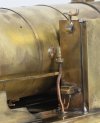
I also fitted the clack valves. I had to make a small top hat type bush to sleeve the pipe as it passes through the foot plate
55388066087_cca9c85aaf_h.jpg

55388999526_468d4259b9_h.jpg

55389400975_b499ce0991_h.jpg

You will also note that I have fitted the filler cap locking screws that I had beefed up in the last post.
 

Rob Pulham

Western Thunderer
I finally got all the cab furniture fitted. I made the individual pieces up last year while out at shows, but I’ve only just got around to fixing them in place.

55389184419_db91163d55_h.jpg

55389132718_5f4a0b5ffa_h.jpg

55389132693_9a2fbab296_h.jpg

55388065912_6a2fd71faa_h.jpg

If you are wondering what the little round bung is on the splasher/locker in the last photo. There was an etched hole presumably so that the reverser could be fitted at that side or it was just a mirror of the splasher on the other side so the hole came with it. Either way, I just turned up a small bung to fill the hole.
 
Last edited:

Arun Sharma

Western Thunderer
I think both versions of the painted slide bars look equally good. Do bear in mind that the outside surfaces of inside slide bars were often painted the same colour as the inside of the frames - mainly red?
Dave.
There was some correspondence a while ago suggesting that the reason the frames on German locos [and the inside of frames and moving parts on UK locos] were painted red was that any cracks would be outlined/filled in with black oil so would be more readily spotted when oiling around by the crew.
 

Rob Pulham

Western Thunderer
The next part on my hit list was the coal rails. Unusually for one of Jim’s kits I had a bit of a fiddle to get it to sit correct and ended up filing the curve to get it to sit better against the rear of the cab.

After looking at the drawing to see how the rails were mounted on the full sized loco, I made up some mounting strips cut from some 10 thou nickel sheet.

55391688713_0f81324a7e_h.jpg

55391951600_c3fc56111c_h.jpg

55390621467_3eb3290688_h.jpg

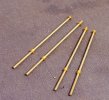
Then it was the turn of the cab handrails. These are, like on many locos of the period, tapered from the bottom up. I made them by putting some short lengths of 1mm nickel rod into my Dremel laying it flat on the cutting mat and running a diamond file upon it to create a subtle taper. It doesn’t look very tapered in the photos but it does taper from 1mm to 0.7mm over the 30mm or so. I also turned up some washers for the top to take up the difference in the etched holes and some collars for the bottom which gives a bit more area to create the soldered joint while looking prototypical

55395369653_3c1a834c49_h.jpg

55397188923_cf99c95c3c_h.jpg

I have also fitted one of the cab doors. Most photos show one of the cab doors open but the design of the kit doesn’t make that easy, so some more thought is needed before I fit the other one

55397450865_94ba291d0e_h.jpg
 

Dave Holt

Western Thunderer
Rob.
To get the coal space spectacle protection bars a more consistent stand out from the cab back plate. I insert a "U" shaped piece of wire, of the appropriate diameter, horizontally between the bars and the cab plate, and press the bars on to it. Obviously, the width of the "U" has to be less than the length of the shortest bars, so as not to solder it to the job.
Equally, some non-metallic substance could be used.
Dave.
 

Lawrence Boul

Western Thunderer
My approach to tapered handrails is to use tube. In part because the decorative knobs at the top have a spigot that I want to locate into the top of the handrail. But in any case it can be a nice solution as you can run a wire up the tapered tube to form spigots at each end for mounting.

Basically I fit a length of tube into the mini drill chuck with a length of wire within. Taper the tube with emery etc. For 0.1mm wall tube I'm looking to go from nominal dimension at the base to nothing at the top. The resultant piece can then be cleaned up at the top and cut to length. Fitted to the engine with a fresh piece of wire up the middle.

It sounds difficult, but it has been a lot easier than wire for me.

Wa217-300124.jpg
 

Lawrence Boul

Western Thunderer
My approach to tapered handrails is to use tube. In part because the decorative knobs at the top have a spigot that I want to locate into the top of the handrail. But in any case it can be a nice solution as you can run a wire up the tapered tube to form spigots at each end for mounting.

Basically I fit a length of tube into the mini drill chuck with a length of wire within. Taper the tube with emery etc. For 0.1mm wall tube I'm looking to go from nominal dimension at the base to nothing at the top. The resultant piece can then be cleaned up at the top and cut to length. Fitted to the engine with a fresh piece of wire up the middle.

It sounds difficult, but it has been a lot easier than wire for me.

View attachment 268783
It's also possible to cast them in 1 piece as on this F in 1:64.
_HLB5302.jpg
 

Lawrence Boul

Western Thunderer
Rob.
To get the coal space spectacle protection bars a more consistent stand out from the cab back plate. I insert a "U" shaped piece of wire, of the appropriate diameter, horizontally between the bars and the cab plate, and press the bars on to it. Obviously, the width of the "U" has to be less than the length of the shortest bars, so as not to solder it to the job.
Equally, some non-metallic substance could be used.
Dave.
I haven't done it myself, but I've seen card used. Depending on approach, it gets captured, but easy to cut it out especially after heat and flux have attacked it.
 
Top