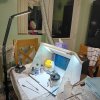
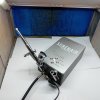
Airbrushing.... my journey from Enamels to acrylics... so far

John TAYLOR

Western Thunderer
The only real issue I have, which you are in the process of addressing, is the adhesion to brass. I have so far stayed with an aerosol of self-etch primer, then sprayed on top.

Watching with interest.

Yes John, like you I`ve always done the same with brass and have relied on Closterman rattle can etch primer but recently have tried Upol in a failed attempt to escape the new style spray can nozzles which are now predominantly fan cap design to give an enormous wide and flat spray angle that gives very awkward coverage on model loco`s.


I have forgotten to mention that this whole enterprise of mine was influenced by Hatchette`s O Gauge Build The Mallard Partwork Kit.

As many will know , all the brass and alloy parts were sprayed with a lacquer primer so that anyone out in the non modelling world could assemble the kit entirely with superglue.

I have built this kit as a soldered construction and I can tell you that the lacquer primer was a s*d to remove easily . After a lot of experimentation ,including my wife`s nail varnish remover, it turned out to be Wilko`s paint remover that stole the show in removing the lacquer without destroying the many delicate parts...... and that needed at least one hour of soaking.


.... and so, I`m hoping to emulate the effect on brass.....
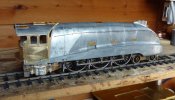
DSC05234.JPG
 
Last edited:

John TAYLOR

Western Thunderer
Well, not particularly scientific but nevertheless some encouragement.

The brass sheet shows good paint adhesion overall.

20241102_001253.jpg

At the top is scratchings from a coin. Middle area is P180 abrasive sheet rubbings . Bottom is a sharp edged metal object.

The left side has the etched primer first coat but overall the second coat polyurethane primer shows equal strength to me.

I`m more inclined to think that quality products have better adhesion.

More interestingly, cleaning the wheel treads was as difficult as the traditional acid etch primer first coat and despite using an abrasive sheet there are the usual primer remnants.....

20241101_235848.jpg

I feel encouraged to continue with airbrushing the loco with my chosen products......
 
Last edited:

John TAYLOR

Western Thunderer
Just a thought - have you tried cellulose thinners on a cotton bud to wipe the wheel treads clean? I find this will remove most paints from metal surfaces.
Thanks Chuffer, I`ll give the cellulose thinners a try for the final tidy up. I wanted to assess the paint adhesion on the wheel treads with the acrylic products first.
 

paulc

Western Thunderer
I'm pretty sure MEK or equivalent will remove paint from your wheel treads as well , just don't splash it around . I guess the same caution applies to thinners as well though .
 

steve50

Western Thunderer
Thanks for starting what is a very informative thread. I'd like to use more acrylic paints and have had some good results using Lifecolour BR blue, thinned using their own thinners, I have found it needs days to harden properly. It's the weathering that I've not really tried yet, wiping off and moving the paint around seems a lot easier with enamels and I'm concerned about spraying the paint on then putting the airbrush down to manipulate the paint and having everything dry up or clean the airbrush first then the paint is too dry on the model!
The hot water cleaning tip is great, one I will def use.
 

John TAYLOR

Western Thunderer
Thanks for starting what is a very informative thread. I'd like to use more acrylic paints and have had some good results using Lifecolour BR blue, thinned using their own thinners, I have found it needs days to harden properly. It's the weathering that I've not really tried yet, wiping off and moving the paint around seems a lot easier with enamels and I'm concerned about spraying the paint on then putting the airbrush down to manipulate the paint and having everything dry up or clean the airbrush first then the paint is too dry on the model!
The hot water cleaning tip is great, one I will def use.
Thanks Steve, I`ve found Lifecolor paints to be great quality as is their thinner ( although Ultimate thinner is even better when using small needle/nozzles ).

I`m in the same boat as you with weathering railway locos/stock and my particular aim is to complete a finished model ,including weathering, by airbrushing alone.

My thinking so far is to airbrush a model, apply transfers , then protect with an acrylic clear coat and then apply weathering washes using acrylics or enamels and wipe of as required.

I`ve recently learn`t this from aircraft modellers and experimented with a Tamiya 1/48 scale Spitfire.............

So:.... Apply Primer.

20231022_231255.jpg


Then highlight details with white.......

20231023_010121.jpg


Apply livery colours using light thin coats............

20231023_132647.jpg


I used `chippng` method using AK metal pencils

20231024_213415.jpg

Then a clear coat (Pledge) and apply transfers.... and apply enamel panel washes and wipe off when almost dry.

20231222_123733.jpg

Then a final semi gloss varnish..... should have used matt though.

20231222_123707.jpg

I`m hoping to use this approach with weathering some railway models in the future.

The benefits of airbrushing is the ablilty to apply many varied coats of paint that won`t obliterate fine detail.
 

steve50

Western Thunderer
John that Spitfire looks superb, love the chipping. I've got some of those pencils but haven't used them on a railway model yet. Another difficulty I have is weathering for the sake of it. It's so easy to try a new method or technique then find out the prototype never actually weathered like that!
I'm currently trying not to overdo a loco roof, with the airbrush I should get a light coating of dirt.
 

Max M

Western Thunderer
Apologies as this is off topic, but for the aerial wire use some invisible thread and then paint silver (I use one of the paint sticks)
 

John TAYLOR

Western Thunderer
Here it goes then.....

20241111_185120.jpg

20241112_200928.jpg


A strip down of chassis parts and my preferred method of wheel blackening as mentioned a little further back. Including axles and bearings.

20241112_202014.jpg


20241113_095725.jpg

And then on to the main event >>>>>>>>>>>>>>>>> starting with both chassis, which were cleaned with Viakal.

20241119_203113.jpg


Then multiple light coats of the `etch` primer tinted with black, using a Gaahleri GHAD 39 airbrush 0.35 nozzle @ 17psi.

20241119_233417.jpg

Very enjoyable, now I`ve got the hang of things, and resulting for the first time for me , a very smooth primer finish.

20241119_234611.jpg

20241119_233639.jpg

Tomorrow will see an application of my other hard wearing lacquer black primer................................

20241119_203254 1.jpg
 

Attachments

  • 20241119_223641.jpg
    20241119_223641.jpg
    172.3 KB · Views: 44
  • 20241119_235838.jpg
    20241119_235838.jpg
    109.7 KB · Views: 43

John TAYLOR

Western Thunderer
Very pleased and more encouraged after using Mr Hobby surface finisher.

20241121_211857.jpg

I am omitting a final coat of satin black as Mr Hobby finished is a lovely smooth egg shell finish that will suffice for a chassis finish.......................

.............. now for some reassembly....
 

John TAYLOR

Western Thunderer
Chassis painted/chemically blackened and assembled into working order................

20241126_200206.jpg

I like blackened axles as they seem to avoid rusting over time.....

20241126_200013 1.jpg

I dropped the chassis during reassembly and bent a brake rod..... no paint damage during it`s re-tweaking back into shape.

20241126_193120.jpg

Balance weights did`nt blacken that well but these can be sorted with the airbrush later....

Despite the 1980`s gearing standards she has the potential to be a more quiet mechanism once fully run in and lubricated as well as wired for DCC sound.


John TAYLOR

Western Thunderer
Bob Shephard was the paint chemist for Precision Paints until 2004. He established that there was only one GWR green colour from 1875 t0 1945.

It was the slow reduction of the number of coats of varnish over those years from 5 coats to1 or none that gave rise to the different shades of green. The varnish was made from natural materials and had a brown tinge to it.

Precision Paints don`t make an acrylic GWR green so I have used Railmatch Acrylic post 1928 green as a satisfactory example of GWR green whilst I experiment with an alternative non enamel paint.

TAMIYA are a hybrid acrylic which can be thinned ( up to a point) with water , so can be cleaned with water. But they are also an alchohol based paint and can be thinned with Tamiya X-20A thinner as well as Tamiya Lacquer thinner and Mr Color levelling thinner which give a more superior finish and are harder wearing than absolute water based acrylics. Tamiya cannot be mixed together with water based acrylics.


So far, this is the result of experimentation with three Tamiya colours mixed together, which unfortunately are all matte finishes.

The far right is the Railmatch product which has a satin finish.

I have given them both a coat of Johnsons Pledge to balance things up . I will be adding Tamiya gloss clear to the mix next.

20241201_171220.jpg
 

John TAYLOR

Western Thunderer
Happy New Year to you all !!

A bit of fun with airbrushing to kick start 2025.

So, the non-enamel journey continues with my first acrylic/lacquer loco paint job.

It`s been far too cold for the paint shed so I bought the cheapest £59 airbrushing spray booth on Amazon for my 73rd Birthday (always a few days before Christmas....) and have been working in the kitchen....

20250101_193129.jpg

All has gone particularly well with my chosen `gripper` coat for brass.....
20250101_194758.jpg

A very smooth finish......
20250101_234802.jpg

Loco bodies are always a bit more challenging......

20250103_004005.jpg

20250103_004106.jpg

An advantage to me is that everything is touch dry in 10 minutes reducing the problem with dust particles attaching themselves.


Continuing the cheap theme................................................

All done with one of my favourite airbrushes ....the ubiquitous bd-130 from China that comes in many branded forms.

This example cost £10.99 from Ebay plus £2.50 for a new pinch type aircap , as I like to see the needle when airbrushing.

20250101_232403.jpg
 

steve50

Western Thunderer
I'm looking at a new nozzle for my Neo airbrush, and they are more than you paid for the airbrush! Cant say I'm not tempted to look for one of them. That looks a good finish, is the brush good for weathering?
 
Top