You are using an out of date browser. It may not display this or other websites correctly.
You should upgrade or use an alternative browser.
You should upgrade or use an alternative browser.
6221 Queen Elizabeth and the crazy task of building her train
- Thread starter T30rra
- Start date
Richard Gawler
Western Thunderer
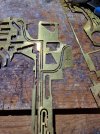
Another suggestion - try to work out whether the narrow slots are showing the inside or the outside or the middle of the part with the tab. When you know this, file off the tabs and use the slots as alignment markers.
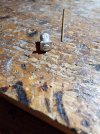
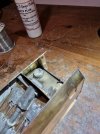
I've got a new razor saw which has worked well but no modelling has been done for over 2 weeks as I'm back working on the house at the minute. One room left, although I hope to go down the club wednesdayYou could use a file with edge teeth, ground down in thickness to suit the frame material. I have one created to make a slot on a model. Sorry for the blurred images.
View attachment 172626View attachment 172627
Dave.
Chas Levin
Western Thunderer
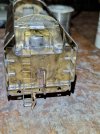
Looks excellent! Is that a lamp, to the left of the coal doors? And is that a dedicated cover or hinged lid over it? I don't think I've seen that before, nice detail: was it simply for practical convenience, for use by the crew?
Yes it is a lamp, was there as a spare on the real thing I believe but stand to be corrected. Not sure of the purpose of the cowl above it though.Looks excellent! Is that a lamp, to the left of the coal doors? And is that a dedicated cover or hinged lid over it? I don't think I've seen that before, nice detail: was it simply for practical convenience, for use by the crew?
Chas Levin
Western Thunderer
Very interesting, thanks gents. I'm on foreign ground here (mainly an LNER/GNR modeller for UK stock) but always interested in what other companies did. Makes perfect sense of course - goodness knows they'd have been able to use any lamps they could get I should think, in a working steam loco cab!
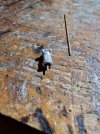
Slight diversion from the loco. Got my sidelines coronation scot corridor first out the box tonight to tackle the train alarm gear. The alarm castings are from the cavalier coaches range available from DJ Parkins. Well happy with the result. The random hole will be filled later. The brass wire is a single piece and passes tight under the top step. Note to self, fit the steps after!
P.s. how do I change the name of my thread?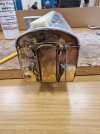
P.s. how do I change the name of my thread?

Chas Levin
Western Thunderer
Aha - even though I'm a bit of a newbie here, I can answer that: when you're the author of the thread, you'll see, at the top right-hand corner of each page, next to the 'Watch'/'Unwatch' button, a little arrow indicating a drop-down menu. That menu contains an item called 'Edit thread' and if you click on that, it opens a box where you can change the thread title...P.s. how do I change the name of my thread?

ThanksAha - even though I'm a bit of a newbie here, I can answer that: when you're the author of the thread, you'll see, at the top right-hand corner of each page, next to the 'Watch'/'Unwatch' button, a little arrow indicating a drop-down menu. That menu contains an item called 'Edit thread' and if you click on that, it opens a box where you can change the thread title...
OzzyO
Western Thunderer
IIRC they are for the rear of a de-streamlined tender. As the tender sides extended passed the rear of the tender, also the de-streamlined tender kept the ladder rather than the normal rear steps.
To illustrate the point here are two photos showing the rear of a streamlined tender and a de-streamlined tender,
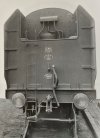
Note how the side sheet is still running passed the rear of the tender., the tender has also still got the two fillers from its streamlined days it's not showing very well in this photo but the rear edge of the tender sides had a vertical beading on them.
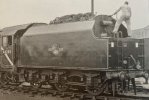
ATB
OzzyO.
To illustrate the point here are two photos showing the rear of a streamlined tender and a de-streamlined tender,

Note how the side sheet is still running passed the rear of the tender., the tender has also still got the two fillers from its streamlined days it's not showing very well in this photo but the rear edge of the tender sides had a vertical beading on them.

ATB
OzzyO.
I really appreciate that Ozzy, thanks. Looks like they are rogue parts on my etch for the streamlined version then and hence I can't find them in the instructions. At least it's not a case of I hadn't put them on but should have!IIRC they are for the rear of a de-streamlined tender. As the tender sides extended passed the rear of the tender, also the de-streamlined tender kept the ladder rather than the normal rear steps.
To illustrate the point here are two photos showing the rear of a streamlined tender and a de-streamlined tender,
View attachment 183420
Note how the side sheet is still running passed the rear of the tender., the tender has also still got the two fillers from its streamlined days it's not showing very well in this photo but the rear edge of the tender sides had a vertical beading on them.
View attachment 183419
ATB
OzzyO.
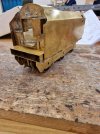
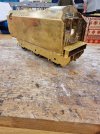
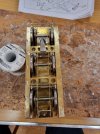
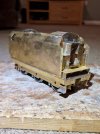
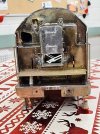
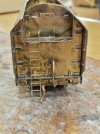
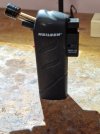
So, after a couple more sessions, various etch overlays, the rear lamp irons and the vac and steam pipes have been added, along with the tank lifting eyes? The overlays have been made much easier thanks to my newly acquired microflame. £5!
Just the buffer housings, ladder, a few white metal castings some etched L shape brackets, plus a bit of pipework to finish the backhead. Then it will be off for a decent scrape, scrub and wash before it enters the paint shop.
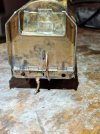
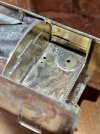
Just the buffer housings, ladder, a few white metal castings some etched L shape brackets, plus a bit of pipework to finish the backhead. Then it will be off for a decent scrape, scrub and wash before it enters the paint shop.


