Evening all,
Well where has the past five months gone to! I actually managed a modelling afternoon this afternoon - first in ages. Not particularly successful but after a break it always takes me a little while to get back into things. So whats happened...
J50
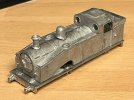
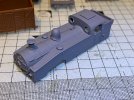
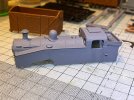
Very little progress here, primarily because of one step forward and two back. It was point out to me that the dome was leaning backwards and the chimney was in the wrong place! I really should have seen both to be honest. So time has been spent prizing the Araldite off. Both came away relatively cleanly. The positioning hole for the chimney has been redrilled in the correct place now, so just needs reattaching. I have done a little bit more smoothing with the sandpaper and craft knife where the white metal body didnt meet quite right, and I am now happy with the tank fronts. I have also taken the moulded hand rails of the front and tank sides, and drilled the holes to replace these with wire. Cabside ones are still to do. Next task is a fresh coat of primer. This cruel close up shows the current progress.
View attachment 225512
My plans for a milled chassis have changed, after a friend of mine pointed out to me that the traditional style would be heavier, as more weight could be added. So I have reverted, however, he also pointed out that the wheelspacing for the J50, N2 and J6 (my first three locos I am planning for) were all the same, and hence the same basic chassis could be used under all of them, with slight modifications. The gearbox and motor are here from High Level Kits, as are the wheels. I am probably just needing some gears, which I'll get sorted out this week hopefully.
I am thinking of trying one of the Lincoln Locos 3D printed N2 bodies for the N2 tank. Depending on what I think tho them, that would be an option for the J6, or I could try and make the white metal kit I have got for the J6 work, but it needs a lot of attention I think.
Coaches
No further work at all. Acquired a few more books with reference (god knows where they will go as the bookcases are full and overflowing!) but in addition to the Mk1 bible acquried earlier in the year, I also picked up 'Gresley's Coaches 1905-1953' by Michael Harris and 'Historical Carraige Drawings' Vol 1 LNER by Nick Campling. Both of which should help with drawing up etches. Im hoping i can create an almost standard underframe / ends / middle roof onto which the etches, the underframe details, bogies, coach ends and roof ends can be applied. But that is still all on the to do list.
Wagons
Wagons
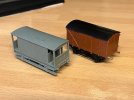
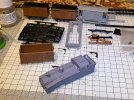
The LMS brake van needs a coat of primer and paint, then transfers, probably Cambridge Custom Transfers, as well as DG Couplings making and fitting. Three box vans (fruit vans and the Moto) are all finished, just needing the wheels to be inserted and couplings made/attached. The third van also needs the lead weight inserting and the roof fixing on. Each vehicle gets a code, such as 3mmW01 (meaning 3mm Scale, Wagon No. 1) or 3mmW03 (left hand vehicle in the image below) all of which are catalogued in a file as to what kit, what wheels, when built, running number etc. Locos are the same with an L as the fouth letter and carraiges with a C. Each vehicle will also get a small etched plate on its underside with the same code allowing a point of reference in the future if needed.
View attachment 225513
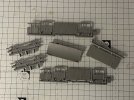
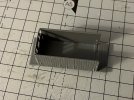
I am also part way through a 21-ton LNER style Hopper now. (3mmW05)
View attachment 225511
So all in all nothing to shout home about, but general progress. I tried making some DG couplings today, but it all went wrong so back in the box for another day! I know they are not difficult, but 2+2 just was not making 4 today. Also had a good tidy up and found the 3mm Scale MTR coach compensated bogie frames and associated wheels that I bought earlier in the year. Probably early next week I'll get some more time.
Layout
Dont make me laugh!! No progress at all at the moment. Plenty of plans and ideas but no progress!
Richie
(Edited: To add in missing info and images)

www.cambrianmodelrail.co.uk


