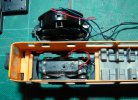
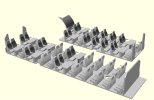
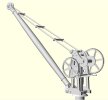
Stevers' Stall of Shame

Hornby Van C in EM Gauge

Stevers

Western Thunderer
This is the place where I will try to (or more likely won't) complete my many unfinished projects.

First up is a Hornby Van C that once graced Beaminster Road and was a gift from Tim. A 'simple' EM conversion (I thought) to make another 'Adaptavan', in this case to go between locos with 'three link' and coaches with Kadee couplings. My locos always have hooks and chains, and may also have a Kadee on the tender. Coaches may be ELC(N Gauge) on wires or Kadees, and may also have hooks if non-corridor. The goods stock that was set up for Mere has Kadees, unless they've fallen off, otherwise three link. For Verwood I need to be able to drop off and collect goods stock, and although Kadees could do that, it doesn't seem quite right for a UK steam era layout, but that's a decision for further down the line.
DSC03134.JPG
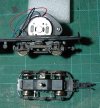
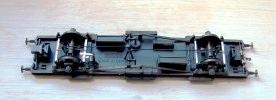
To remove body from underframe was just a matter of releasing the six clips underneath and easing the body off whilst making sure that the vacuum pipes were released at each end. The wheels could be released by unclipping the retainers from the top and releasing the long plastic brake rodding that was much more robust than it looked and came to no harm. I found a pair of EM bogie/tender wheel axles, that must have been left over from the Wills T9 in 00 that I finished for Tim, and I fitted a couple of 00/EM coach wheels to them. I replaced the retainers after snipping off the fragile looking brake gear. The weighted underframe ran through my test crossover very smoothly indeed - so far so easy.

I needed to spread and refit the brake blocks, and over engineering these started with an oblong of .040" styrene 10mm x 8mm. An 8mm x 5mm spacer was placed in the middle of the front and then a 20mm x 3mm strip at the back. This gave me two 'Ls' at the correct spacing to take the Hornby brake shoes and their crooked mounts. The Hornby plastic definitely takes solvent, but I still used two 3mm x 4mm blocks to wedge the crooked arms in place. The two areas not covered by all these bits of styrene were cut out to clear the wheels. I tried a test fit, and the units sat too low, so I added a further 20mm x 8mm piece (020") to pack them up to about the right height. There was too much side play in the EM wheel sets so instead of adding tubes/washers in the middle I put some .010" ABS strips on the inside of the Hornby W irons to limit travel so that the brake blocks at the correct spacing wouldn't rub on the flanges.

How to restore the brake stretchers? Having considered my options I elected to fret some out of 015" nickel silver, filing in the little divots at the ends that locate in the brake block holes. I had bought a gross of fret saw blades at an unfeasibly low price - and you could tell, as it was impossible to keep them on track and they won't cut steel. I then soldered some short lengths of wire onto the stretchers to represent the pull rods. These were then glued in place and the complete assemblies installed in the underframe as close to the wheels as I dared. So far not nearly so easy.
DSC03138.JPG
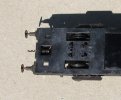
To be an 'Adaptavan' it needed a hook (preferably sprung), and surprisingly there was no representation of the hook at either end let alone any sort of slot. The only way forward was to file about 015" off the central panel of the buffer beam, and I then drilled a hole through to the void under the NEM coupling mount. Surprisingly I was able to open this hole out to 1/8" to take a coupling hook spring. I then put a slot into a piece of 015" nickel silver for the coupling hook then trimmed it to fit my central panel and epoxied it on with the spring already inserted. Once the glue had set, I was able to insert the hook, compress the spring and pop a bent piece of wire in the hole to retain the hook. Drilling the hole destroyed the Hornby plastic buffer springs, so these were substituted with strips of brass folded at the end to thicken them up so that they better fitted the slot where they were epoxied in. The buffers do still spring, but perhaps not quite as well as they did. How easy? The less said the better!
DSC03136.JPG
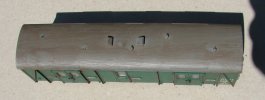
Being a Chinesium Hornby Maunsell vehicle it had lost a couple of what look more like moulded in torpedo roof vents. I looked at my collection of brass and white metal torpedo vents, but as they were a poor match for the surviving ones, I ordered some 3D printed 'LNER style' ones that seem to be a better match, and I'll probably replace all five, keeping the surviving Hornby ones as spares for my Maunsell pull-push unit and 2-set.
 
Last edited:
Stevers

Western Thunderer
Van Cs (BR Code 'BY') were primarily intended for trains made up of NPCS stock. For anyone wondering if my model of Verwood needs a Van C (BR code 'BY'), the Weymouth portion of the WoE newspaper train had one rostered from at least 1957.

I was only aware of this because a while ago, to get some idea of what trains on the Sal&D looked like, I combined EWN, CWN and WTTs (not necessarily from quite the same year) to document some train formations on the Sal&D, and for the newspaper train I have:
1953: News van B off 1.25 Waterloo + 2-lav from Berth.
1957: News BY + News van B off 1.15 + 2-lav + van fit from Berth.
1960: 1 News van B + 1 News BY MX off 1.15 Waterloo + 1 SK MFO + 3-set (L) from berth
Train Services on the Salisbury and Dorset

I have a Ratio Van B, Hornby 2-lav set and Ian Kirk Maunsell 3-set* - perhaps showing my age there! Only the 2-lav and 3-set are needed for any other train. The requirements for couplings for my Newspaper train (a creature of the dark on the Sal&D), are simplified if I treat it as the passenger train that it was (sets down only at Downton). Most passenger trains ran without vans hence the Kadees on some locos. The loco was a T9 duty in 1958, but by 1960 is more likely to have been a 4MT 2-6-0. Examples of both of these will be Kadee fitted for passenger trains, so actually for the Newspaper Train, the Van C needs Kadees both ends in the NEM pockets, with the screw coupling giving options for non-Kadee fitted locos and to run random trains on YMRG's South Junction as a reliable 'Adaptavan'. The ELC couplings on the Ian Kirk Maunsell 3-set are not ideal, and it would be good to put the Kadees on the ends of those, the 2-Lav and Bogie B. All potential projects for this thread.

*[Edit] A 3-set(L) would be a deep vent Bulleid set, a 3-set(M) being a Maunsell set. In my collection is an original Bachmann Bulleid 3-set in blood and custard that also once graced Beaminster Road, and they really are easy to convert to EM. No doubt the Bulleid 3-set was effectively being worked to somewhere it would be more usefully employed than on an early morning newspaper train.
 
Last edited:
Stevers

Western Thunderer
DSC03148.JPG
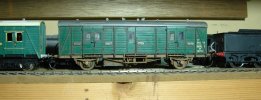
Although beset by a torrent of crane orders, a bit of progress has been made on the Van-C. ABS Oval vents have been fitted to the roof matching those fitted over ten years ago to the Ratio Bogie B. The body is back on the chassis which has had a first dose of weathering, but possibly needs toning down slightly and needs to be less patchy on the wheels, though those won't be coming out again unless they have to. I'm not a fan of the truss 'slats', but you wouldn't know from normal viewing angles. On the right is a my Jidenco Black Motor tender with Kadee fitted, but I've temporarily mislaid the NEM pocket that came with the Van-C, so can't currently put a Kadee at both ends. The Ratio Bogie B has Bachmann Bulleid bogies fitted as the Ratio ones were never satisfactory. This was originally intended to be another 'Adaptavan', so I only fitted a Kadee at one end, and that needs to change. In the flesh they look like they will go well together once painted, and I only noticed that the droplights aren't as straight as they could be when viewing this photo.

Privett Lever Frame.jpg
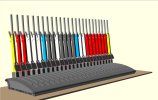
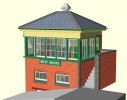
This is a render of a Stevens style Evans O'Donnell 25 lever frame - the sort of thing to be found in the vast edifices (by Sal & D standards) that were any of the Meon Valley signal boxes. This is for a model of Privett as it would have been if the signal box hadn't suffered the indignity of being downgraded to a ground frame in 1922. On my workbench I need to complete the current crop of crane kits, then I have a 3D printed 'Downtonbridge' signalbox to test build, mainly to try out a new supplier of the laser etched windows and doors. It needs to be ready for Taunton Rail-Ex, but with enough spells of wet weather stopping me from painting outdoors that will be easy enough as long as my feet are kept firmly to the fire here.
 

Stevers

Western Thunderer
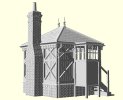
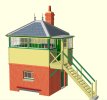
More displacement activity pending the arrival of the rollers sets for my remaining crane kits. The painting of my 'Downtibridge' signal box has started with a base coat of cream - that currently looks pretty rubbish. Quite tricky to work out which bits of the balcony should be green, not that the prototype would have been much help when I could have walked up there as a child and taken a picture of it. Best not to dwell on missed opportunities!

SBX Chimney and Porch Rear.jpg

A useful piece of displacement activity has produced the original style of chimney for the box at Verwood, now seen here as it really might have looked originally. it's a style of chimney more appropriate to other Type 1 boxes especially Downton. When the chimney was rebuilt a half brick slimmer each way, the base was retained, and a couple of course of champhered bricks put in to reduce it to the new size. The original chimney was a little taller than its replacement, the stepped in gather is as seen at Instow, and there is a decorative string course of bricks below the top. Introducing a fatter chimney affects the roof and rear wall of the box introducing some complications configuring each part separately for the intended final version. Next stage will be a controlling parameter file that each program can reference to generate its component correctly. So far we have with and without valencing and weatherboarding, ground or platform versions, and now stepped or Verwood chimneys. Plus of course the partial weatherboarding almost unique to Verwood.

Privett Lever Frame with Pull Plates.jpg
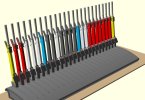
With the kind help of Chris Osment, an entirely credible set of pull plates has been added to the lever frame intended for Privett. In a completely selfless act Chris has even put together a putative locking table for it from scratch! He's also inadvertently helped me to better understand the locking at Verwood, and I'm much closer to getting to grips with that than I was.
 
Last edited:
Stevers

Western Thunderer
DSC03160.JPG
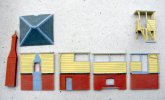
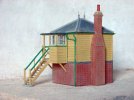
The brick colour (Humbrol 100 - now apparently unobtainium) has been drybrushed on trying to keep it out of the nominal 0.2mm wide and deep joints. In reality these joints are probably more like 0.1mm each way due to the additive kerf of 3D printing (light bleed/over exposure/layer effects), so not as wide as the joints of the Slaters brick sheets that I was seeking to emulate. The string courses have been picked out in a dark grey as these were a blackish sort of brick, quoins were also blackish at Verwood, but I'll do those in final finishing when I pick out individual bricks. The cream paint is my own mix of Humbrol enamel, but has poor coverage and this is actually the third coat. The slates have had their first coat. and are wafer thin, too thin really, so I'm going to up the minimum slate thickness from 0.13mm to 0.2mm as I think that slightly overscale (cartridge paper thickness) will look better. Magic should happen when I flood the mortar colour into the joints and add green paint - that's the theory and what happened when I painted the Verwood box... That porch/step 'printing' is close to exquisite and it fits!

DSC03164.JPG
Yes, I did forget to paint the bricks in the fireplace and inside the builders opening on the first pass. Only the one coat on the roof so far, the poor coverage being evident. strictly speaking the bosses that were below the finials should still be there even after the finials have been removed, so I'll add those because I can. The fireplace (painted a charcoalish sort of grey) had delaminated because it wasn't quite as attached to the rest of the model as it should have been. Next step is to mask off the wainscotting before painting it green - what a difference that will make!

A Taller Downton box.jpg
Not exactly on my workbench, but still occupying my time. In looking at the few photos I have of Downton I realised that the braces for the porch landing were alongside the top of the locking room door, this led to some step counting and the realisation that Downton was three steps taller than Fordingbridge. A rainy day later and I'd added 18" all round and moved the locking room door to where it was at Downton. I then rewrote my routine that assembles the finished signal box to create all elements from scratch rather than to import the STL files - hence the first colour render of a complete box. Once the global variables are set for a particular version I can view the assembled virtual model to check that everything is as it should be for that version, then generate the set of STL files to a suitable folder - fool proof, although perhaps not necessarily for this one! The lower 'Fordingbridge' version is still catered for with the original locking door placement on the opposite end to the steps.
 

Stevers

Western Thunderer
Have got mountains of painting (and stripping) done, but it's all full size Victorian joinery and outside - two sets of French windows and a porch! On the modelling front another diversion - there hasn't been a full release of OpenSCAD for a while, but as I know that development is ongoing, I downloaded the lastest 'nightly' build and can report that it copes with my models extremely well and is stable with some very useful new features. What's most interesting is that the option of a 'Manifold' render has been added - the original render being 'CGAL'. The Manifold render is significantly faster than the slow and resource hungry CGAL render, so fast in fact, that for me it makes the glitchy preview render completely redundant.
Taller Downton Box - Manifold Render.jpg
A bonus is that this Manifold render is in colour, and on the left is this latest render of the 'Downton' box with glazing added. This is achieved by setting the opacity property of the 'color' function to a value between 1 (solid) and 0 (clear) in this case 0.15, however at the point this is set something has to be visible beyond the item for it to work hence the end windows being opaque.
WM Box plus lever frame and glazing - MF.jpg
The development of a 3D model of the box at West Moors has been occupying me for the last few weeks - this box was much closer to my childhood home than Verwood. This was a Type 2 cabin re-erected in about 1904 on a substantial brick base, with brick back wall and steps. Shown here the new 'Manifold' render has made a lovely job of this box too. The 24 lever EOD frame is shown inside with the Tyer's No. 6 tablet instrument placed on the back wall - though only because it can't be seen at the end of the lever frame where there is very little room for it. Amazing to think this box with its mitred corners can be 3D printed pretty much as it stands with just a bit of extra effort to get the sash windows and door laser cut. The ornate roof vent is shown on an aerial photo as being offset towards the crossing and my suspicion is that if there were an odd number of rafters this would avoid cutting one. As at Verwood the lettering of the sign conforms to no regular font so has been traced to get the right 'look'.
 
Last edited:

Stevers

Western Thunderer
DSC03176.JPGDSC03177.JPG
The much delayed test build of the 'Downtibridge' box to prove that the sashes and door cut by York Modelmaking fit, and they do - beautifully! Using Araldite Rapid it was assembled front to side, allowed to set, then I added the floor. The rear to other side was then assembled and left to set after which the two halves could be united with the floor already glued in to keep things square. The mitres and trueness of the sides left a little to be desired, but a hair drier was used to render parts maleable and true them up. Tamiya masking tape proved essential to keep everything tight and aligned as it set. The roof has a 'problem' in that there's a nasty artefact across one corner and I didn't receive a replacement in time. As a result there's only a lightest coat of slate coloured paint on the resin which shows at this angle. Looks better (less bright!) in the flesh and will (hopefully) be on the Mudmagnet stand at Taunton Rail-Ex today. It needs a bit of touching up and toning down as there are some epoxy fingerprints on it, but lessons have been learned for when I assemble my Verwood box.

[Edit] The original lurid photos (auto corrected in Gimp) replaced with toned down ones!
 
Last edited:

Stevers

Western Thunderer
It's been a while, but big things are afoot.
DSC03232.JPG
Now decoration of my new workshop is complete, the move from my tiny workshop (the old pantry) to the large workshop (the old dry kitchen) is well under way , and the first fruit of that move is that my inherited EM test track has been extended by a couple of inches to be installed between the ends of the old Welsh Dresser. I've also replaced the broken black Gaugemaster feedback controller with a conventional cream one that takes up more room and needed to be boxed to fit. On the right is a switchable power take off for wheel cleaning etc.

As can be seen lighting isn't great, and out of sight to the right I've fitted a single mains socket (the least expensive and locally sourced way to provide a USB outlet) to power a USB strip light for the test track. The trusty Wills I3 is the first engine I built (almost forty years ago) and due to the influence of YMRG was even back then weathered, compensated on the Sharman principle on Sharman Wheels, with an Escap, brake and sand pipe detailing. It's of no use to Verwood, but gives astonishly little trouble and is test hauling the first two vehicles of my 'News' train for the Verwood line.
 
Last edited:

Stevers

Western Thunderer
And then there was light!
DSC03238.JPG
The COB LED light strip is described as 'Natural White' (4000-4500K). On the YMRG layouts we used to achieve this effect by combining LED strips of both 'warm white' and 'cool white' in the same fittings. The GPO phone rings and can be answered (via an ATA), but I've yet to get it to dial out since going VoIP. In its previous location a shelf for my Anglepoise work lamp had applied a torsional load to the track, and it's currently propped to correct a slight sag (1/8") on the near side.
 
Lima Class 156 Underframe Detailing

Stevers

Western Thunderer
My work desk (a very solid 'Abbess' product in oak) has been moved into the new workshop, and whilst I decide how best to set up my soldering irons, minidrill and other tools, I thought I'd do something nice and simple between Christmas and New Year. What could be less problematic than fitting the Hurst Models 3D printed underframe kit (bought in 2022) to my Lima Class 156 - or could I spoil that experience too by overthinking it? First stop was to take another look at the excellent instructions, except I hadn't downloaded them at the time, and now the link was broken. It was a huge relief when an email request for them was speedily answered - thanks Daryl!

DSC03250.JPGDSC03252.JPG
Even though a Class 156 is not useful for Verwood, I can try to justify an example of one because in 1989 they ran through Salisbury on the Cardiff-Portsmouth service whilst substituted for the then unservicable Class 155s. The Regional Railways livery suits them and the Lima model is pretty good for its time. I've already converted mine to EM using Ultrascale wheelsets and fitted a DieselTrains can motor. I finished off by adding extra pickups, though how I thought sticking the extra wire through a small hole at the trailing end was going to work is a mystery - when it all goes back together again there will need to be some changes.

Once disassembled, the first step to overthinking it all was realising that with the kit fitted there's no room for the heavy steel Lima weights. Plan A is to pack lead in any gaps in the underframe, Plan B is to hide any extra weight needed in the roof space. Interestingly another option for underframe detailing for the Class 156 does provide room for weight to be added:
Model Railway - Hornby Lima Class 156 Underfloor Detailing

The next realisation was that the very basic Lima Interior didn't look much like the Super Sprinter seating actually fitted. Whilst I was bemoaning the apparent lack of any 3D printed option I realised that perhaps I could do something about that. I then spent a very happy Boxing Day creating a simplified 3D model of a seat pair with the arms randomly up or down, then added a table for the bay seating and then gradually built that up to a complete interior with the same overall dimensions as the Lima interior.

Class 156 3D Printed Interior.jpg
This is too long an object for me to print on my Anycubic Photon Mono 4K in one go, but my plan is to separate it at the central partition and print it on the bed in two halves. The insert for the motored car is basically the same since the Lima motor bogie takes up the space where the differences are and four seats at that end are lost as well. A huge benefit of 3D printing is that it doesn't have the limitations of plastic injection moulding!
 

Stevers

Western Thunderer
Class 156 3D Printed Interior - Two Parts.jpg
The 'trailer' car interior has been split in two to fit my build plate. The seat backs have been scalloped, tables set back slightly and there is a revised centre partition that looks more like the one in my reference photo. In that photo the heavy orange-red chevrons down the middle of the grey seats of the 'Ashbourne' fabric was a reminder to me of just how ghastly some 1980s designs could be!

DSC03254.JPGDSC03258.JPG
Now that a better class of interior is planned I realised just how intrusive the Lima mechanism is. On the 'motor' coach Lima have omitted six full seats and the four tip-up seats opposite the only loo. In looking at alternative power options, I was amazed at how expensive Black Beetles had become, at which point I remembered that my son had once installed an EM gauge one under a van body with a DCC chip. That had since been dismantled and needed a new purpose. After a good clean. I reassembled it with a shorter Mashima 1020 motor. With back to backs adjusted and a light oil it started to run really rather well, and I'm thinking this is a good fit for my Class 156 refurbishment.
 
Lima Class 156 Interior

Stevers

Western Thunderer
Class 156 3D Motor Coach Printed Interior - Two Parts.jpg
First cut of the interior for the 'motor' coach. The size of the void can be easily tweaked (minimised) once I've installed the motor bogie and know how much headroom it will need.

[Edit] Revised render with one less row of aircraft seats and properly spacious loo. The interior now fits the windows!
 
Last edited:

Stevers

Western Thunderer
There don't seem to be any very elegant (straightforward) ways to solidly fit the Lima bogie frame to the Black Beetle motor bogie, so bearing in mind that the Lima motor bogie mounting is a sound bit of engineering, I thought I'd explore what the interior would look like if I retained the proven Lima drive.
Class 156 3D Printed Interior Lima Motor Coach  - Two Parts.jpg
The two seats in front of the lavatory compartment would be lost, but I can live with the end result and I won't lose a day trying and possibly failing to come up with a solution to fit the Black Beetle that I would be happy with. Visually it might be better if the curved partition wasn't there but I can play with that once it's printed. The Class 150 bogies are available from Bachmann at a sensible price, are much less of a compromise visually, and it would make sense to upgrade to those if a Black Beetle was to be fitted. At that point the cost of the Lima Class 156 + Underframe detailing + Bachmann bogies + Black Beetle would approach the cost of the RealTrack model. As this is a layout model to be viewed from distance (at speed) on South Junction, I'm going to pass on fitting the Black Beetle (and the loo).
 

AJC

Western Thunderer
I think that's a valid and viable compromise - and I wouldn't get too hung up on the curved element of the interiors, the windows in a 156 aren't that capacious in the scheme of things and, I think, are fairly noticeably tinted which hides a multitude. I daresay that includes the horrid moquette!

That said, I'm well aware of the potential for scope creep with this sort of project. My Jinty is a case in point - I think just one wheel set is left from the defunct but complete loco Bob had left, though the chassis lives on so little was actually wasted, albeit at the cost of bits for almost a complete loco. Eventually!

Adam
 
Last edited:

Stevers

Western Thunderer
I think that's a valid and viable compromise
And you're correct of course! But then, unable to save myself a whole load of trouble, I had a look at the cab end bogie on the 'trailing' coach, and that looks to be a better basis for fitting a Black Beetle, so one of those is winging its way to me for some experiments to see what's possible without ruining my Lima motor bogie. In the meantime I've been carefully stuffing any of the hollow 3D printed underframe detail parts with sheet lead ready to glue the mutilated underframes into the bodies and add the detailing that was all I was going to do before my chimp brain kicked off.
 
'Brightonised' Verwood (and Semley) Yard Crane

Stevers

Western Thunderer
Prompting an interesting diversion from what I should have been doing, a member of the Brighton Cirlcle sent me photographs of three yard cranes all on LBSCR territory. All have the same frames that look identical to Crawley (no surprise there) and Verwood. A reasonable conclusion is that they had the same origin. In each case though a different pattern of boom was fitted, with round, octagonal and square designs featured. Despite this all the Brighton examples seemed to have the same distinctive pulley and wheel metalwork that was quite different to that at Verwood.

Brightonised 'Semley' Crane 3.jpgBrightonised 'Semley' Crane 3A.jpg
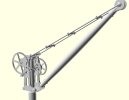
A photograph of one of the frames was particularly useful in showing parts of it never seen before. Using this I have been able to add missing detail to the Verwood and Semley Crane models, and produce a 'Brightonised' version as well. For all versions the base was extensively revised, the brake wheel has been enlarged, brake and ratchet have swapped sides, the bearings have gained end caps with bolts and the tiny cogs have all gained end plates too. The new purely 'Brighton' elements are the rollers and jib/boom.

Brightonised 'Semley' Crane 3B.jpg

Now back to that Class 156 armed with some newly acquired J&B 'Plasticweld' epoxy...
 

Stevers

Western Thunderer
DSC03260.JPG
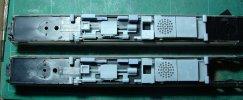
Such a clever idea and so well executed by Hurst Models! An absolute delight to fit, the JB Weld 'Plasticweld' epoxy seeming ideal for the job. It should be ideal to secure the remains of the Lima trailing cab bogie to the Black Beetle. I'll be squeezing strips of lead in the gaps, but with the fuel tanks and batteries already filled, and with the resin parts fitted the weight is already coming on nicely.
 
Top