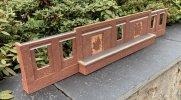
Rivermead Central

40057

Western Thunderer
A while since I have reported on progress. That’s partly because there hasn’t been much, model railway-wise. Warm and wet weather has seen overwhelming growth in the garden needing vegetation management, we have been on holiday etc. etc.

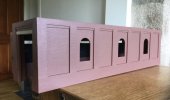
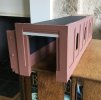
However, some further work on the Benham’s factory building has produced this:

928F9823-B756-484F-8130-AB2B9F97C4FF.jpeg

F6E6D3C6-C33D-4F4E-B2AF-9B4F66A47A42.jpeg

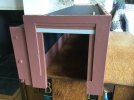
Compared with the photo posted on 16 May, the roof is attached to the walls and painting of the walls and roof is complete. Still to do are the windows and capping for the walls. The ‘Benham’s’ roof sign is being made separately and will sit on the roof without being permanently fixed.

I have started work on the adjacent Benham’s warehouse building. Photos to follow in due course.

The last month or so has reminded me once again just what a huge task it is to build a complete model railway measuring 23’ x 10’ and how many hours of work are required. Even with my renewed determination to prioritise the work needed, I am going to have to find some ways of reducing what I have to do. So, my first decision towards achieving that is to ask Stephen Fay to build my next building based on a kit. Once I have finished the Benham’s building, I will get back to rebuilding Lowko Track points — a task that I really have to do myself, and the rate limiting step for track laying.
 

40057

Western Thunderer
I have been working on the Benham’s warehouse building. This building abuts the Benham’s factory building. It slots into the space to the left of the entrance, covering the area with the three visible screw heads:

B4BA6C7A-C5BB-4511-9A0E-1B23783FB910.jpeg

On the layout, the warehouse will be sited to the south of the factory, against the west wall of the room. The Benham’s private siding will serve both buildings, the warehouse first, then the factory at the end of the siding (with the buffer stop inside). The warehouse will have an outside loading platform with two doorways for goods arriving/leaving by rail.

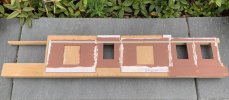
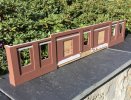
Construction is similar to the factory building. Plywood on a wood frame with the visible elevations covered by MDF panels from LCUT Creative. The warehouse building is in low relief with the main/front elevation only a little over 30 mm proud of the wall. The current state of construction is shown here:

EF24AFF8-D1FC-4D54-906E-0B179263C527.jpeg

Two more panels with rectangular windows are to go at the left hand end (ie. the same as on the rhs). The vertical joints between the window/door panels will be covered by piers and the parapet, arranged as per the factory building. The loading platform will be the length of the three central MDF panels (ie. the two with doorways plus the central window panel). I will model the building with the doors closed. The doors will correspond in height to the concrete lintel, not the aperture in the MDF panel. I’m inclined to put a canopy over the loading platform, but will see how the building looks without one before deciding.
 

40057

Western Thunderer
Some progress with the Benham’s warehouse building:

5C4228F1-0A32-4D24-BA80-4FD5C8017AF9.jpeg

I am painting this as I build because I thought it would be much easier to get the edges of the ‘concrete’ lintels straight and lined up if painted before attaching the brick piers to the wall face. I find that fixing the first few MDF ‘tiles’ is critical, especially on such a long building. Even a very slight misalignment, multiplied up as subsequent tiles are fixed relative to the first ones, would likely result in a visibly ‘wonky’ building. As it is, everything seems to be square/parallel and correct.
 

40057

Western Thunderer
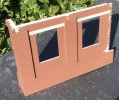
I have now made the ‘missing’ left hand end of the Benham’s warehouse building. Actually, I decided to make and assemble as one piece the rest of the front elevation and the short section of the southern wall included in the model:

D9FFB5BB-6E62-43A5-ACB1-12528C5B4B49.jpeg

I thought it would be easier to ensure the east and south walls were correctly aligned if the corner was assembled at this stage. The south wall is only 34 mm deep as the warehouse is modelled in low relief. As with the rest of the building, the lintels were painted before any piers were added.

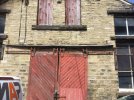
Next, I will join the two parts of the building and add the remaining MDF panels. Then I need to make and attach the loading platform. I have asked Poppy’s Wood Tech to make the warehouse doors based on these I found recently in Huddersfield:

07406301-D97D-4AF3-925F-E276607A0124.jpeg

The non-matching repair on the right hand door will not be modelled. I want perfect doors!
 

40057

Western Thunderer
Finally, the Benham’s warehouse building is in one piece:

0616B4EB-F4D7-4B55-8E4E-9199734889E5.jpeg

Narrow strips of brickwork are still to be added above four of the windows and one door. Otherwise, all the brick-effect MDF panels are in place. The position and length of the loading platform is now apparent.

The Benham’s factory and warehouse building project is proving to be realistic in a way I had not foreseen. Like so many full-size railway infrastructure projects, it is taking longer and costing more than anticipated. Expectations appear to have been skewed by that well-known problem, optimism bias. Fortunately, it looks like the time and cost over-runs will be to scale, so weeks and a few tens of pounds only.

Even with my lack of previous experience in making anything similar, I suppose I should not have been surprised by the amount of work involved. The combined factory and warehouse building complex is over 1.3 m long. I’ve seen whole layouts not much longer than that.
 

40057

Western Thunderer
Wet weather here today, hence more work done on the Benham’s warehouse building.

Sometimes, what should be obvious is not obvious.

It had been my intention to simply paint the walls of the Benham’s factory and warehouse in plain brick colour, so as to be in keeping with the usual approach adopted for pre-war commercially made model buildings built from wood. However, looking at them yesterday, it was very clear the Benham’s buildings were just not ‘right’ with their uniformly coloured walls. Somehow, despite copying the approach used for painting, my new builds really did not at all replicate the feel and character of vintage buildings. Comparing the new builds with the few vintage buildings I have showed the difference. The old buildings do not have walls of uniform colour. They will have done when new, but seventy years plus of handling and deposited dirt has made them far more realistic. The impressed mortared joints are paler now than the bricks discoloured by contact with hands. Upper surfaces have darkened paint from dust, soot and other air-borne dirt. Some colours have faded. To match the character of my vintage buildings, as they look now, my new buildings will have to be realistically weathered, at least to a degree.

Accordingly, I have now added ‘mortar’ to the brickwork on the front wall of the Benham’s warehouse, which has considerably improved its appearance:

FB3BBB6A-3C11-436A-BF47-3537B4CA2F1F.jpeg
 

40057

Western Thunderer
On with the loading platform for the Benham’s warehouse. As usual, the construction method is to use sheets of plywood covering a wooden frame:

D01A1358-5CBB-487D-B5E2-20F871FC3F93.jpeg

I tend generally to a ‘belt and braces’ approach. So everything is secured with both glue (PVA) and moulding pins. The two ‘V’ shapes cut in the front plywood sheet are to accommodate the heads of two large wood screws which will join the loading platform to the rest of the building. The brick-effect MDF panels will be applied to the sides after the platform is in place.
 

40057

Western Thunderer
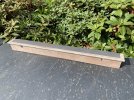
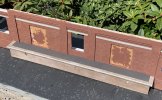
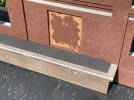
In line with the decision to apply some weathering, I have toned down the loading platform before attaching it to the warehouse front. I have also painted the white safety line on the platform edge as that would be more difficult to do neatly once the platform is joined to the rest of the building. I have two small holes to drill for fixing the railings at the ends of the platform, then it will be ready for attachment.

4C0C2BF1-FFD7-43DC-B9CF-9EF51F77A34F.jpeg
 

40057

Western Thunderer
The warehouse doors have arrived from Poppy’s Wood Tech. Also canopy parts, which I will get to in due course.

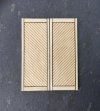
The first pair of doors now assembled:

D476DC83-2986-408B-A2C2-7DD1356092FA.jpeg

I’m pleased with these. A bit different to usual in their construction but right for the time. I will have to thin the visible edges from the back.
 

40057

Western Thunderer
I have previously posted photos and given descriptions of a couple of the locomotives I intend using to operate Rivermead Central. To date though, I have said nothing about goods and passenger stock. The first wagons I would like to describe are some made in the 1950s and retailed by Bassett-Lowke. I have about half a dozen of these.

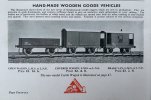
It’s probably easiest to start with what appeared in the Bassett-Lowke catalogues from c.1950 to c.1955 relating to these wagons:
E952E0B5-CA7A-455D-B3FB-92D1B2D77F42.jpeg

The catalogue description is accurate except the buffers on these wagons are turned blackened brass, not white metal. The buffers are not sprung. The above illustration was used throughout the period these wagons were listed in the catalogue. A couple of points in the description do change from one catalogue to the next; the wheels were sometimes stated to be cast iron, some years they were ‘made from anti-friction metal’. Some years the wagons were listed as being made in the colours of two railway companies (LMS, LNER), other years three companies (additionally, GWR).

I should say I have never seen a GWR example of these wagons and I am sceptical that these actually exist. British Railways versions however definitely were made but were never included in the catalogue.

The LMS merchandise wagon in the above illustration is a little different to the merchandise wagons I have and others I have seen. Perhaps the one in the catalogue illustration was the prototype. The regular production models are clearly shorter and with a shorter wheel base than the merchandise wagon illustrated in the catalogue.

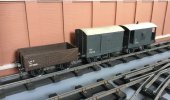
Here are the same three types as in the catalogue illustration photographed at Cavendish Goods earlier today:
77D5C246-163D-4C96-BF24-F7B27CC01239.jpeg

The open wagon and covered van have cast iron wheels, the brake van has alloy wheels. This suggests the changes in the catalogue description regarding the wheels were reflected in the models made. The LNER brake van models always seem to be in grey though I don’t believe the LNER ever used grey for brake vans; an unfortunate error. The bodies of the LMS and LNER brake vans are quite different corresponding to their respective prototypes. The goods van bodies are also different between the two companies. The merchandise wagons are all the same except for livery.

I am not sure how many different running number transfers were made but these seem to be applied randomly to the different vehicle types. By contrast, the transfers for ‘10T’ and ‘12T’ are both used on the merchandise wagons but I have only seen the ‘20T’ transfer on brake vans.

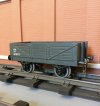
Several of the above points are illustrated by this example of an LNER merchandise wagon which has survived in pristine condition:
62125034-7BEE-4B5F-A42B-B53447CDC703.jpeg

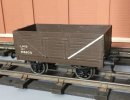
The catalogue listing of ‘open wagon’ gives no indication that the range included both mineral wagons and merchandise wagons, apparently sold for the same price. But both types turn up frequently enough for it to be clear that both were regular production items. The mineral wagon I feel is a particularly nice model:
7378DE96-6E45-4781-B8BD-9FCDFC612506.jpeg

The above example has been fitted with the type of single-link coupling normally fitted to Bassett-Lowke lithographed tinplate wagons. The alteration appears to have been professionally done, quite possibly at the factory prior to sale, perhaps to meet the requirements of a particular customer.

As with the merchandise wagons, the LMS and LNER liveried mineral wagons have identical bodies.

A brief comment about the cattle wagon mentioned in the catalogue excerpt shown above. This had much in common with the wagons just described but the sides and ends were plastic mouldings. These have not lasted well. Every example of the cattle wagon I have ever seen had been affected by shrinkage and distortion of the plastic components and was unusable.

A few general points about these wooden wagons. By the standards of the time, they are really very nice and look pretty convincing. They were by a large margin the most accurate wooden wagons ever offered by Bassett-Lowke. There wasn’t really a suitable goods loco to haul these wagons included in the post-war Bassett-Lowke range. I also wonder who actually made them. Bassett-Lowke used many suppliers to provide the range of items listed in the company’s catalogues. Whilst I don’t have any definite evidence, I don’t think these wagons were made at the Northampton works. They don’t have a maker’s transfer. The wooden wagon kits offered at the same time build into different models to the ready-to-run vehicles described above. This suggests to me that the kits and the ready-to-run wagons were from different suppliers. The kits, for example, have the same axleguard casting as the pre-war Bassett-Lowke wooden wagons had. I think the kits did come from Northampton.

I would be very happy to hear of any supporting or contrary evidence as to the possible manufacture of these models. Also, has anyone seen a GWR liveried example?
 
Last edited:

Allen M

Western Thunderer
We keep hearing about the cost of RTR models these days. I look at the prices for these and they go from £1 14 6 to £3 20 0 in 1955. I started work at 15 yeas old to train as an electrician. My starting pay was £1 19 6 for a 45 hour week.
What would a 16 year old on minimum pay be on now and how does it compare to RTR prices? Someone might know.
And look at the detail.

Regards
Allen
 

simond

Western Thunderer
The minimum a young worker can be legally paid is £5.28 / hour, so £211.20 for a full 40h week. MLW is £10.42 for those aged over 23.

A Dapol or Minerva wagon is about £55 (so about 10 hours) and a brake van is £90 (so about 18 hours) on their website.

I reckon quite a bit cheaper relatively speaking - you'd have had to work 39 hours for the open, and 70 odd for the brake van!
 

40057

Western Thunderer
An update on the Benham’s warehouse building. It now looks like this:

D56BB73E-EF9B-403A-95D1-69AB140C77FE.jpeg

Since I last posted a photo of this building, it has gained a roof (which still needs a final coat of paint). All the MDF brick-effect panels are now in place and painted. Still to be added are window sills and windows, doors, the canopy, railings at the ends of the loading platform and coping.
 

simond

Western Thunderer
You can start by doubling the price every ten years.

It’s 6.3something percent compound, and it’s really not bad, considering how simple it is.
 

40057

Western Thunderer
A follow-up to my post of 22 August describing post-war Bassett-Lowke wooden wagons.

Taking the photos for that piece reminded me that a few more of these wagons have been long-term residents of my for-attention-at-some-future-date pile of boxes. In fairness to myself, I bought these wagons some years ago at a time when life was somewhat fraught. However, having located them, all they really need is cleaning, some missing coupling chains replaced and, in one case, a minor repair. So getting all four to serviceable condition won’t require much effort.

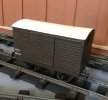
The four rediscovered wagons do throw up a few interesting points. First, here is the LMS covered van:

D32A2406-22F0-40C2-AE68-0872B1A59F6C.jpeg

Although the dimensions are the same, the LMS van is quite different to the LNER model, shown previously. A proper attempt has been made to portray vans belonging to the two companies. Personally, I think the LNER van is a far more convincing model, the LMS version having a slightly toy-like appearance in comparison.

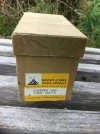
The above LMS van still has its original box:

254327DE-0A55-40F9-9ED5-C2C74A6B0D15.jpeg

What surprised me here was the ‘C I’ stamped top left on the box label. This can only be to indicate that the model inside has cast iron (as opposed to alloy) wheels. The LMS van does indeed have cast iron wheels. So although the catalogue, at different times, describes the range of wooden vehicles as having either cast iron or alloy wheels (see my post of 22 August), the type of wheels fitted clearly had some significance. My assumption is the price was different. For the range of lithographed tinplate wagons, alloy wheels were standard. But the catalogue description for these wagons specifically stated that cast iron wheels could be fitted instead for an additional charge of 1s 10d. No choice of wheels was offered for the wooden wagons. However, presumably, the prices given in the catalogue for the wooden wagons were, over time, slightly higher or lower depending on the wheels then provided.

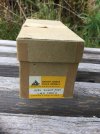
Finally, here is the slightly odd box label identifying the contents as an LMS mineral wagon:

9AF1FA9B-D680-41D7-9285-F5DA8BFDB211.jpeg

No ‘C I’ stamp in this case and the wagon has alloy wheels. Maybe ‘mineral wagon’ was considered too technical for those working in the mail-order department. The box I have for a merchandise wagon says ‘open wagon low’ on its label. What I don’t understand here is how anyone ordering from the catalogue would know there was actually a choice of two functionally different open wagons, since the catalogue description gives no hint that two types were made. So if a customer ordered, as per the catalogue, an LMS ‘open wagon’, what did he get? There is no confusion about the models themselves and what the different types are; the ‘open wagon low’ is a rather nicely modelled merchandise wagon, the ‘open wagon high’ is an excellent portrayal of an end-door-fitted mineral wagon.
 
Last edited:

40057

Western Thunderer
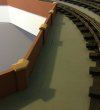
Further progress today with the anti-plunge wall.

All the intermediate brick piers are in place and nearly all of these now have their capping stones.

4D9BAA86-5623-431F-AAA1-20929B39AEBD.jpeg

I have not yet made the coping for the sections of wall between the piers.

There really ought to be more piers as the scale 20-foot spacing between the piers is excessive. However, each capping stone has to be individually made and each pier has to be filed to exactly the right height for its position. So, in the interests of not spending even longer on what is ultimately merely a wall, I decided two intermediate piers per section was my limit.

Each capping stone is glued in position but also held with two panel pins. The position of the wall on the layout, at the north end of Cairnie Junction station, means that it is liable to be leant against/over as locomotives are coupled and uncoupled (and wound up) on the adjacent tracks. So the nails are a precaution against the capping stones being accidentally broken off if caught in clothing or leant on.
 

40057

Western Thunderer
Continuing with the theme of wagons for Rivermead Central.

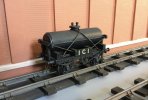
The post-war Bassett-Lowke wooden wagons previously described are going to be, for sure, the largest single element of the layout’s wagon fleet. But not anywhere near a majority. I aim to get a range of interesting wagons of comparable quality to represent not only different wagon types but also different model manufacturers. I have a number of examples already, including this one:

D8126D16-4CC4-4948-8E7D-B6418A20B09E.jpeg

What a characterful little wagon! It exemplifies everything I love about vintage model railways. The body is wood (including the tank). The fittings are almost entirely of brass. Both the buffers and couplings are sprung. It has independent either-side brakes, fully modelled. More to the point, the brakes work. The lever guards each have a ratchet down one edge to hold the lever in a down position.

It is not always easy to identify the origin or age of wagons made by one or other of the minor manufacturers offering good quality 0 gauge between the wars. In the case of the above I.C.I. tank wagon, there is no maker’s plate or transfer identifying the builder. Features of its construction though point to the Scale Products Company of Sheffield. I am confident in attributing the wagon to that maker. The date of manufacture is likely to be late 1920s or sometime in the ‘30s.

Good quality 0 gauge wagons like this tank wagon, dating from between the wars, are not easy to find. They will have been made in tiny numbers compared to the mass produced tinplate model and toy wagons of the era. Nor will they have been cheap to buy when new. Today, if you can find them, they can be bought for a fraction of the price some rare Hornby tinplate vans typically sell for. Essentially, not that many people now want them. The wheels alone mean they can’t be used on model railways with modern track. They are not what vintage toy collectors look for. In fact, I think the I.C.I. tank has wheels that are too fine to work on Hornby tinplate rails. They are perfect for my track though, and the wagon is perfect for my railway. I love it.
 

40057

Western Thunderer
The private siding serving the Benham’s factory and warehouse is the back siding (ie. nearest the wall) in a fan of three sidings behind Cairnie Junction station. All three sidings are a good length, the Benham’s siding being just over seven feet, the longest of the three being nine feet. I have laid the plain line but now need three points, which will have to be rebuilt as described in my post of 3 April, and three buffer stops.

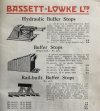
Bassett-Lowke sold three types of buffer stop that could be used with Lowko track. This is the relevant section of the July 1933 catalogue:

5BC4B975-C3E3-49B2-AF42-464C5CCBD84C.jpeg

The hydraulic buffer stops were made up of folded tinplate clipped and soldered together. They were also sold after WW2 and are very common. The version made for ‘tinplate rail’ will join to Lowko track. Not right for my sidings, obviously. Strikingly similar hydraulic buffer stops were made by Hornby (ie. Meccano Ltd) and Bing. The Bassett-Lowke sleeper-built stops are all-wood construction and fairly easy to find. It wouldn’t be appropriate to use one of these for the Benham’s siding where the buffer stop is inside the factory building. Which leaves the rail-built type of buffer stop — the problem being that these turn up very rarely. The reason for the relative scarcity of the rail-built stops has to be their high cost. In 1933, the price of Bassett-Lowke’s 0-gauge standard open (merchandise) wagon was 2/9, the buffer stop was getting on for three times that amount. Not many people would prioritise buying a buffer stop over adding more wagons to their railway.

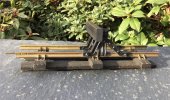
Some years ago, I obtained three wrecked examples of rail-built buffer stops fitted to Lowko track. I decided to see if I could repair one of these to use on the Benham’s siding. It won’t show, as it is inside the factory, if it’s still a bit distressed in appearance. For this location, as long as it functions, it will do.

I finished the repair today:

42D39873-835E-444D-BF6A-A1D824587CD6.jpeg

This one has (clearly) brass rails and these are very prone to getting dented and crushed. The rail on the far side in the photo is a replacement as the original was mangled beyond retrieval. I also had to repair a long split in the buffer plank caused by a large nail being used to hold one end of the plank in place (instead of a missing small screw). Overall though, it has cleaned up pretty well and is more than good enough for its intended use.

The catalogue listing described the rail-built buffer stops as being fixed on a piece of track nine inches long. It seems though, from the small number I have seen, that the rail-built buffer stops supplied with Lowko track were usually only seven-and-a-half inches long, ie. half the length of a standard fifteen-inch long piece of Lowko track. That length, with three sleepers, as per the photograph above, seems to be the most common configuration for Lowko track rail-built buffer stops.
 
Top