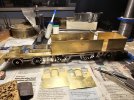
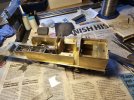
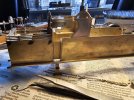
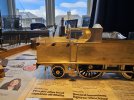
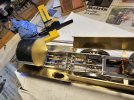
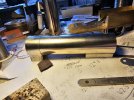
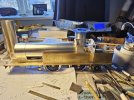
Nick Dunhill's workbench - Gladiator Kits LNWR 4-4-2T Precursor tank.

Nick Dunhill

Western Thunderer
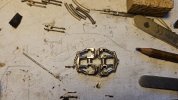
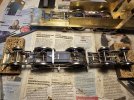
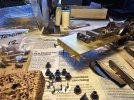
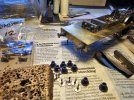
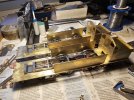
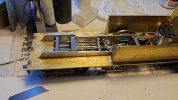
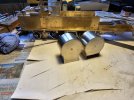
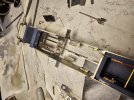
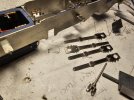
The cylinder blocks were a doddle to fit. They just needed a smidge off the sacrificial layers round the sides. The slide bar castings from Laurie Griffin needed a fair bit of fettling and a lot of straightening and realignment. A bit of patience paid off though. I also made the connecting rods supplied as etches from Mick D.
53527518724_1a4e28d62e_b.jpg

53527518774_bcb22d3515_b.jpg

The 3D printed cylinder block is pinned in place with brass rods, and glued to the frame with epoxy.

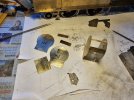
The crank castings needed a fair bit of fettling and straightening too. Maybe it's time for some new moulds for the waxes?

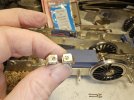
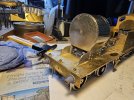
The crank axle was held in position in the photo shown below. The crankpins on the wheels fall on the points of the square bosses on the axle ends. This means that the crank casting could be carefully measured and positioned for soldering. Usually the crank webs are an interference fit on the axle and will be a push fit for soldering. These were a sliding fit so needed some clamping.
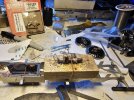
53527206326_3e5eb08f35_b.jpg

The crank castings were soldered one at a time, and then the axle cut and loads of cleaning up carried out. I use electrical solder and Baker's flux.
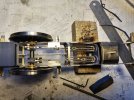
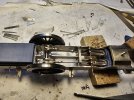
53527384593_a4fd8cea80_b.jpg

53527384538_9f6fa4ce05_b.jpg

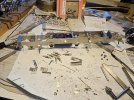
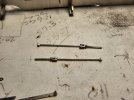
The anchor points for the anchor rod were fixed to the lower slidebars, as were oil pots to the uppers. The rest of the day was taken up with making valve gear rods from the etches Mick produced.
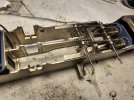
53527384668_1e1a250437_b.jpg

53527207021_eef24a8135_b.jpg

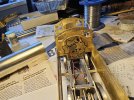
The valve gear comprises etched parts and Laurie Griffin castings. I don't hold out much hope for the castings, as they are a generic set and I have concerns that they won't mate with the etched parts copied from the GA. We will see, when work recommences on monday!
 

Nick Dunhill

Western Thunderer
53527639720_2e4cd47505_b.jpg

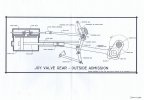
It has been about Joy valve gear most of this week. I assembled all the Mick Davies etchings which went together without much trauma. The LGM castings were a different kettle of fish. The reversing shaft had different centres from the cylinders, so needed to be narrowed (shortened?)

53547380171_9311259770_b.jpg

I did this by drilling through the middle of the joining shaft to allow a rod to be inserted for alignment. Then I could cut out as much as required from the joining shaft. The quadrant blocks needed a lot of fettling before they'd fit inside the reversing shaft, then both guides needed to be widened to accept the lifting links. Quite a lot of modification, but the castings were generic parts, so it was to be expected.

53547711294_817303d8ff_b.jpg

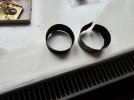
I had to make bearings to fit into the 'holes' in the ends of the reversing shafts, the bearings support the outer shafts. I had to massively thin the cast trunnion blocks so that it they would support the reversing shaft inside the frames.

After a few days of cutting, fettling and fabricating, I assembled the motion and it worked perfectly first time. I was very smug for several hours.


You certainly get more bang-for-your-buck than with Stephenson Link or Walschearts.

The rest of the week was spent fabricating brake components from the etches, and fitting Lego to the chassis (a nice easy job for a friday.)

53547568638_7423dbb433_b.jpg

Next week will be taken up with reassembling the Stirling Single and GWR 155, which I am expecting back from paint.
 

Nick Dunhill

Western Thunderer
53578660633_674e80cd4c_b.jpg

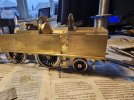
I managed to get both chassis finished for Kettering and had one with me as show and tell. I added all the sand boxes, the operating rods for the sanders, reversing rod and the cylinder drain cocks. I also added a representation of the drag boxes.

Reunited with the footplates, I set about making self contained buffers. The buffers in the kit were a bit too chunky for my liking, and the Slater's Cooke type buffers you can see lurking in the background of some of the above pictures were the later types. I had been chatting with Mick Davies about a 3D printed solution, and we hit on an idea to print stocks that could be slid over brass tube attached to the buffer beams and containing the buffer head mechanisms. I used the Slater's buffer heads in the Cooke sets.

53576732650_93f85c40bf_b.jpg

53575422862_918e8b88a3_b.jpg

The buffer heads had to have a brass sleeve fitted over the shafts to fit the brass tube, and the brass tube had an end stop installed inside. This would have been much easier if I had a lathe, and could have turned some bespoke tubes. I think that this method will solve the issue of locating decent buffers, and problems with the badly cast and drilled stocks that some have.

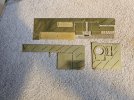
I tackled the body parts next. The tank sides and fronts are, in typical Meteor fashion, all one piece. Their front sections are designed to go all the way across the footplate, which of course they did not in real life. Luckily I was able to correct this. I had problems with the tabs not fitting in the slots properly, so had to run a 0.5 mm drill along the slots to give clearance. The bottoms of the tank sides were a bit wobbly, as I suspect they were hand drawn, and had to be adjusted. I also had problems with the bunker. It's designed to be folded into a U shape and the tabs dropped into the slots on the footplate. The fold lines on the etch were too narrow and a 90 deg bend wasn't possible. I had to force them slightly, so inevitably they splayed out a bit and the resulting U shape was too wide for the slots. I had to break one side off and fit separately, adjusting the width of the rear section to suit. Annoyingly, the bunker sides and back had pre etched holes for the handrails and steps that appeared in LMS years. I had to fill them all with solder and make good. It would have been better if there had only been dots on the rear to mark drilling positions if needed, but there you go.....

The cab rear was too narrow to fit between the sides (!) so I had to solder thin strips to the front edges of the rear cab openings and file the width of the cab rear to fit. The water tank tops in the coal space were too small as well, but they'll ultimately be covered in coal, so I added strips to fill the gaps. To my complete surprise the beading etches for the tops of the water tanks and bunker fitted perfectly. I was just very lucky I suppose.

53576501493_eace0292a9_b.jpg

53576291076_1e7eb43c79_b.jpg

The etches in this kit are just a bit poor in their execution, and have building standards from the 1980s when they were drawn. Things have moved on a bit since then, but I suspect that it would be possible to build something resembling a Precursor using them as intended. Luckily the etches have generous spacing on the panels, which leaves loads of metal for cutting out replacement pieces.

53576615889_c9c5253620_b.jpg

Cab interiors etc next.
 

Nick Dunhill

Western Thunderer
I began the next week of work on the locos by building the coal rails. The coal rails on the real thing look like they're made from half-round beading-type material. They're certainly not flat like the etchings for them in the kit. The kit etchings also have cusps that are inaccessible to all my files, and don't have the relief between the upstands and rails......and they don't quite fit either. Anyway they're now in my bits-box to be cut up and used elsewhere.

53589739402_6832877035_b.jpg

The spacings on the drawings scaled out at 1.2 mm half round separated by 0.6 mm gaps. I soldered the upstands into the coal space. I used the water tank top etchings supplied (even though they were slightly too small,) and they have registration marks (possibly in the correct places, as I didn't check!) for the upstands. I laid 0.6 mm rods onto the beading and soldered on a layer of half round strips, made good, and moved upwards. It doesn't take as long as you'd imagine to do this, but you do have to check carefully that all is straight and square and parallel as you go. The corners were formed as each layer was completed.

They look miles better than a crappy etch.

53591057350_a1b127f741_b.jpg

The tool boxes and water fillers will hopefully arrive this week as 3D prints, and I'll be able to finish the coal spaces.

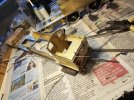
Moving on to the cab. The cab front and rear just about scrape into the 'Acceptable' category. A big failing is that they have a row of etched rivets under the roof beading. The rivets should actually be ventilation holes, and, as there isn't enough budget to make new ones, I modified what I had. I had low expectations that the tank etchings for the inside of the cab would fit, as I have changed so much of the rest of the loco. However, they did without too much cutting. I had to reduce their width and cut away the front to accommodate the backhead casting. The white metal backhead casting in the kit looks like something that fell out of my worm-hole to the 1970s, with all the fittings and pipework pre-cast onto it. I'll melt it down for ballast, or donate it as a fishing weight. Luckily Laurie Griffin does a decent alternative, more about that next week.

53591057360_05c4eef61e_b.jpg

The cab sides in the kit are part of the tank sides etch. They're half etched onto the top of the tank sides, and the beading strip that you fit to the tank sides is recessed to accommodate it. The original etching doesn't portray the step between the tank and cab sides adequately, so I cut the cab sides off and made some better ones. The cab sides on the real loco look like they overlap with the inside of the tank sides by a couple of inches, and are held in place with a large long plate, hence the row of rivets on the bottom of the cab side.

53589747492_14a1071731_b.jpg

The cab roof etching in the kit is the correct size! But, it is etched in 0.6 mm thick brass (as is the rest of the kit.) This is a bit too thick to be able to form the subtle curves in the edge of the panel without a form-tool and an hydraulic press. I did at least use one of the roof etches. I used the material to cut out the roof ribs for the centre of the cab roof, absent from the kit. Anyway more cab roof forming next week.

The last job of this week was making and fitting the cab and tank handrails. I made the taper in the handrails by spinning lengths of 0.8 mm NS rod in a mini drill and filing them on a block of wood. You soon wear a slot in the wood which helps greatly. The handrails are detachable, to make the painter's life easier, and sit in a cup on the footplate made from a short length of 1.0 mm thin walled tube. The holes pre-etched into the ends of the cab and bunker beading, for the tops of the handrails, had to be 'manipulated' to allow the handrails to have even spacing. This is always an issue on tank loco kits.

53590938764_90ef54f18c_b.jpg

The poor quality of the kit is starting to compromise the cost of building these models to a reasonable budget......as a lot of kits do. More making-good, scratchbuilding and general grumbling next week. I'll be finishing the cabs and having a massive moan about the awful etchings supplied, and 'pre rolled,' for the boilers.
 

Genghis

Western Thunderer
Always interesting following your builds! A couple of observations: I am not sure how old your kit is but I am surprised it is formed from 0.6mm brass. The standard for this kit is 0.018" or 0.45mm. Completely agree about the coal rails: when we know it's required we pack half round wire that as an overlay makes a decent improvement.

We have a few really old kits in the range that could do with upgrading, but we have to ask if it is worth the expense? I checked this morning and in the seven and a half years that we have owned Gladiator we have produced 6 of these kits, one of which is still in stock. We did invest in a new mould for this kit to make some of the castings that were required. As you know, we were interested in the possibility of replacing the crude frames for this kit with the one that Mick designed, but Mick has explained that the etches you are using aren't really suitable for commercial production and I agree. So do we go to the expense of having the kit redrawn when demand is likely to be so low? Or would a redrawn kit excite the market? It's an expensive investment to test that theory.

We do have a policy of upgrading kits where required when we can. However, funds are limited. We have invested nearly £10k this year in new designs and upgrades. This is a significant part of our turnover. It is best directed at the more popular kits, which is what we have done.

Dave
 

Nick Dunhill

Western Thunderer
Thanks for your generous reply Dave. The kit is, I suspect just a product of the age. My problem now is hitting the estimate for building the pair, due to the amount of replacement part I am having to make. Mick is correct in that the chassis only fits the rest of the kit with some pretty big modifications. From the rumblings I hear, Mick is seriously considering some new body etches when this kit crosses his workbench.

I did consider using your coal rail etches and planting half round on them but didn't as I couldn't clean up the etching cusps between the rails. I thought it would be quicker just to make new.

I understand the issues if economics you face with this kit, and indeed you could build a basic model of a Precursor tank from the kit. However my brief was for something more detailed.

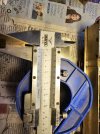
The pic shows a roof panel between my vernier jaws. Perhaps some of the tab/slot and folding issues are because the wrong thickness brass has been used by the etcher.

I can see that you have struggled to form the boilers from this thickness material, and I'm not going to try and manipulate them into a cylinder. It's quicker just to cut out new ones from 0.3 mm NS.

The boiler has etched slots for boiler bands. These will land far too proud of the boiler surface, and they're too narrow. I'm hoping to use all the supplied parts for the smokebox though. It just depends how they fit with the modified chassis.
 

Attachments

  • 17106647155058780677792806896982.jpg
    17106647155058780677792806896982.jpg
    149 KB · Views: 29

mickoo

Western Thunderer
One thing to consider regarding material thickness,

Nicks kits could be 20-30 years old and long before David took over the range, whilst David supplies 0.45 the previous vendors may well have supplied something different.

I have just opened my box which I think the client bought recently and the roof is 0.45.

One thing I have noticed, and I’ll stand corrected if wrong, is that David’s packs all the castings in one long strip of little sealed bags, previously they were just packed into a few larger bags like most kits, that sometimes helps date a kit or define ownership.
 

Genghis

Western Thunderer
Nick, no worries.

I've just measured the kit that is coming to the top of my to-do build pile and that is 18 thou so hopefully I'll have fewer problems!

I wish kit designers wouldn't design boilers that have a cut out for the motor. The changing stiffness of the section makes uniform rolling very difficult. If your kits have been rolled from 22 thou that would have made the problem worse. I don't like the half etched relief for the boiler bands either. As you say, an easy job to roll some thinner material into a tube, use that and cut out where necessary.

Dave
 

Genghis

Western Thunderer
One thing I have noticed, and I’ll stand corrected if wrong, is that David’s packs all the castings in one long strip of little sealed bags, previously they were just packed into a few larger bags like most kits, that sometimes helps date a kit or define ownership.
That's a dead giveaway! But for the sake of accuracy and domestic harmony, Trisha packs the parts into the strips!
 

mickoo

Western Thunderer
Regarding replacement etches, like Nick and David I'm also working with a budget, not just mine, but Nicks clients too. It takes time to draw them up, error check and get processed, a lot longer than I've been willing to admit previously.

If you have big large slab sides or simple shapes it is more economical to simply cut by hand, the Mercian 2-4-2T is a good example.

However, sometimes it is worth expending the energy and cost for new etches, but even then there are economics involved and if you can get more clients involved then the cost lowers between all of them. Nick and I build in pretty much in the same way, so its very easy (for me) to design etches that I know he can work with economically. Therefore the etches are more akin to (a personalized) good aids to scratch building, converting those to kit level is a huge step beyond in may cases.

In the case of the chassis, all three clients wanted something more; so a lot of energy and cost went it to those and again they are designed to go together in a manner that suits myself and Nicks build style. Having a frank discussion with David at Kettering, we agreed that converting those for a wider market would be cost prohibitive, more so since David has shown the sales figures above.
 

Nick Dunhill

Western Thunderer
My castings are in long strips in the DJH style. Maybe I should just appreciate the fact that there is a kit, and just treat it as an aid to scratchbuilding. Fact is that even if it was a detailed modern kit we'd still be modifying it to get where we wanted to be!
 

mickoo

Western Thunderer
My castings are in long strips in the DJH style. Maybe I should just appreciate the fact that there is a kit, and just treat it as an aid to scratchbuilding. Fact is that even if it was a detailed modern kit we'd still be modifying it to get where we wanted to be!
Sounds like a modern one then, interesting about the material thickness though.

Yes you're 100% right, we were both going to have to do battle on this project and your comments on legacy kits is valid, they are of an age that has passed, people require more and the only way to do that is bespoke supplementary etches or breaking out the fret saw.

Anyway, this'll cheer you up, in the post today along with the rest of the bits :thumbs:

9b643c78-8fd4-40c0-9b79-f0900bce3cb9.jpg
 

Genghis

Western Thunderer
My castings are in long strips in the DJH style. Maybe I should just appreciate the fact that there is a kit, and just treat it as an aid to scratchbuilding. Fact is that even if it was a detailed modern kit we'd still be modifying it to get where we wanted to be!
Oh well .... guilty as charged! Strange about the thickness but I know that sometimes PEC changed size if they couldn't get 18 thou brass. I checked again and the last order for these was completed just before PEC ceased trading. Likely they were using up stocks of sheet. Apologies.

Dave
 

Nick Dunhill

Western Thunderer
I did get a very useful bag of lego from Mick Davies last week and installed it all on the model.

53605603069_eeff6f3b79_b.jpg

Here's the toolboxes and water filler in the coal space. I put some lead sheets inside the bunker. They were painted in an etching primer first and glued in with epoxy resin. I painted the lead sheets first as one of the models is going to a hot tropical climate. The client is worried that the lead will corrode, but painting should prevent this. I closed the coal space with a sheet of brass and sealed round the edge with more epoxy resin. When I glue coal in the bunker I use a thin skim of real coal on the top of the bunker, held in place with acrylic varnish diluted with water. Sealing up the coal space prevents varnish running all over the model. You can see that I coloured-in the bunker in with a Sharpie. This is to check that there's no visible witness marks left over from filling the pre etched handrail holes with solder.

53605475693_52ea673cb5_b.jpg

This is the cab interior with all the structures in place. You can see the 3D printed front platform, what a time saver.

The kit includes this backhead casting.

53605677730_ca3bdeb354_b.jpg

Luckily Laurie Griffin does a good backhead set for large LNWR locos that fits very nicely.

53605475713_d04ec30f73_b.jpg

A worthwhile upgrade I think. Here's the finished cab.

53605214891_340f83398c_b.jpg

I also made some new cab roofs from 0.3 mm NS sheet, which is much more manageable than the 0.6 mm thick brass ones in the kit.

53605426763_18b5fbb64f_b.jpg

53605426773_2beb0080ae_b.jpg

They are detachable so you can marvel at the cab interior.
 

Genghis

Western Thunderer
Laurie's backhead sets are really nice. We pack them with the larger LNWR loco kits and with the new crab kit. There are still a few ex-Meteor kits that use the old 'Majestic' models backheads but we're moving away from them with time.
Dave
 

Nick Dunhill

Western Thunderer
Since my last post I have moved the build project on by adding the 3D printed balance ducts between the front and bunker tanks. They're behind the cab steps, and also have a pick up pipe for the injectors, which passes round the rear driving wheels, so will have to be attached post-paint. To complete the under-footplate detail I need to add the vacuum pipes and end connectors and possibly the train steam heat pipes. I'm not clear whether Precursor tank locos would have had steam heat equipment fitted from new. These locos were built in 1907, and all the grey works photos of Precursors I have found DO have steam heat pipes on the buffer beams. It was always my understanding that carriages did nor have any provision for steam heating until the 1910s, and often early pre-grouping engines were not equipped with heating equipment from new. If anyone is able to enlighten me about carriage heating on the LNWR I'd be grateful, or maybe the pipe I'm looking at on the buffer beam is for steam brakes or somrthing else?

Next up was finishing the portion of the chassis frames sticking up above footplate at the front. The chassis isn't split at footplate level, as is often the case with kit locos. Micks design has an overlay for the outer face of the chassis frames attached to the footplate. These carry the rivet detail, and extend to the front beyond the smokebox front and valve chest. This creates repercussions with the width of the base of the smokebox. The Precursor is unusual in that the frames pass through the smokebox. I decided that the best course of action was to add the overlays, measure up and make custom smokeboxes.

53635175699_c358c5e6e5_b.jpg

Here you can see the front of the loco after the frame overlays have been added. They extend down the insides of the water tanks and stop at the front of the firebox. I can't rule out having to chop the overlays short as they disappear behind the tanks, as I will need to close the water tanks soon, and there's an inner panel that needs to pass between the frame overlay and the back of the wheel. There may not be enough clearance, we will see!

With the overlay in place I was able to take measurements and cut parts to make a pair of smokeboxes.

53635283065_41ab3807c6_b.jpg

53635283075_d9f90a6f7d_b.jpg

I made the smokeboxes and cut away the bottom of the front and rear formers, and the bases, to form a structure that straddled the loco frames.

53633944142_645f16725e_b.jpg

53635047153_e8fffc028a_b.jpg

The rivet detail was embossed before forming the parts, and the fake bolts added after. The fake fastners are from this German range


The etches for the smokebox in the kit didn't fit, as we've moved so far from the original kit design. I did entertain the idea of modifying them, as it would have avoided a lot of rivet embossing. The problem was that the front of the kit smokebox etch needed narrowing, and I would have lost the line of etched rivets near the bottom. Also I suspect the wrapper would have been too short.

The kit boiler etch is just not viable. It was etched in 0.6 mm thick brass plate and is just too thick to manipulate. It also has half etched rebates to drop the boiler bands into. These are just wrong, and I used the boiler bands supplied as beading elsewhere. Into the bin-o'-shame.

53634053952_62e0ce60be_b.jpg

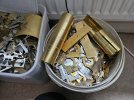
As a happy aside it turned out that my motorcycle needs sleeves to fit round the exhaust pipe headers as they pass inside the cylinder head castings. They need to be of copper/brass soft material of 0.6 mm thickness, so I have a supply of the correct material for the forseeable.

53634053932_9466c61604_b.jpg

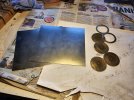
Last job of the week was to cut out all the parts to make boilers. The formers are cut from 0.45 mm brass and the wrappers from 0.3 mm NS sheet. I managed to approximately form one and then ran out of hours in the working week.

I sense I will have quite an annoying issue to overcome at the start of next week. The cab front has a boiler shaped former half etched onto it, and I can see that it is going to come into conflict with the boiler I have just made. I think the kit boiler is slightly too large, and mine is correct, and the stupid former will get in the way!! I should have made a bigger boiler and smokebox to overcome the issue, and not read and copied the stupid drawing.

53634835396_f77d82d3bd_b.jpg

53635174379_ac1baa87a9_b.jpg

53633944197_03e592272b_b.jpg

53634974371_8177365378_b.jpg
 

Dave Holt

Western Thunderer
I suppose it would be too much a stroke of good luck if the oversize etched former matched the O/D of you new boiler or, if even bigger could represent the angle sealing ring often present between firebox wrapper and cab front?
Dave.
 
Top