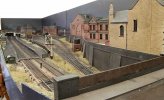
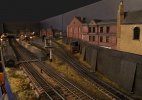
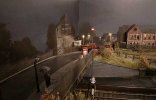
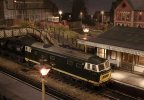
Brettell Road, 1960s black country (ish)

Herb Garden

Western Thunderer
Ah now that makes sense! Thanks for clarifying. To someone like me not too familiar with the midland Locomotive history it seems simple from the outside and the more you dig the more you find out it is anything but
 

Herb Garden

Western Thunderer

Jim smith-wright

Western Thunderer
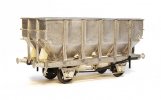
When my friend Tom kindly gave me the Ks kit for the Coral glass wagon (featured earlier) he also gave me another Ks kit for the 24.5t coal hopper. Further investigation showed that this was a kit that was based on the prototype B333000 which was not really like the production ones in that the ends were different. I suppose back in the day this was your only option however now you can buy 24.5t hoppers ready to run this strange little oddity might have a little value as something different from what everyone else is doing.

B333000 was one of 2 prototypes and was built at Shildon. The other B333001 was built at Ashford and it seems to heave been this latter example that influenced the production run. I believe B333000 was later used for experimentation of the automated doors used for MGR trains but photos of it are rare as hens teeth. Simon Bendall kindly supplied the only picture I had to work from.

So, breaking a golden rule I have had to make educated guesses about some of the details of this wagon. The underframe in Simons picture is very dark and looked to have been modified in some way. It was claimed the Shildon design was basically a taller 21 ton hopper and the lack of outer discharge doors kind of backs that up. So getting hold of a parkside 21t kit to use as a guide I set to work.

Ks-24.5t-hopper.jpg

The hopper had some chunky mouldings on the inside of the corners that gave quite a positive location. But as I wanted it to be empty they had to go. I replaced the W Irons with Bill Bedford sprung ones (from my nearly depleted stocks) and Wizard model axle boxes. These were soldered in place as supplied and when I was happy everything was square the centre of the w irons was cut away to give an open floor. The end platforms were replaced with a bit of brass as the moulded ones sat on top of the solebars and were too thick. The kit had no hopper doors so these were made from plasticard using a parkside 21t hopper kit as a guide.

The finished wagon (well almost finished - I haven't added the door mechanism handles yet) is a bit of a heavyweight in that its 78 grammes. About 50% more than my usual target of 50g.

parkside-21t-hopper-raw.jpg

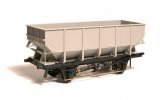
The parkside kit built up. This is the opposite of the Ks kit as while i added some lead overlays to the inside lower hopper its a tad light at only 38g.

Moving away from hoppers I've also finished of the construction phase of this...

David-Geen-milk-tank.jpg

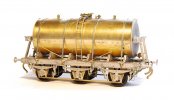
A David Geen milk tank which I was told by the man himself when I brought it was the last one! This uses a Rumney models chassis and has, to be honest, been a bit of slow burner. Its one of those kits that I just seemed to struggle to get any enthusiasm for but I'm pleased with it now it's done. I thought the hopper was heavy but this weighs in at 88 grammes!
 

Allen M

Western Thunderer
A question.
Are you going to model a few of the condemned old wood body wagons that when to Wallows Road shed and cut up to be melted down in the Round Oak furnaces?

Regards
Allen
 

Jim smith-wright

Western Thunderer
A question.
Are you going to model a few of the condemned old wood body wagons that when to Wallows Road shed and cut up to be melted down in the Round Oak furnaces?

Regards
Allen
Somebody else mentioned that Allen and its an idea i have in the back of my mind. Its not just wagons though some locos went for scrap there too and not just EOD ones.
 

Herb Garden

Western Thunderer
Is it just me or do metal kits always just seem a bit 'meh' once they are painted?
My other half always says that she prefers my models in the raw brass as you can appreciate how there are made as you see the craftsmanship (bodging in my case). And I do agree with that in part.

On the other hand metal tarnishes and by painting the model transitions to being part of a greater landscape.....

Ooo how philosophical

Herbie
 

Jim smith-wright

Western Thunderer
new-RH-fiddleyard.jpg
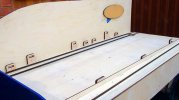
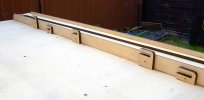
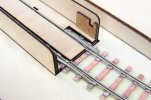
Ive mentioned before that enlarging Brettell Road would mean I need to build new fiddleyards. The reason for this is the way the cassette system worked was to have a recess in the board which given that the layout is now 2 tracks meant the old ones couldn't really be made to fit. I also took the opportunity to make some improvements and the result can be seen above.

The boards are 6 inches longer and this time I've included a little barrier on the near side edge to stop anything falling off It never did but it was something that bothered me.

higher-level.jpg
View from the front. I decided that the Round Oak industrials running on the mainline was a no-no, so now they will appear from the right of the layout behind the warehouse. As the mainline drops away this means that i needed a different level for this bit.

With the cassettes I have also made some improvements. The originals use 9mm ply which as it was unsupported did bend somewhat. I now have 3 sizes instead of the original 2. A short one for locos, A medium one for units and a long one for coaches/wagons. I have made the long and loco ones reversible but I only expect to reverse some of the locos.

cassettes.jpg
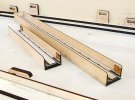
Pictured are the loco and unit versions. The base is 9mm MDF this time.

little-bumper.jpg
The little bits on the inner ends are for rudimentary buffer stops. This stops the trains running off the end but also adds a little security when lifting the cassettes so that nothing rolls off.

connector.jpg
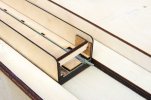
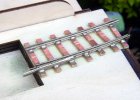
The way they connect is a tweak on my original design of using a bit of flat bottom rail on its side - positioned in the web of the running rail for alignment and electrical connection. Originally these were both sides and the rails on the cassettes were angled outwards a little for a good fit. Making the loco cassettes reversible main this wouldn't work and so a small bit of 0.6 straight wire is soldered to the inside of the web to help with alignment.

connection.jpg

You may be wondering what the little blocks are for in the first 2 pictures.

cassette-storage.jpg
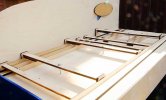
Taking a hint from Amlwch (a layout i used to help out with) I decided to make the storage of the cassettes integrated with the fiddleyards. This one will store the locos and units, the other one the long cassettes. Most of the braces slot in place meaning I can lock in place 8 unit cassettes with just 3 bolts and 16 loco cassettes with just 2. The less time spent faffing about at an exhibition the better!
 

Jim smith-wright

Western Thunderer
Today, 21st June 2023 marks a small but significant date in the life of Brettell Road, in that it's exactly 2 years since Tim and I first cut wood for the 2 new baseboards. I think it fair to say that a reasonable amount of modelling water has flowed under that particular bridge since that day and I'm now drawing in to the layouts final destination somewhat.

Drawing being the word as the big thing thats always been missing from any pictures of the new boards is the backscene. Long time readers may recall that this is an area of the layout that I have revisited on more than one occasion and, with every intention of this being the last time, I find myself deciding to get this particular subject closed off once and for all.

The method

The method I use is like modelling but in a 2 dimensional world rather than 3. Starting with drawing up the basic structure in much the same way as I do the modelled buildings.
illustrator_building.jpg
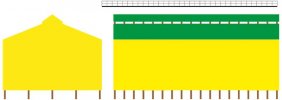
Above is the basic drawing of a typical industrial shed. Think of it like a kit of parts. This is done in Adobe Illustrator and the rather bright colours are simply so that they are easily selectable at the next stage.
larger-main-shed-board-1.jpg
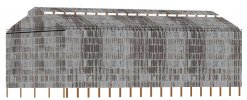
Which is to transfer the basic drawing to Photoshop where Scalescenes textures are overlaid and the bits 'assembled' into something resembling a basic 3d building. You will note theres no shading and no perspective yet.
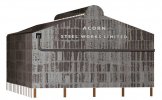
acorn-shed.jpg
A different building showing some shading and some perspective. The image is still made up of separate parts in a folder so that I can fine tune it once applied to the finished backscene.
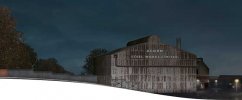
board-1-end-copy.jpg
Of which this is the end board for the left of the layout. Some consideration, such as the metal fence, needs to be made for elements of the layout that will cross from the 3d world to the 2d one. The line the railway takes, under the bridge on the left is hinted at by the arrangement of the trees.
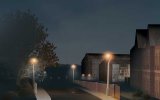
board-1-backscene-copy.jpg
This is the view of the bottom of the hill on the left. Again the wall and the building on the right of the image are intended to match up with the 3d model.
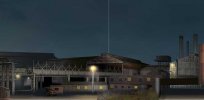
middle-factory-scene-copy.jpg
And finally the middle bit of the 2 new boards. Based on images of the real Round Oak. Of course the point of all this is that its there but not really all that noticeable at the same time.
 
Last edited:

Jim smith-wright

Western Thunderer
BR-backscene-1.jpg
My Back scenes have been printed onto self adhesive vinyl and most of them mounted to the boards. Just the last one still to do. I used a local company who kindly did a couple of test prints so i could tweak the colours. Anyone local to Stourbridge area who are after something similar I can highly recommend them - Marine Graphics, Sign and Print | SAC Graphics SAC Graphics

BR-backscene-2.jpg
BR-backscene-3.jpg

Below is how it looks in something close to the intended light.

BR-view-from-the-bridge.jpg

BR-hill-street.jpg

D7022-@-BR-july-23b.jpg

47238-@-BR-july-23.jpg

smokey-deeley-bw.jpg
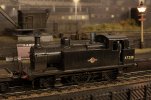
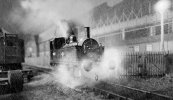
Haven't done a bit of photoshopery for a while but i found a pic of a Deeley tank in a cloud of steam and thought I'd emulate it
 

Jim smith-wright

Western Thunderer
Thanks Michael. It's been a lot of fun finding my way with this. Not having done steam locos before was ok but when it came to wet and dark there wasn't a lot of prior examples to follow really so I kind of had to wing it.

Having said that's where's the challenge in kinda going through the motions and just repeating the same thing over and over?
 
Top