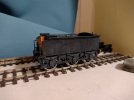
The Chronicles of Canary Sidings - Eastern Eccentricity in EM

Herb Garden

Western Thunderer
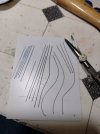
but have read that plenty of practice by spraying a sheet of plasticard and then practising lining a lot on that essentially disposable item helps you understand the pitfalls and work out how to overcome them in a safe environment.
The thing is Nigel that's exactly what I did do and got it to a point that it worked on painted plasticard.

I was going to take back the livery on the E22 anyway so it was worth a practice before I did that.....there is a plan B for getting this thing lined on the way
 

Herb Garden

Western Thunderer
A black art?

So following on from my previous experiments with painting locomotives as I said earlier I had a small epiffany.

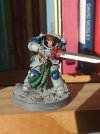
Now as well as making model railways amongst other things I paint wargames miniatures
IMG_20221026_143950553.jpg

Nothing to do with the trainset but here is one example a champion from my space marines chapter

My epiffany was simple.... Instead of using techniques and mediums you are not comfortable using why not use something you are much more at home doing? So I endeavoured to try applying the techniques I use for my Warhammer miniatures to a locomotive

The hardest colour to get any kind of contrast on is black. And that is because you can only highlight it is impossible to shade. So obviously I was sensible and started with the hardest option: a plain black goods loco.

Those who know me might be aware that I have a slight soft spot for the GER Y14 (J15 if you speaky LNER speak) and I've acquired one or two models from the Hornby stable during my OO gauge years. These I have been slowly backdating and regauging to the GER period and EM gauge respectively.
IMG_20221228_115409235.jpg

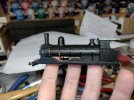
So this was the guinea pig for this experiment #510 built in 1899 by the GER and currently painted plain black using car areosol.
IMG_20230120_073145935_HDR.jpg

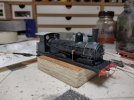
To start with I had a go at breaking up the block colour by a layer wash of an off black.
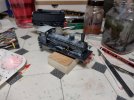
IMG_20230120_165931148_HDR.jpg
Next I added so over exaggerated highlights bly drybrushing first a medium grey and then a very light great in a streaking pattern top down
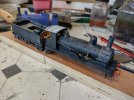
IMG_20230121_125720367_HDR.jpg

This was calmed down by a black filter coat which softened the highlights and brought it all together.
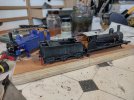
IMG_20230121_125756167_HDR.jpg
The footplate and smokebox were then drybushex heaving with a slate grey just to lift them in contrast to the body colour.

There's still some things to do, and details to touch in not to mention the brassmasters easichas to fit but I really love the effect. I appreciate it might not be everyone's cup of tea but I like it.

The next challenge is how to apply the same technique to a blue engine? Oh and then how to line it....

Happy modelling!
 

Herb Garden

Western Thunderer
It looks rather effective. I'm curious as to why you didn't paint the roof, do you plan to depict it in its GER days?
Hi Dave,

Yeah the white roof is a dead giveaway but other modifications, including the stove pipe chimney new smokebox door and the modified tender mark this out as a GER era loco.

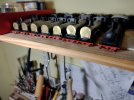
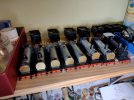
The conversion from Hornby models is quite drastic here's a few of them undergoing modification with my #510 on the end (not all are mine as I did a few for friends at the same time)

IMG_20220126_214155071.jpg
IMG_20220126_214147216.jpg

Bar the odd industrial diesel shunter all my EM gauge stock is GER era.....
 

Richard Gawler

Western Thunderer
The hardest colour to get any kind of contrast on is black. And that is because you can only highlight it is impossible to shade. So obviously I was sensible and started with the hardest option: a plain black goods loco.

I have never tried shading but I have used a very dark grey to represent black - 'Volvo Dark Grey' from Halfords. Maybe this would allow shading in the dark direction?

11 Most British H0.jpg
On this model, the smokebox was "black" (probably Revel 'Anthracite' in its acrylic form) and the rest of the loco was the Volvo Dark Grey.

I was always pleased with the result but I did the conversion from a worn-out model and I ended up removing the motor and using it to do double-heading and top-and-tailing on my layout.
 

Herb Garden

Western Thunderer
I have never tried shading but I have used a very dark grey to represent black - 'Volvo Dark Grey' from Halfords. Maybe this would allow shading in the dark direction?

View attachment 178705
On this model, the smokebox was "black" (probably Revel 'Anthracite' in its acrylic form) and the rest of the loco was the Volvo Dark Grey.

I was always pleased with the result but I did the conversion from a worn-out model and I ended up removing the motor and using it to do double-heading and top-and-tailing on my layout.
It's funny as that's what close to what I do I've got varying shades on black from absolute black black to coal black and then varying shades of dark grey... A really really dark blue or dark brown also helps add contrast.

The method I used on the Y14 was easier because I could build up the contrast between recessed sections and raised sections then use the semi translucent colour to take it back approximately to where I wanted the colour... I was able to put lots of layers on of the filter shade getting darker each time until I got what I wanted.

The paints I used can be used through an airbrush but I actually did all of this with some decent watercolour brushes....

I'm experimenting with the blue at the moment and will share presently progress from that
 

Suffolk Dave

Western Thunderer
The conversion from Hornby models is quite drastic here's a few of them undergoing modification with my #510 on the end (not all are mine as I did a few for friends at the same time)


View attachment 178614
That's an impressive line up you've got there!

Having done a little research before starting my Brassmaster's east-chas chassis, I got the feeling backwards conversion to the GER original was not going to be easy with the Hornby body. So, hat's off to you mate for doing it.
 

Herb Garden

Western Thunderer
That's an impressive line up you've got there!

Having done a little research before starting my Brassmaster's east-chas chassis, I got the feeling backwards conversion to the GER original was not going to be easy with the Hornby body. So, hat's off to you mate for doing it.
The conversion is easier than you think.... Once you get over the "I'm taking a real course file to a very expensive RTR model" fear

I did actually write it up in the GER society newsletter a year or so ago.... For those whom might be members of that esteemed mob

If not I'm probably going to get another one sorted soon so will post progress
 

Herb Garden

Western Thunderer
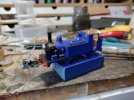
The creature from the blue lagoon

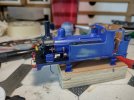
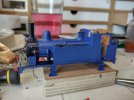
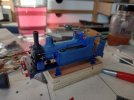
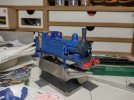
So following on the success of painting black locomotive I've now taken the experiment to the next level trying out the same methods on a GER blue colour.

GER ultramarine blue is one of those railway colours that seems surrounded in myth and legend. Although the experts on the GERS and PPP have a pretty good understanding of what the colour was when it was applied ... What we don't really know is what happened to it when it went into service.

image.jpg

The problem is that blue unlike more common railway colours of green seems to fade and or darken over time. Even with modern paint the preserved Engines have changed over the years as well. The ultramarine colour also changes depending on what light conditions there are.

For example when I was at the north Norfolk railway on an overcast day in September #564 looked more a royal blue. But I've seen photos of it that look far brighter on a much sunnier day.

Add to that in the pre grouping days there were reports of various shades of blue in service. At the London end of the system the paint reacted with the ploution and darkened.... At the country end in some places due to the sunny exposure the paint faded.

Basically the conclusion I came to is I needed a method of painting various different variations of the same colour as no two Locomotives should quite look the same.... Yeah that bucks a few trends.

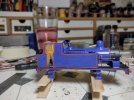
So with the E22 my model #151 was a kings Lynn engine for many years so I thought with the colour to go for the lighter end of the spectrum

IMG_20230121_120607982_HDR.jpg


I started with sanding back the old enamel paint

IMG_20230121_130001919_HDR.jpg

Then put on a base coat of Matt ultramarine

IMG_20230121_131954560_HDR.jpg

Then some exaggerated highlights

IMG_20230124_063956074_HDR.jpg

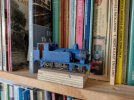
And finally a filter coat of translucent paint. I'm pleased with the look so can now start experimenting with varnish, lining and other shades of blue

Happy modelling!
 

Herb Garden

Western Thunderer
To my eyes, BS381C 105 Oxford Blue is a fair representation of the GER Blue worn by 564 as I saw the loco last August, but really this is only my opinion - there may be more accurate specifications out there.
I wouldn't disagree with you there Richard.

The other challenges I'm having is trying to get the colour to look right under layout lighting (yeah that non existent layout) and at a viewing distance as well as up close.... Colour does wired things I find as you change those factors ...

The other thing I found is that when I painted the loco in PPP ultramarine it looked blue.... I added the red lining the blue got darker and more purple

IMG_20230108_101249065.jpg

IMG_20230119_220806024_HDR.jpg
See what I mean....

It reminds me of the work of Georges Seurat and his experiments with how we see colour and that if you place two colours next to each other you get a different effect than if you mix them together.... So I've gone for a slightly greener blue to compensate for this so when the lining goes on it should look right..... (Offers prayers to the model railway gods)
 

Richard Gawler

Western Thunderer
A slightly hairbrained idea, but make up some colour patches on cards. I suggest give them a broad white border. Suppose the usual model viewing distance is 0.5 m, then go to visit the chosen prototype and walk 76 x 0.5 = 38 metres away from it (or 43 x 0.5 for 7mm scale). Hold the cards 0.5 m away from your eyes and compare how they compare to the prototype. When you have the best version of the model blue in natural daylight, adjust the lighting above the layout until it looks acceptable at home. I have used combinations of warm white and cool white LED strips above and in front of layouts to good effect, but my best-looking layout for colour is the one near a window.
 

Herb Garden

Western Thunderer
A slightly hairbrained idea, but make up some colour patches on cards. I suggest give them a broad white border. Suppose the usual model viewing distance is 0.5 m, then go to visit the chosen prototype and walk 76 x 0.5 = 38 metres away from it (or 43 x 0.5 for 7mm scale). Hold the cards 0.5 m away from your eyes and compare how they compare to the prototype. When you have the best version of the model blue in natural daylight, adjust the lighting above the layout until it looks acceptable at home. I have used combinations of warm white and cool white LED strips above and in front of layouts to good effect, but my best-looking layout for colour is the one near a window.
I love a hairbrained idea! That's an awesome suggestion.... I will have a go and see how it goes
 

Herb Garden

Western Thunderer
Who thought it a good idea to paint the inside of the frames cream?

Well the GER did that's who.....

Progress recently has been in the chassis department here at the sidings.... Firstly the E22 split chassis has now been painted ready for reassembly

IMG_20230125_070937552_HDR.jpg

Nice and grimy ready to go with it's equally distressed locomotive

IMG_20230128_125106470_HDR.jpg

Next step will be the lining ... To which I have made an accidental discovery. I use the citadel paint range for most of my modelling. They have a set of acrylic paints premixed for airbrushing. However after an accidental experiment I found they work rather well through a bow lining pen

IMG_20230123_180358109.jpg

Picked up a shade of red over the weekend so watch this space!

Happy modelling!
 
2023.03 - GER Y14 class #510

Herb Garden

Western Thunderer
Springs that go ping!

Yep I've got distracted again and the poor 73 class is looking at me sorrowfully as if to say: "why are you bothering with that modern traction why am I not getting finished?"

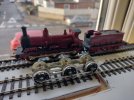
Well there be a reason for that... Since starting up in EM I've always wanted to have a go with one of the brassmasters easichas kits for the Y14(J15). But never got round to it until recently when I acquired one being sold off to raise funds for one of our preserved railways.

So when it arrived I had to drop everything and have a go.

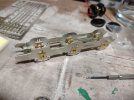
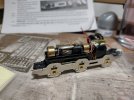
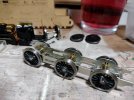
IMG_20230126_214852225.jpg

IMG_20230126_213820375_HDR.jpg

IMG_20230127_185626884.jpg

IMG_20230128_110329339.jpgIMG_20230128_120924808_HDR.jpg
IMG_20230131_071034734.jpg
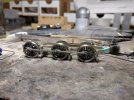
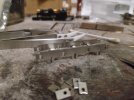
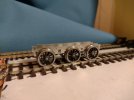
So that's with progress with the Y14 easichas so far. Brakes are in and it's rolling nice. I did at one point drop five out of the six springs on the dark green carpet. Much colourful language was created and they could probably hear me in Gateshead but with much crawling around with a magnet produced the required results and all the springs are back in place..... Not how to spend a weekend.....

So on to the tender and getting it fitted to the Y14 body you have allready seen in previous posts...

Happy modelling!
 

Herb Garden

Western Thunderer
Tenders & temptation

So I was foolish enough to loose one of the loco springs on the Y14 how it happened goodness knows but it meant that work on the loco chassis paused and I've moved over to the tender

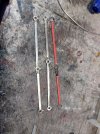
The tender itself is lovely and simple to put together but it does use a form of suspension that is rather controversial. Continuous springy beams....

IMG_20230201_212026186.jpg

The frames folded up together rather well and apart from the 17 attempts to thread the wires I had the wheels on in no time

IMG_20230202_195500507.jpg

And it fits the tender like a glove (a tender shaped glove)

IMG_20230202_195542178.jpg

I was also pleasantly surprised to see how well it ran along. Which took me down a proper rabbit hole of looking into CSB and trying to work out I could fit the system to some of my loco projects. I was very tempted but logic prevailed. CSB is a lovely system and really is the best replication I've seen of real railway Locomotive performance.

However.... and it's a big however, the models I built must work differently to the real thing. If the layout ever gets built the locos will need to work on a prevailing 1:50 gradient almost continuously..... Most of them are single driver or 4 coupled locos.... They will all have to put perform their full scale counterparts.... Therefore like in the case of the 73 class they will have to be built not to load the wheels prototypically but frig the loading to get some actual traction into the single driver.

So apart from this tender.... And any other Y14s that get rechassied I feel that CSB will go into the same category as Alex Jackson couplings and spilt frame chassis. I admire the very clever people who get them to work. And they do work very well but they are not the techniques that suit my application.

Hopefully soon I will have the whole loco back together very soon

Until next time.... Happy modelling!
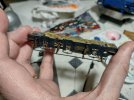
Herbie
 
Top