7mm Scruft's Junction:- Down the Garden path

Spike

Western Thunderer
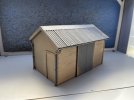
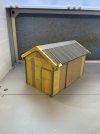
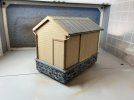
New Year and first project completed - aim was to finish the first of two Forest of Dean goods sheds, going to take a break before continuing with the second Goods Shed.

Progress has been to produce a capping strip for the corrugated roof, Mother's Turkey Foil came in very handy, its ok but I think there must be a better solution. The first set of doors warped, they were removed and replaced with a new set which I am pleased with as these were some of the first items I have had 3D printed - decided to use the doors as a learning experience in how to draw in 3D.

I am really pleased with is the guttering. After I had posted the update in July I was looking for how to make the guttering and this just happened by chance to co inside with the launch of ModelU's guttering products. One phone call later as they had not even made it on to the website at that point and on my way to me were the parts I needed.

The parts from ModelU are just what was required and after some modification as there was only a T junction and I needed a down pipe right at the end of the guttering. Modifying the parts was easy to do the mouldings are good and with a bit of cleaning up look the part.

IMG_2939.JPG

IMG_2940.JPG

IMG_2941.JPG

The owner of the building wants to paint it themselves so for now the building will be put away awaiting restrictions to be lifted to allow delivery.

Regards
Peter
 

matto21

Western Thunderer
Lovely looking goods shed!

Can I ask what glue you used to bond the embossed plastic to the foamboard please?

Matt
 

Dog Star

Western Thunderer
Can I ask what glue you used to bond the embossed plastic to the foamboard please?
Peter replied initially, as here:-
{Thank You
I have used UHU por for sticking plastic sheet to the foam board, avoids the glue eating away the foam and limits the warping.
Peter}.

We discussed this later and decided a fuller response is in order.

The carcass of the building is 3mm Foamboard which was bought on-line, all joints were made with UHU Por as that product is a solvent-less adhesive and so does not attack the foam core. Exposed foam edges were then sealed with Gorilla wood glue as we thought that a solvent might be used for styrene detailing, eg. Mek-Pak. The structure of the prototype has vertical wood posts at the corners and these were made as styrene "L" angles, assembled on the workbench with Mek-Pak and then fitted to the structure with UHU Por. The Slater's embossed sheet was cut to fit between the corner posts and secured with UHU Por as per the instructions. The stone base of the shed is 3mm Depron sheet bought on-line and that was fitted with UHU Por.

Initially the sliding doors were made as two layers, the first was attached to the building with UHU Por, the outer layer fixed with Mek-Pak. This was fine for several months and then the door peeled away from the building - the UHU Por remained attached to the door along with some of the paper face of the foamboard. The doors were replaced with a 3D print ex-Shapeways and affixed with UHU Por.

The roof is foamboard to provide a support for the "wiggly tin". A sheet of corrugated cardboard was cut into suitable panels and each was stuck to the roof with UHU Por. Bargeboards and fascia / soffits are styrene affixed with UHU Por. Guttering and fittings are from Modelu, affixed with UHU Por as are the styrene downpipes and the holderbatts.

So, overall, a mixed media building (foamboard, Depron, styrene, 3D print) with UHU Por for everthing bar making the L angles for the corner posts.

regards, Graham
 
Last edited:

Dog Star

Western Thunderer
The last time that the baseboards for Scruft's Junction graced this topic was almost one year back and at that time Peter and I were "extending" the layout to include:-

1/ a scenic section between the fiddle yard and the station and;
2/ a colliery "beyond" the station.

We included a photo of work on the scenic section and Peter noted then that there was a concern about the meeting of rails across the board end.

Fast forward by several months and a discussion with Chris Brown (@ChrisBr) touched upon how to secure rails at the end of a baseboard. Now this was an opportune discussion because Peter and I were working through the options to support rail ends and had discarded our previous method which was the C&L rail supports (no easy vertical / horizontal adjustment once fitted... price was an issue given that we needed sufficient to support four tracks over five board joints). After much chewing of the cud the three of us (Chris, Peter and I) decided that at a board end a rail would be located by a brass rail chair and for the chair to be soldered to a brass screw (through a sleeper, track formation and baseboard material). So here we have a series of photos to show what we have done... and we are pleased with the result.


This photo shows the start of work, rails have been removed to provide access to the formation, the foam underlay has been cut back and pieces of 1/16" ply Birch stuck to the baseboard surface.
IMG_2974.jpg


Several layers of 1/16" ply have been added so as to produce a firm base which puts a 1/16" Birch ply sleeper at the correct vertical position to support a brass chair and nickel silver running rail.
IMG_2975.jpg


With the ply support pad at the correct height relative to the baseboard surface it is time to add the brass screws... some months back I asked the WT collective for suggestions as to a source of screws which were (a) long enough to pass through sleeper/foam/formation (say 15mm) and (b) thin enough to hide under a brass chair (say 3.5mm over the screw head). Here is what we have used.
IMG_2977.jpg


This photo shows our chosen screws inserted into a sleeper. The position of each screw is chosen to (a) come under the rail and (b) be on the longitudinal centre line of the sleeper.
IMG_2976.jpg


And here is the finished result.
new board end.jpg

regards, Graham
 

Dog Star

Western Thunderer
I take it that the rail just passes through the brass chair ?
Yes.

As supplied the rail does not pass through the chair so I use a miniature file to enlarge the opening for the rail, generally between the jaws and over the fishing angle of the rail foot. Minimal stock removal so that the chair is a tight fit onto the rail and holds the track to gauge. If the chair is tight enough then, I believe, there is no need to solder the chair to the rail.

Where necessary, some vertical adjustment is possible by raising / lowering the screw in the formation. If the screw is positioned "just inside" the running face of the rail there is some horizontal adjustment to accomodate alignment of rails and track gauge.

Although not shown in the photos we have used GWR plain line chairs from C&L (1885-1895 pattern) and from Exactoscale ("00" pattern, available from the S7 Group Stores).
 
Last edited:

Spike

Western Thunderer
Time to progres the layout, decided to get it finished by the end of next year, and document the process here, aiming to post at least twice a month with updates. Not a lot has happened with the layout for the past two years, three new boards are now in place, the layout is getting a colliery.

My dad @Dog Star has been working on the trackwork using 3D printed chairs designed by @ChrisBr and printed by myself. Will leave my dad to cover that side of the layout. I deal with the scenary and non track work bits.

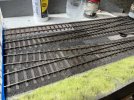
I have just about finished sorting the ballasting for one of the station boards. Going back over the layout and inspecting the ballast I did not do a good enough job. Every time a defect was found a red pin was placed. Lets just say there were alot of red dots poking up.

I won't go into the ballasting process as it is no different to what can be found on you tube. But here is the final result.
IMG_5772.JPG

Around Christmas just gone I wanted to start the path leading to the station. Gordan Gravett's book was consulted and a plan formed for a path with fence. Looking through photos of the Forest of Dean I would be modelling a Midland Style fence. Dad found the information I needed in terms of measurements with help from Stephen Lea and I was off and running.

I thought about using plastic strip for the fence but decided I fancied building it out of timber. The model boat hobby use a wide range of woods in different thicknesses. I placed an order and awaited the parcel. I realised the I needed about 4 foot of fencing for this project and a jig would be required to keep the fence sections consistent. The Jig is made from Plastic Strip. The picture below shows the first assembled section within the Jig.
IMG_3702.JPG

The thought behind using wood would be once painted the grain would show through and look better than just plasticard.
I used my usual paint set of Games Workshop strange named colours. The end result after drybrushing and I am pleased.
IMG_5774.JPG

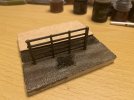
At this point attention turned to the path and what I would cover the ground with. At the Basingstoke Show I picked up from Squires a product called Acrylic Mud for Dioramas, believe it is a military modelling product. I was not sure on the product as it was new to me, so a small diorama was called for to test the product and see if I liked the result.

The first photo shows after a bit of ballast (the middle section) and the acrylic mud have been applied. The raised section on the left is for static grass. Photos of the Forest show that where the ballast meets the grass there appears to be what could be described as a step. this is my attempt at recreating this. Card has been used to raise the grass up and the top layer of cereal card is over hanging the ballast to help give the effect of the step.
IMG_5775.JPG

Next up was painting the muddy ground to give different colours and avoid it looking uniform. I used around 10 different shades of brown and greys to give the result below. This for me was the bit I was not happy with my first attempt despite using lots of different shades still looked too uniform. Another round of more intense drybrushing and I got a result that I am happy with. From a distance you can now pick out the different colours.
IMG_5781.JPG

Finally came the static grass, I combined the usual process with some stick on bushes I picked up at Stafford last September from Primo Models and some more Games Workshop products.
IMG_5789.JPG

IMG_5788.JPG

Overall I am pleased with the outcome, I think I did one to many applications of Static grass. and the flowers only worked around the fence. I tried them within the grass bank but they do not look right.

So whats next?

I need to create another Jig to aid with creating sections of fence that join together. I will order some more flowers, at the moment I only have purple ones.
More fencing is now to be made and painted.
Finally I feel confident enough with the acrylic mud to apply it to the layout and tick the footpath off the to do list.

Peter
 
Last edited:

Yorkshire Dave

Western Thunderer
I will order some more flowers, at the moment I only have purple ones.

Be careful. Before I make flowers (bedding or wild) for my layouts I check horticultural information to ensure which flowers, bushes, grasses, etc are in bloom at any particular time of year as all the colours available are not actually in bloom at the same time - if you get my drift :).

More fencing is now to be made and painted.

I always stain the wood first before assembly as any dried seeped glue prevents any staining afterwards. One thing I do after dyrbrushing wood is to apply a brown to black wash to knock back the drybrushing. In some areas I apply a subtle green wash. These are sections of two 7mm structures I scratchbuilt from wood (Wotton goods shed and Church Siding water tower on the Brill branch). Both stained, drybrushed and washes applied for weathered creosoted wood.

The Brill Collection 2d.jpg

The Brill Collection 3c.jpg

Acrylic Mud for Dioramas, believe it is a military modelling product. I was not sure on the product as it was new to me, so a small diorama was called for to test the product and see if I liked the result.

I use military/wargaming diorama products all the time. In my view this aspect of the hobby is supplied with far more and superior products than those produced for the model railway scene.
 

Spike

Western Thunderer
Dave since your post I have found myself watching YouTube videos for military modelling and the range of products I agree is far superior.

Fencing has taken a back seat this past week, new timber has arrived but a jig has not yet been started.

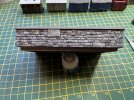
Painting has been the order of the day (week) last year I finished the second goods shed model which has been given a coat of Halfords primer and my focus has been on the stone base. Trying to replicate a picture my dad took at Parkend station of the wall.

A86E707D-6A6D-4E77-8171-2D6E4AC9FE99.jpeg

Trying to match this has been interesting, I ended up with 12 different greys/stone colours on the workbench and have ended up with the following.

35409BA6-698A-494F-957F-67A5EEB69020.jpeg

DCB520A0-5FF6-4351-933E-956E6AA93E7C.jpeg
Rather pleased with the result, dreading the prospect of repeating this for the station wall and platform.

regards
Peter
 

Yorkshire Dave

Western Thunderer
It's a good start Peter.

From my own experience, personally I have three greys (light, mid, dark and steering away from blue greys), umber, buff, black and ivory white on the palette as mixing these provides the variations.
 

Pencarrow

Western Thunderer
Dave since your post I have found myself watching YouTube videos for military modelling and the range of products I agree is far superior.

Fencing has taken a back seat this past week, new timber has arrived but a jig has not yet been started.

Painting has been the order of the day (week) last year I finished the second goods shed model which has been given a coat of Halfords primer and my focus has been on the stone base. Trying to replicate a picture my dad took at Parkend station of the wall.

View attachment 184925

Trying to match this has been interesting, I ended up with 12 different greys/stone colours on the workbench and have ended up with the following.

View attachment 184928

View attachment 184929
Rather pleased with the result, dreading the prospect of repeating this for the station wall and platform.

regards
Peter

Looks good. The problem I have is replicating the effect I'm happy with across other buildings and walls. Done taking notes and photos, still can't do it. :))
 

Spike

Western Thunderer
Progress has been slow over the past two months, been focussing on a batch of 10 private owner wagons.

Not helped by finding I needed to buy a new airbrush in order to paint the goods shed. Last week my new airbrush arrived so off to the shed today to start painting.

I am using railmatch acrylic paints, specifically the GWR light and dark stone colours.

First up I painted the light stone colour which required a couple of coats.
FF2429B3-3232-4CF9-88AF-5B9368D1DFF0.jpeg
2F3EBEB8-7DBB-4978-89FE-E09C56E2E6ED.jpeg

Next up I masked the framing of the shed.

516AA9DC-59CC-42E0-B3BB-1A61A3858A63.jpeg

Dark stone was then airbrushed over the framing.

2E6C862F-27E1-495E-9A5E-3F1B490084BB.jpeg

I made a mistake with the masking and will need to go back over with the light stone to correct the error.

Still got the doors to finish and the roof, but could not resist placing it on the base and seeing the overall effect.

E78F8C3F-7896-48A0-8A91-E656C7CF5FDF.jpeg

Regards
Peter
 

Ressaldar

Western Thunderer
Hi Peter

very neat work. May I ask as to the manufacturer of the acrylic paints please?

regards

Mike
 

Ressaldar

Western Thunderer
Hi Peter,

many thanks for the speedy reply. I phoned Squires last week to order these acrylic paints but was informed that Railmatch did not do these colours in acrylic so I had to settle for enamels. I will be aware for next time.

regards

Mike
 

Ressaldar

Western Thunderer
Hi Graham,

many thanks for the heads up, I will look out their website/contact details.

regards

Mike
 
Top