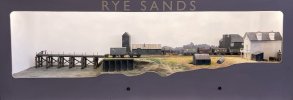
Rye Sands

James Spooner

Western Thunderer
The grande vitesse van is all painted up. I'm not entirely convinced by the colour although the beauty of modelling SECR is nobody can actually decide what the correct colour is anyway!

I've not decided I've I'm going to line it or not yet. Once that's settled I'll make the final push and get it done

View attachment 235409

View attachment 235410

I've been working on my second etched kit this week. It's the aforementioned Roxey mouldings LCDR brake third. This is definitely a step up in difficulty. The instructions aren't nearly as good and some etches don't seem quite right. The duckets for example don't seem to be designed with the curve where it meets the carriage side, instead just having a flat plane. It was easy enough to reshape it into a curve with some trimming and sanding but given how new I am to this game I was a little nervous departing from the instructions.

I also found out the hard way what happens when you hold the soldering iron in one place for too long, hence the little dent in the non-ducket end

The coach seemed to have an infinite number of overlays and door handles which meant just preparing the coach sides took the same amount of time as the whole Grande Vitesse van build. The sides need some more tidying up

If anyone has tips for removing excess solder from the panel lines beyond just scribing it out they'd be much appreciated!

View attachment 235411

View attachment 235412

View attachment 235413

View attachment 235414

I'm very much enjoying this etched brass lark but I can't help but feel the more I do the more daunted I become about the prospect of attempting a loco, especially the high level neilson I've got on the way!

Will
That’s looking very good Will! When I am cleaning up solder, if it is just a mere smear, I find the fibreglass pens very helpful. They seem to be strong enough to rub away the solder whilst too soft to obliterate the etched brass detail.

Nigel
 

Ian@StEnochs

Western Thunderer
Blobs of solder can be wicked away with some copper wire braid. Simply press the braid against the solder with the tip of a hot soldering iron and watch the solder flow. The residue left can be rubbed away with a fiberglass stick as Nigel says but often it is just a stain which will be covered by the paint.

Ian.

D4680DF2-64D4-40B2-889E-7183FC82B65D.jpeg
 

Yorkshire Dave

Western Thunderer
Nice LCDR 4w coaches - shame Roxey do not offer these in 7mm scale.

As for the livery I just went for the closest I could mix up from Vallejo acrylic paint to match a colour plate in a contemporary publication - Our Home Railways by W J Gordon published by Frederick Warne in 1910. The South Eastern & Chatham Railway

I think the official description was Wellington Brown.

This is my much detailed Alphagrafix 7mm etched kit of an ex-LCDR 6W composite brake (which ended up on the EKR declassified as a brake 3rd)

LCD 79.jpg
 

spikey faz

Western Thunderer
As an alternative to the fibreglass pencil I've been known to use a small wad of wire-wool to help remove excess solder. But, that's after I've scraped away the worst of the excess solder.

Mike
 

Willl

Western Thunderer
Wire wool sounds like a good option - I’ve been using a fibreglass pen and the solder wick already but have needed something a bit more vicious for some areas… my soldering definitely needs some more work

Nice LCDR 4w coaches - shame Roxey do not offer these in 7mm scale.

As for the livery I just went for the closest I could mix up from Vallejo acrylic paint to match a colour plate in a contemporary publication - Our Home Railways by W J Gordon published by Frederick Warne in 1910. The South Eastern & Chatham Railway

I think the official description was Wellington Brown.

This is my much detailed Alphagrafix 7mm etched kit of an ex-LCDR 6W composite brake (which ended up on the EKR declassified as a brake 3rd)

View attachment 235451

that’s a lovely build. I’m planning on building mine in the plain varnished livery that the one at the bluebell carries. Painting the teak/wood finish should be an interesting challenge.
Will
 

spikey faz

Western Thunderer
Wire wool sounds like a good option - I’ve been using a fibreglass pen and the solder wick already but have needed something a bit more vicious for some areas… my soldering definitely needs some more work


that’s a lovely build. I’m planning on building mine in the plain varnished livery that the one at the bluebell carries. Painting the teak/wood finish should be an interesting challenge.
Will
Unfortunately there's sometimes no substitute for some laborious scraping! I often use the end of a very small file that had a bit broken off. The sharp broken remain is ideal for such cleaning exercises. Not that I'm suggesting you start snapping your file collection to produce such a tool!

I'm really liking the look of Rye Sands. It's the sort of thing I'd like to do if I had the room, but I model in 7mm/1ft whivh makes it a bit tricky for me.
.

Mike
 

Willl

Western Thunderer
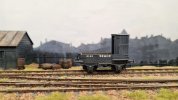
Something very special has arrived. A Folkestone Harbour brake van was always on the wishlist but chances of getting one RTR are slim, so I was actually considering using my extremely limited CAD skills to try and design one myself. As it happened, Chuffinghell (Chris) from the other forum offered to make one for me, and I'm glad he did as there's no way I could have made something this good. Chris also built and painted this one as a test piece, but I have another which I will be making myself.

It's an absolutely amazing example of what 3D printing is capable of now, and Chris has absolutely nailed the design. Ive no affiliation but as a very happy customer I'd thoroughly recommend sending him a message as he's got a great range of wagons.

I've not been able to get it on Rye Sands yet, but that is a sight I am very much looking forward to.

20250308_132455.jpg

20250308_132639.jpg

20250308_132506.jpg

20250308_132320.jpg

Will
 

Willl

Western Thunderer
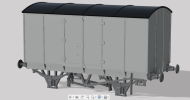
Recently, I've dipped my toe into the (big, scary) world of CAD. This wasn't really a deliberate choice, but a recent purchase of the Southern Wagons book opened my eyes to some tempting SECR (and earlier) wagons which I can only have by designing them myself. I was also inspired by the quality of recent 3D printed wagons I've bought, so thought I'd give it a shot.

On a whim, I started drawing up a SE&CR gunpowder wagon (before this I had only tried making some bottles/lego bricks, following along to a tutorial, so this represented a bit of a leap into the dark!)

I foolishly started this design whilst away from home, so was reliant on a fairly vague drawing (and no prototype pictures) until two days in when I got home, opened the Southern Wagons book, and instantly spotted several mistakes! The door locking mechanism, and the rivet patterns on the ends, roof, and doors aren't right but I've got myself in a bit of a muddle and can't really change the design for the van body without everything breaking!

I was particularly pleased with the W irons and springs, which aren't perfectly dimensionally accurate, but should be a fair approximation of a SECR J hanger suspension design. Likewise, the brakes are based on the Stones pattern system with blocks on one side but handles on both.

image.png.a3e340471aa613d07261b0ea318bc559.png

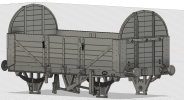
The current project is a SER/SECR D1340 open wagon. I've got some other round ended wagons (d1327 and a LCDR example), but have recently been reading Brian Hart's book on the Canterbury and Whitstable (which is inspiring yet another layout scheme). Pictures of Whitstable Harbour in the period I'm interested in (1880s-1910s) show vast numbers of round ended wagons, so I will both need a variety of types, and also the means by which to make them cheaply. Hopefully 3D printing my own will be a very cost effective way of achieving a decent sized fleet. The below wagon only took about half a day to design, and some parts should be reusable, so it also doesn't take all that long once you've figured out the basic techniques.

I don't yet have a printer (but that will be changing soon) so at present I'm just staring longingly at the renderings in Fusion 360.


1744054072562.png

I think the thing that has most surprised me though is how much I enjoy the design process. It's very satisfying and still feels new and exciting in a way that physical modelling sometimes doesn't (hence the recent dalliance with etched brass, more to come). It's also immensely rewarding to be able to design these things from scratch, and liberating not to be reliant on the commercial market.

My approach to modelling has been rapidly escalating from RTR stock and buildings, to scratch built structures and now designing my own stock, and I think it's only a matter of time before I crack out Templot and start building my own track. It's not that I'm consciously trying to make my life more complicated, but it really is a slippery slope. Pattyndenne and Rye Sands each took about 4 months to build, but at this rate the next layout won't be completed for decades!

I just hope I don't end up being drawn in by EM gauge or P4... I'm not sure I fancy re-wheeling all my RTR locos!


Will
 

Willl

Western Thunderer
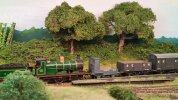
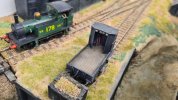
The status quo on Rye Sands.

IMG_0204.jpeg

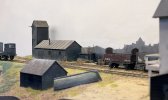
The layout has gained a few structures since I last posted here

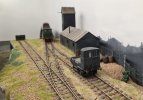
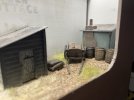
A new shed has been added at the front of the layout. This hopefully disguises the join between ground and sky a little better

IMG_0183.jpeg


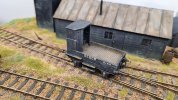
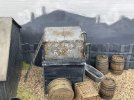
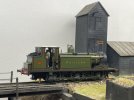
I’ve also made a decrepit water tower, which takes the place of the grounded coach body. I always thought the coach was a bit cliche. You can just about make out the name “Vidler and Son”. This was a real business, served by rail at Rye and a number of other stations around Kent. They seem to have been involved in trading a variety of nautical goods. Perhaps the tank has been pillaged from their yard in town, and dragged down to the harbour to see out it’s final years

IMG_0195.jpeg

IMG_0197.jpeg

IMG_0198.jpeg

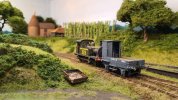
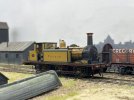
I’ve also added two new locos to the fleet (well more than two, but these are the locos that are specifically intended for Rye Sands). Both beautiful models out the box, perfected through some light weathering. France needs a crew though…

IMG_0181.jpeg

IMG_0180.jpeg


Will
 
Last edited:

Joe's Garage

Western Thunderer
Lovely to see these photos Will, a bit ironic on the loco names as what happened at Poitiers was a very dark day for France mid 14th century!!
I can hear the creaking of the trestle underneath Poitiers.
Thank you for sharing
Julian
 

spikey faz

Western Thunderer
I thought I'd logged into the wrong forum when I saw that Status Quo were playing at Rye! :rolleyes:

But seriously Will: Rye Sands continues to inspire. Please keep posting your updates

Mike
 

Willl

Western Thunderer
Thank you all! I'm always blown away by the positive nature of responses on this forum. I'll definitely try to keep this thread more current in future.

I've been reflecting quite a lot recently on what comes next. The hot weather has caused some structural problems (in particular, warping of the trackbed), not fatal but certainly ominous given the layout is under a year old. I'm not planning on disposing of Rye Sands (especially given I'm due to take it to Uckfield in October) but it's led to yet more thoughts of a new layout. I've got several different schemes on the go at present, which really need a bit of ruthless consolidation... there's no world where I end up finishing all of them! I'm trying to stay focussed on Rye Sands for now but it's only a matter of time before some other Kentish (or even East Anglian) backwater catches my attention.

Will
 

spikey faz

Western Thunderer
Hi Will
From what I can see Rye Sands appears to be a sturdy construction, so I'm intrigued to know what's warped and how. Definitely something to bear in mind if you commence a new build.
Mike
 

Willl

Western Thunderer
Hi Will
From what I can see Rye Sands appears to be a sturdy construction, so I'm intrigued to know what's warped and how. Definitely something to bear in mind if you commence a new build.
Mike

The main baseboard is very sturdy (despite being 5mm ply throughout). However, the trackbed rests on three thin cross members, and is floating at the left hand end. I used left-over ply from a packing crate and I think moisture must have got into the end grain. The pier has also always been on a bit of a gradient but the broader undulations have definitely got worse. I think I'll splash out on proper marine ply for any future builds (at least where I'm using an open frame construction with a ply trackbed)

Will
 
Top