7mm Rob's Rolling Stock Workbench

Rob Pulham

Western Thunderer
Hi Rob,

I hope you and your good lady are staying safe and well.

A quick question, those screwlink couplings from Laurie, are they the same as the CPL ones and need putting together or straight out the packet ? They certainly look good from your photos.

Cheers,

Martyn.

Hi Martin,

We are good thanks, keeping our heads down and out of the way until the storm passes.

They LG couplings come on a sprue so need to be cut out, cleaned up and assembled. I should think from what I have seen, that the CPL ones are their equal and slightly cheaper but when ordering I had to consider postage when ordering from several sources (not my money). So it was simpler to get all from Laurie.

To be fair I don't tend to look at CPL much unless I am at a show because the bulk of the range is western biased and I don't build much in that area.
 

Rob Pulham

Western Thunderer
I have had a few of Dan’s kits over time and one thing that I find odd is that some come with roofs and some come without. Sadly, the road van came without (yet an NER horsebox that I bought at the same time had one). I can only guess that it depends on whether Dan has roof material to hand when he packs the kit.

A suitable piece of sheet was obtained and cut to size. It was just too long for either of my sets of rolling bars so I had to resort to rolling it by hand but I got there in the end.

When built these vans were fitted with sliding roof hatches over the left hand set of doors on each side. Later these were replaced with canvas or just boarded over so lots of permutations are possible depending on the period being modelled. This van was to have roof doors so I cut an offcut of thicker brass sheet to size (my guillotine needed a bit of muscle to cut through it). This time it did go through the rolling bars…

The photos that I have seen with roof hatches had a curved strip across them which is possibly a rainstrip? I represented this with a short length of 1mm square rod.

50918505141_d45bbd3d11_b.jpg


The roof was still loose at this point.

The kit does provide the runners in the form of whitemetal castings so these were duly soldered on. And finally the roof was soldered on to the body.

50917815458_771857710a_b.jpg


50917813848_d08b85bf2a_b.jpg


I had got this far, then while studying photos noted that there was a turnbuckle in the middle truss rod. I made some up using tube and 14ba nuts and then cut the truss rod to allow them to be eased aside and slipped on.

50918503036_3f240c6e91_b.jpg
 

3 LINK

Western Thunderer
Hi Martin,

We are good thanks, keeping our heads down and out of the way until the storm passes.

They LG couplings come on a sprue so need to be cut out, cleaned up and assembled. I should think from what I have seen, that the CPL ones are their equal and slightly cheaper but when ordering I had to consider postage when ordering from several sources (not my money). So it was simpler to get all from Laurie.

To be fair I don't tend to look at CPL much unless I am at a show because the bulk of the range is western biased and I don't build much in that area.

Hi Rob,

The couplings this time are for a SR bogie luggage van I am building, so I’ll purchase from LG and give them a try.

I do like the SR parcel/ luggage vans and they did travel all over the network in the later years, so I have an excuse :thumbs:.

Martyn.
 

Rob Pulham

Western Thunderer
Hi Rob,

The couplings this time are for a SR bogie luggage van I am building, so I’ll purchase from LG and give them a try.

I do like the SR parcel/ luggage vans and they did travel all over the network in the later years, so I have an excuse :thumbs:.

Martyn.

Me too, I am sure that one of the four wheeled vans will grace my workbench at some point. It's just a matter of seeing a kit somewhere when funds are available to buy one.
 

Rob Pulham

Western Thunderer
The other V1/3 is at a similar state of play. I was going to say what I am struggling with now is a suitable number for this van but just before posting I had another look in Ian Sadler's North Eastern Brake vans book and on the example shown in there, although the bodyside lettering isn't visible, the number plate 57916 is so I shall use that as my example.

50965253973_fd42c6cffc_b.jpg


50965253808_aee589ca5b_b.jpg


50965959071_09c38c3f69_b.jpg


50966063922_4ea6bae8f0_b.jpg
 

Rob Pulham

Western Thunderer
The Road van was painted at the same time as the brake vans but I held off posting photos because they formed part of the GOG virtual show’s lockdown models display. The show was held today so I am not taking anything away from it by adding them to my threads.

I enlisted Chris's help to paint the curved arrows on the plate above the brake hand wheel


Finally I was asked by a friend to take photos of both bogie vans together.


For those not familiar with it the LMS van is the Dragon Models Lancashire and Yorkshire 30 ton Bogie van now with TaffVale Models.
 

Rob Pulham

Western Thunderer
In my quest to clear the workbench of its long time inhabitants I took stock of what was needed to finish the crane and runner/match wagons. It turned out that to do the bare bones of the build they only actually needed buffers and couplings. Then I recalled why the build had stalled. The buffers and couplings that came with the kit were a bit of a 'hotch potch' of different makes/types. I bought it second hand so I am not sure which of them might have been included originally.

There were a couple of different type of white metal buffer stocks and a nice set of Slaters cast brass RCH pattern buffers but there were only three buffer heads. There were buffer heads/springs and retaining nuts. The trouble was that the springs were a bit bigger than the normal springs that Slaters and other supply.

I had a look in my spares box and managed to find three complete sets of Buffer stocks, one set NER, One set GNR and one set LNER. Which I thought would be typical of a railway company using whatever wagon was available to use as runner wagons for the crane.

Again, there was a mixture of couplings so I sorted out three assorted sets and added them.

It was at this point that I asked for assistance on the LNER forum as to what colour mobile hand cranes would have been painted by the LNER. I didn’t get a definitive answer but the suggestion was that they might have been lined black the same as the steam cranes were.

Armed with this, I masked them up and painted them black. At this point I thought that the runner wagons were a bit plain so I made up some toolboxes from coffee stirrers and added them to what was to become the leading runner wagon.


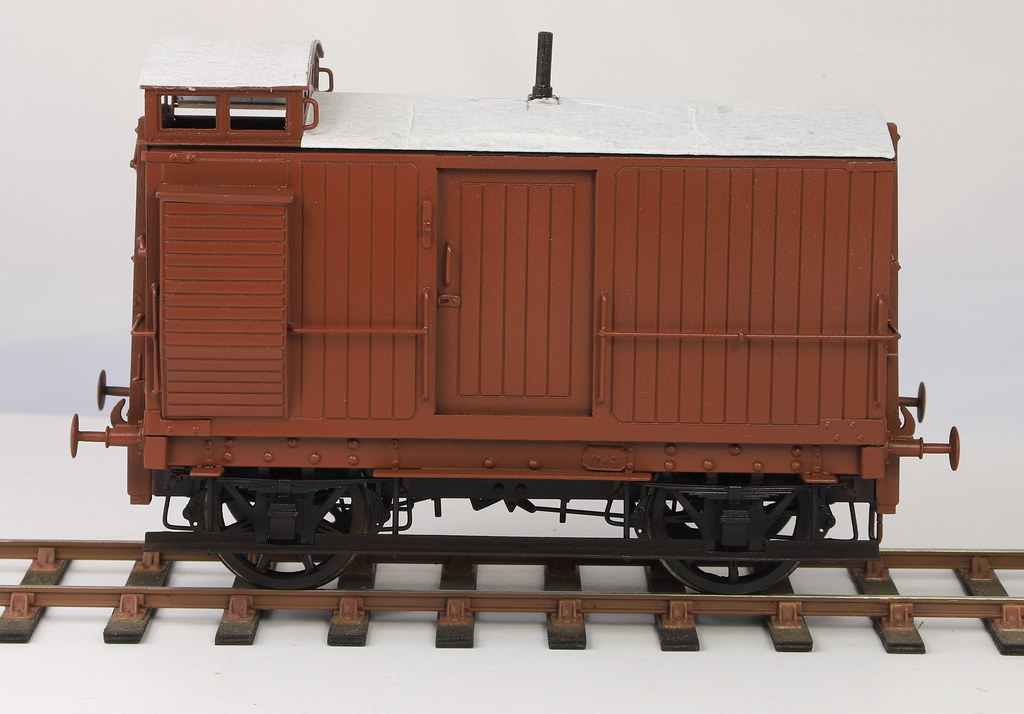
I couldn’t resist posing them with a shabby NBR van and one of the NER brakes to simulate a breakdown train.


Still some way to go before I and happy with them.
 

Rob Pulham

Western Thunderer
Having looked at it for a couple of days I felt that the second runner wagon looked a little bare so I knocked up another toolbox and I added some hardware to them all. It's starting to come together now. A friend has just sent me some spare 'Crane Runner' transfers so I now have enough to do both runners (assuming that I can get them to fit of course.

51010108131_a96295393b_b.jpg


51009402143_5b1150b306_b.jpg


I am still undecided as to whether to line the counterbalance weight on the crane because the gears on the crane itself will prevent me being able to add any lining around the frame if indeed they were actually lined.

A few tools and lumps of timber and some weathering will bring it all together.
 

Rob Pulham

Western Thunderer
Depite building it at the same time I completely forgot to post this, following on from the Road van my second victim is a conversion of a Connoisseur LNER Perishables van from one of these – photo courtesy of Jim McGeown’s website

http://www.jimmcgeown.com/Wagon Kit Pages/Wagon images/LNER Perishable Van Photo.jpg

To a North Eastern Railway version with cupboard type doors instead of the sliding door on the LNER version. The cupboard doors and their locking mechanism will need to be scratch built. LNER Wagons Volume Two by Peter Tatlow has photos and a drawing which will prove very helpful during this conversion.


We start off by cutting out the parts etched in the door openings


Once they are removed and put to one side for later in the build, the openings need to be trimmed back to the door pillars. I did this with the trusty piercing saw with a no 6 blade.

Once I had my door opening dimensions, I cut a couple of replacement doors and scored the planking on them using an Olfa Cutter (skrawker).


These were soldered in with some strips of scrap etch soldered all the way around to prevent them being dislodged through handling of the finished van.

Once this was done, I started on the hinges. This job was made some much easier by riveting the edge of a piece of 10 thou brass sheet at the appropriate spacing (taken from the drawing) using my GP models rivet press and then cutting the strip from the sheet using my guillotine. I ended up filing a few down to width before I got my eye in despite scribing a cut line…


Rob Pulham

Western Thunderer
From there it was just a case of keep adding the details to the doors
50934546993_b82b3277c5_b.jpg


50934547978_1de1cdb08a_b.jpg


The ‘barrel’ of the hinges was made by filing a slot in a piece of 2mm x1mm bar using an oval file to give the slope where it meets the strap and then rounding off the other end. The RSU came into its own when soldering them on. I think it’s the first time that I have ever managed to solder on some fine detail without at least one part pinging off and requiring a search to find it or to make a replacement.

50935233171_1dae90af97_b.jpg


50934547273_f07422963b_c.jpg
 

2-Bil

Western Thunderer
Like the puckered roof canvas on the NE road van... a prototypical feature rarely observed on model rolling stock .Enjoy viewing the builds etc etc......Regards Brian W
 
Top