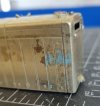
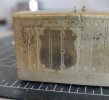
Priming and painting tarnished etch brass

bordercollie

New Member
Hi
I am at the point of painting a brass wagon under-frame. It has taken me some time however I have cleaned it after each session with water and in an ultrasonic cleaner using plain water. However, there is quite a bit of tarnishing. I have tried getting rid of it with some success on larger flatter sections, but when trying to do the harder to get at parts I am having difficulties. I have bent or broken off small parts. I am therefore wondering if I can ignore the tarnish and apply etch primer followed by painting without any ill effects. I have both SMS etch primer and Tamiya Metal primer.
Best wishes
 

Mike Garwood

Western Thunderer
So long as the surface of the metal is clean, tarnishing should not make any difference to an etch primer doing it's job - thats what I've found.

I had a bit of a eureka moment with my sonic bath last week. I completely covered the wagon in Viacal, a cup of warm water in the bath. 5 minutes later a completely clean chassis, no scrubbing required!

Mike
 

Allen M

Western Thunderer
For the older ones here who may remember the late Joe Moss many years proprietor of CCW models in Birmingham. He, when building a brass model gave it a good scrub with VIM or similar pan cleaner then left it to tarnish before painting. His comment 'never try to paint bright brass'.
I have used Halfords etch primer for years including on 16mm NG live steam locos.

Regards
Allen
 

Richard Gawler

Western Thunderer
Why do all the professional painters insist on shiny brass, then?

DSC_2300.jpeg
Well, a professional painter has just accepted this model from me.

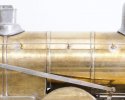
They saw the model at Kettering and gave me a verdict. The model needs to be clean, and this means the degree of cleanliness witnessed by the firebox and the forward part of this boiler. They do not want to see the look I achieved using Goddard's silver polish on the centre section; quote, "don't use it".

My favourite cleaner for brass at the moment is tomato ketchup. This is I suppose "acetic acid paste" and I have used it to remove the worst of tarnish before cleaning in Viakal, this worked in with a toothbrush and then a rinse in water. The water marks on the firebox are an occupational hazard of living in Essex.
 

Daddyman

Western Thunderer
They saw the model at Kettering and gave me a verdict. The model needs to be clean, and this means the degree of cleanliness witnessed by the firebox and the forward part of this boiler. They do not want to see the look I achieved using Goddard's silver polish on the centre section; quote, "don't use it".
Interesting!
 

bordercollie

New Member
Thanks for replies.

I have cleaned my model in ultrasound bath and in running water. Also, I have physically cleaned with iso-propyl alcohol and emery where I can get easy access and don't risk damage. I think it as clean I can get it over most of kit. However, I am hoping that I can get away with a chemical etch before painting of the whole thing including tarnished and non-tarnished surfaces.
Chemical blackening works well before painting.
I am not really familiar with chemical blackening, As the under-frame is going to black would it form a convincing colour on its own without paint?
Best wishes
 

simond

Western Thunderer
chemical blacking / bluing is a process using a commercial dip or wash. It only works on really grease-free metal, and it is certainly dependent on having the right liquid for the metal in question - brass ones probably work on steel, but the opposite might not be the case, and none of them seem to work on "Hi Ni" nickel silver rail. (there's no silver in it, but anyway).

Please note that the stuff is quite poisonous, but not an issue if you are careful about use, cleaning and storage.

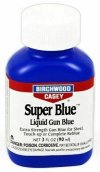
I have personally used this

s-l640.jpg

in steel and brass versions

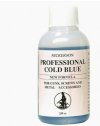
and this

s-l500.jpg

available from the usual on-line suppliers and from gun shops

Carrs also sell it I believe.

I certainly use it for slaters loco and other wheels and if steel is oiled after blacking, it tends to prevent rusting, I guess the process seems to hold the oil to the metal, though I do not know why this should be the case.

Regarding treating it as a surface finish in its own right on chassis parts, I suggest trying it, as if you're not happy, you can certainly paint over it and if the paint is subsequently chipped, it'll probably not show bright brass.
 

paulc

Western Thunderer
Why do all the professional painters insist on shiny brass, then?
I put this question to a professional model maker who's models shone in every photo . His answer was that his clients would rather see a gleaming model in the progress photos he sent them than a drab but clean model .
Clean is clean and that's all you need as a base for the primer to adhere to .
 

Daddyman

Western Thunderer
chemical blacking / bluing is a process using a commercial dip or wash. It only works on really grease-free metal, and it is certainly dependent on having the right liquid for the metal in question - brass ones probably work on steel, but the opposite might not be the case, and none of them seem to work on "Hi Ni" nickel silver rail. (there's no silver in it, but anyway).
The one problem with Birchwood (and possibly other gun blacks) is that it's solder resistant, which means that if the primer reveals that adjustments/corrections need to be made to the model, it's the devil's own job to do any unsoldering. And, yes, I know one shouldn't be making adjustments to models after the priming, but I often need to - I find I can't see the model clearly in bare metal, no matter how much I photograph it or magnify it, and the flaws only show once the primer is on - for example, is it a dark line of solder that I'm seeing where two edges meet, or a gap? I tried gun blue on my first scratchbuild and encountered this problem (the fact that it's solder-resistant) and have never used it since.
 

Ian Rathbone

Western Thunderer
Why do all the professional painters insist on shiny brass, then?
We don’t. We like them clean, ie no crud in the corners, no green flux deposits etc. I clean the brass (or nickel silver) firstly with a floor cleaner to remove grease and then with ‘Shiny Sinks’, or equivalent which removes tarnish but leaves the metal with a matt finish. I do this whatever the condition of the model because, as a professional, if the paint doesn’t stick it’s my fault, not the customer’s.

Ian R
 

Daddyman

Western Thunderer
We don’t. We like them clean, ie no crud in the corners, no green flux deposits etc. I clean the brass (or nickel silver) firstly with a floor cleaner to remove grease and then with ‘Shiny Sinks’, or equivalent which removes tarnish but leaves the metal with a matt finish. I do this whatever the condition of the model because, as a professional, if the paint doesn’t stick it’s my fault, not the customer’s.

Ian R

Thanks for clarifying, Ian! I remember you saying to me at Missenden that if a loco had half-etched components, and if it had been burnished with a fibre-glass brush, that had the same effect as etching primer on paint adhesion. But I can't remember what conclusion you drew from that - it seems unlikely to have been that etched primer isn't necessary?
 

Ian Rathbone

Western Thunderer
Thanks for clarifying, Ian! I remember you saying to me at Missenden that if a loco had half-etched components, and if it had been burnished with a fibre-glass brush, that had the same effect as etching primer on paint adhesion. But I can't remember what conclusion you drew from that - it seems unlikely to have been that etched primer isn't necessary?
Yes, in theory a pre-etched piece of brass does not need an etching primer, but some of the model will be plain brass, so, it all gets a coat of etching primer.

It would be possible to pre-etch the plain bits by dipping in ferric chloride for a few minutes - and then rinsing thoroughly, but that would be a lot more hassle than mixing up a bit of etching primer.

Ian R
 

lag503

New Member
Not wanting to hijack the thread, but I'm having right now the opposite situation, which might be interesting in this context.
If its inappropriate, please let me know, and I'll delete subito. Thanks!

A model I painted in 1991, with heavy damage to the paint.

I took it in in 2016 to add a lighting package, but realised it needs more work, I wouldn't know how to approach at the time.
So I wrapped it up in thin wrappping paper and back it went into its foam box. Until a couple weeks ago when took it out to start the rebuild.
This is how it came out of storage.

Pain_damage1 small.jpg
Some of the damage clearly from the foam: The outer parts had foam stuck to them, the inner not. Also there was distorted paint everywhere where the transfers were applied. (Long term consequence from those setting solutions? The decals themselves?)

After stripping, the brass looks like this:

corrosion1 small.jpgcorrosion2 small.jpg
Serious corrosion where the paint bubbled, tarnish under the transfers. Spot tarnish everywhere. Back then I painted it with enamels, and - i think, at the time not knowing there was one - left the clear protective factory finish intact.
Now, is there any sort of prep work that can prevent these kind of effects?

What to do with those badly oxidised spots?

Anyway, I did several locos at that time, so far all the others show no such effects. So this really surprised me.

Thanks,

C,-w
 

Daddyman

Western Thunderer
Yes, in theory a pre-etched piece of brass does not need an etching primer, but some of the model will be plain brass, so, it all gets a coat of etching primer.

It would be possible to pre-etch the plain bits by dipping in ferric chloride for a few minutes - and then rinsing thoroughly, but that would be a lot more hassle than mixing up a bit of etching primer.

Ian R
Many thanks Ian.
 

simond

Western Thunderer
Not wanting to hijack the thread, but I'm having right now the opposite situation, which might be interesting in this context.
If its inappropriate, please let me know, and I'll delete subito. Thanks!

A model I painted in 1991, with heavy damage to the paint.

I took it in in 2016 to add a lighting package, but realised it needs more work, I wouldn't know how to approach at the time.
So I wrapped it up in thin wrappping paper and back it went into its foam box. Until a couple weeks ago when took it out to start the rebuild.
This is how it came out of storage.

View attachment 184476
Some of the damage clearly from the foam: The outer parts had foam stuck to them, the inner not. Also there was distorted paint everywhere where the transfers were applied. (Long term consequence from those setting solutions? The decals themselves?)

After stripping, the brass looks like this:

View attachment 184477View attachment 184478
Serious corrosion where the paint bubbled, tarnish under the transfers. Spot tarnish everywhere. Back then I painted it with enamels, and - i think, at the time not knowing there was one - left the clear protective factory finish intact.
Now, is there any sort of prep work that can prevent these kind of effects?

What to do with those badly oxidised spots?

Anyway, I did several locos at that time, so far all the others show no such effects. So this really surprised me.

Thanks,

C,-w
Far from an expert in this but the blue-green patch looks like an acid reaction with the brass.
 

Chas Levin

Western Thunderer
Far from an expert in this but the blue-green patch looks like an acid reaction with the brass.

Like Simon I'd have thought the blue-green was acid flux reacting with the brass...

and like other previous posters, I'd second the suggestion of tomato kethup if you do decide, for reasons anywhere form chemical to cosmetic, that you want untarnished brass. I made up a kit a whiel back from an extremely tarnished etch and - rightly or wrongly - thought it might impede either the build or the painting, so I tried the ketchup tihng for the first time, laying the etch on top of a thick flat layer of ketchup in a wide glass dish and adding another similar layer on top, extracting the etch and rinsing it under the cold tap about five minutes later: the results were very impressive, the brass looked literally like brand new!

I'd also agree with those cautioning against gun blue where there's the remotest possibility of needing to make subsequent adjustments or additions...
 

Richard Gawler

Western Thunderer
I think of gun blue as something to use when other approaches are impractical, like darkening a steel tyre on a plastic wheel. A good thing is the treatment does wear well, and for steel axles running in bushes it lasts better than quenching them in cooking oil.

But it seems a poor choice to use gun blue to find faults in a brass model. I don't know what the stuff is made out of but I suspect the chemicals would do bad things to our insides. The least invasive way to find faults I have found it to take photos and put right what stands out like a sore thumb. Primer will show up faults better, soldering will burn this away and recoating the primer does not show afterwards. For some reason, I did this on my very first brass wagon and then decided I could see faults well enough before priming, this is not ideal and a witness coat is very useful.
 
Top