O-EM-OO9 workbench - transfer removal?

adrian

Flying Squad
What I really like is how the curve starts out - I can't find the photo I found now, but in plan view it is like this:

The NLS maps extract of Romford lower goods yard is below. Operationally was interesting as there's no run round because wagons were reversed down the incline to the yard. They always had to have brake van at the siding end direction, which in later years was a SR Queen Mary van in ER territory.
Flicking though Col's Bow Street thread I spotted the photo you may have been think of.


Yorkshire Dave

Western Thunderer
Ok, so I'd been telling myself for weeks I don't need one.

IMG_20260706_200001981_HDR.jpg


But I kept looking at this photo (copyright in image) and fell off the wagon.

Brewery siding.jpg
The NLS maps extract of Romford lower goods yard is below. Operationally was interesting as there's no run round because wagons were reversed down the incline to the yard. They always had to have brake van at the siding end direction, which in later years was a SR Queen Mary van in ER territory.

Tony

Screenshot_20220719-084158-263.png

I also had a look at NLS OS maps and see the line ran to Romford Brewery, who had an internal rail system with two steam locos. I've often heard the name Romford Brewery but didn't realise it was part of Ind Coope as it was then.

If you're basing a small shunting layout around Romford Brewery it looks like a second Ruston will be required -
Double Rustons Works Wonders, Works Wonders, Works Wonders
Double Rustons Works Wonders so buy a second one today
:D
 

76043

Western Thunderer
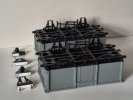
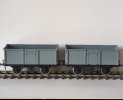
So painting continues on the 7mm wagons. The minerals are ready for assembly, I'm not keen on wagons having non-removable wheels, so the w-irons are removable as previously detailed on this thread five years ago. :oops:

IMG_20260720_083918136_HDR.jpg

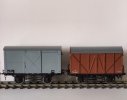
These two vans were made before the acquired wagon series and as such I realised the label clip on the LMS van side was moved to the solebar by BR days, so off it came and a quick blow over with top coat.

The GWR van is missing the door catches, it looks to me that the ones Slaters use on their BR vans fit the bill, but I don't have any spare, so for now that's it, onto transfers next.

It's only been five years.

IMG_20260720_084107789_HDR.jpg

Tony
 

76043

Western Thunderer
Mineral wagon interior time, both little and big ones.

I've also disassembled an LMS red Dapol Jinty into seemingly a lot of parts. Any thoughts on how to remove the numbers and lining?

Thanks
Tony

IMG_20260726_170303772_HDR.jpg
 

76043

Western Thunderer
Simon rattle?

I'll get my coat....

@simond the minerals got a wafting of satin black, not total coverage so is a good basis for weathering I think.

The Jinty's lettering and lining is quite raised so will be seen once my black satin rattle can appears, I guess I can try the usual suspects, IPA, pale ale, mild etc. (Yep, I'm here all week)

Tony
 

simond

Western Thunderer
Simon rattle?

I'll get my coat....

@simond the minerals got a wafting of satin black, not total coverage so is a good basis for weathering I think.

The Jinty's lettering and lining is quite raised so will be seen once my black satin rattle can appears, I guess I can try the usual suspects, IPA, pale ale, mild etc. (Yep, I'm here all week)

Tony
Ah, didn’t realise there was some thickness to the printing. I guess it’s tampo-printed so that’ll be inevitable.

a quick google does not suggest an easy solution to that. I think a mechanical approach, prior to the rattle can might be your easiest option. I doubt IPA (of either variety) will touch it, and stronger solvents are likely to mess up the moulding. Wet & dry used wet? Tedious but effective.

AI Overview


Tampoplus Ink White - Pad Printing - Keygadgets
Tampo (pad) printing ink chemistry relies on a specialized mixture of solvents, solid binders/resins, and intense pigments designed to transition rapidly from a liquid to a tacky film for silicone pad transfer. The core systems consist of single-component physical drying, two-component chemical curing, or UV-photo-polymerization. [1, 2, 3, 4, 5]

Key Chemical Components
    • Binders and Resins: Acrylic, vinyl, epoxy, or polyurethane polymers that establish final film hardness, flexibility, and substrate bonding. [1]
    • Solvents: Glycol ethers, cyclohexanone, or aromatic hydrocarbons that control evaporation rates and viscosity adjustments during the transfer cycle. [1, 2, 4, 5]
    • Pigments and Dyes: Finely milled organic or inorganic compounds that provide opacity and color saturation. [1, 2]
    • Hardeners/Catalysts: Polyisocyanates mixed at 3–20% ratios in two-component systems to prompt cross-linking reactions for enhanced chemical and scratch resistance. [1, 2, 3, 4]
    • Photoinitiators: Light-absorbing molecules in UV-curable variants that instantly trigger free-radical polymerization under UV exposure. [1]

Curing Mechanisms
    • Solvent Evaporation (Physical): Thermoplastic resins dry as ambient air evacuates the solvent carriers, leaving a flexible solid film. [1, 2]
    • Polyaddition/Cross-linking (Chemical): Two-pack reactive formulas build rigid three-dimensional polymer networks, achieving full physical and chemical resistance within 24 hours. [1, 2, 3, 4, 5]
    • Photopolymerization (UV): Liquid monomers and oligomers lock into stable high-molecular-weight polymers in milliseconds upon light activation. [1]
 
Top