Monks Ferry: a layout for the Grandchildren.

A start is made.
  • jonte

    Western Thunderer
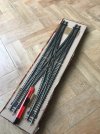
    The arrival of my first section of track heralds the start of the project:

    IMG_0194.jpeg

    Planning can begin.

    Meanwhile, the glue-ing on of lamps to brackets to signal posts, continues in earnest before I face the task of re-routing several below board wires to accommodate, which no doubt will require use of the soldering iron and shrink wrap (if I can find it).

    jonte
     
    Warts ‘n’ all.
  • jonte

    Western Thunderer
    Work on the towers continues, but I’ve reached the point where I’ve run out of materials (I’m surprised at the sheer quantity of materials they’re consuming….)
    Thus, a sojourn over the border into W. Lancs. will be required later today to restock. With Hattons gone and my local model shop seemingly running down stocks to concentrate on the sale of drones and RC models, treks of this nature will become more frequent. At the moment, costs of postage are mounting - a necessary evil I suppose - but if I need materials urgently, I’ve no choice but to travel. There’s a Widnes Models a short drive from Hattons- and well stocked too - but the website is none too specific, and I know from Hobbies’ site that they have what I need in stock. Never mind, I’ll go during my granddaughter’s afternoon nap so I won’t be missed.

    With mention of towers (tower), all three sides have been fitted with their decorative features; the rear is just dressed as per the rest of the building as it will be almost hidden. I’ve started work on the plinths - with more on the bench being made ready - although the dearth of suitable materials has resulted in the sides remaining bare and unsightly:

    IMG_2250.jpegIMG_2251.jpegIMG_2252.jpeg

    Rather than waste valuable time at the ‘bench’, I turned my attention to the base to ensure the build stood up straight on its own, as it’s getting a little too difficult to hold as the build progresses, scrap styrene utilised for the purpose:

    IMG_2249.jpeg

    Finally, here’s a picture as promised of my attempt at the effects of acid rain:

    IMG_2248.jpeg

    As I wrote previously, it’s only a token attempt at this form of weathering/erosion, but a full blown replication of the process would just take too long to do it justice. I’ll still do a tad more before priming but that will be it. Incidentally, the ‘attacked’ freeze goes around the towers too just below the pelmet, with the amount of erosion being less severe in places as per the real thing.
    Also seen are some minor additions such as the inclusion of half round to the top of the lower freeze, and lintels to the upper storey niches, once more from watercolour paper.

    Cheers for now.

    jonte
     
    Two down, one to go.
  • jonte

    Western Thunderer
    Pleased to report that the second of a total of three baseboards is complete, apart from countersinking the screw heads in the track base which will be completed when glue has dried.

    The base shown complete and just needs the track bed attaching:

    IMG_0527.jpeg

    ‘Two become One’ (Moira Anderson), assisted by bolts and removable hinges both sides:

    IMG_0528.jpeg

    The tracked goes on:


    IMG_0534.jpegIMG_0531.jpeg

    Not a bad fit, even if I say so myself, for somebody of extremely limited handyman skills:

    IMG_0532.jpegIMG_0533.jpeg

    Another henge-like appearance:

    IMG_0535.jpeg

    Tomorrow I’ll order yet more wood for the final push.

    Frankly, it won’t be the last order either: so far, I’ve struggled with regard to access, and it’s only now at this point of construction, I realise that better access is required, both to aid future construction and maintaining the layout when finished. Consequently, the intention simply to extend the existing bench ain’t gonna cut the mustard, so a total removal is now planned once the third board is completed, to created a bench which is situated centrally along the available space so that both sides can be accessed a little more easily. Will still be a squeeze, but far better than the current situation.

    This was realised when I to clamber onto and over the baseboards (yet again) to insert the removable pin into the split hinge that connects the two boards, on the far side. To say my patience is wearing thin……….

    Still, pleased that yet more progress has been achieved, and more importantly, it seems to fit the bill.

    So on that lighter note, thanks for your interest and likes.

    jonte
     
    Baseboards x 3 complete
  • jonte

    Western Thunderer
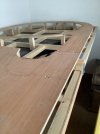
    I’m extremely pleased to report that the third baseboard is now complete, and along with it, baseboard construction as a whole.

    Here are the boards connected together (the total length takes up most of the room, and I only just managed to get it all into the picture! It looks a lot longer in real life):
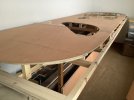
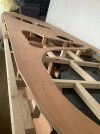
    IMG_2577.jpegIMG_2579.jpegIMG_2581.jpeg

    It really has been a tight squeeze:

    IMG_2578.jpeg

    (This end will need rearranging as it’s purposed for other uses - garden furniture storage - which will be undertaken during construction of a new bench to support the model).

    T’other end:

    IMG_2580.jpeg

    I envisage a through station just before the curves at this end similar to Vauxhall in the Smoke (I have a name already: Tithebarn, just to continue the Merseyside naming theme). The awful modern office buildings seen a short distance from the station in popular views will probably be modelled in half relief behind the curves.

    Further views (including a couple from the halfway line):

    IMG_2579.jpegIMG_2582.jpegIMG_2583.jpeg


    IMG_2581.jpegIMG_2582.jpegIMG_2583.jpeg

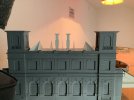
    Way too early for scenic tasks, I thought I’d throw in a couple to show how and where the terminus (Monks Ferry) will be situated, using the shed roof (which will be cut down from three to just one roof), and the half /two thirds /one third, even(?) built station building, which will be sited above the curved tracks at that end to fit it in, and which will form my version of the classic train set tunnel:
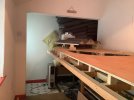
    IMG_2587.jpegIMG_2586.jpegIMG_2584.jpeg

    Under the roof:

    IMG_2585.jpeg

    And finally, you’ll no doubt be pleased to learn (apologies for boring you all with these!), here’s one with the station building plonked roughly in the middle of the layout to provide another sense of scale (still doesn’t look as big here as in the room:

    IMG_2588.jpeg

    In all honesty, the whole layout will be deconstructed and turned one hundred and eighty degrees so that the station is at the far end of the layout. This will aid sight of the platforms as my preferred operating position will be from in front of the window (this way I won’t have to squeeze past the end nearest the door every time to operate it…….

    Right.

    Bit of a blow, as building this has involved some derring-do gymnastics to say the least, then it’s on to tidying up before ‘addressing the bench’.

    Cheers,

    jonte
     
    A distraction…….
  • jonte

    Western Thunderer
    Whilst I fully intended to address the next issue before track laying could begin i.e. a new bench for the layout to sit on, and as mentioned in my last, I couldn’t help feeling that that awful ancient ceiling light needed addressing too.

    After seeing a set of six LED lights (240V) for sale on line, the notion of a sort of ceiling hung canopy or pelmet (suspended on chains like those above Billiard tables) occurred to me. So, with a further order for more timber secured, supplemented by some left over ply from the baseboard build, I set to work (as usual, no drawings or dimensions………..).

    After a couple of days, a skeleton of sorts:

    IMG_2601.jpeg

    Then, some ply cladding to the sides:

    IMG_2603.jpeg

    ……….and ends:

    IMG_2606.jpeg

    I really wish I’d bought an impact drill for all the screws in the build to date, however after already investing in some new electrical tools for the job in hand, I didn’t want to test the patience of the domestic authorities too much (I’ve already popped two drills thus far, having to rush out and by a third on Friday…..).

    And so, say a couple of days to fill the holes and add a spot of emulsion or two, it will be on to fitting the lights, followed by an attempt to attach it to the ceiling, and I should be done.
    It’s not full length (only eight feet), but it already weighs a ton. I’m sure there would have been a lighter way of doing it, but employing new ideas instead of sticking with the old tried n tested ways of yore, has already proved a bum steer, so I’m just sticking with traditional ways and materials which (I believe, not being a DIY-er) should do the job.

    jonte
     
    Top