Greengiant
Western Thunderer
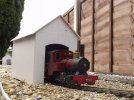
A bit of background for this thread, I have for a number of years been building a garden railway in 16mm to the foot scale, narrow gauge. It comprises six stages of construction, stages 1-3 have all the support structure in place, stages 1-2 have all the trackwork down, stage 3 should have had the track down by now but work and the winter months stopped progress. I suspect stage 6 will be started before stages 4 and 5, this being the indoor section of the railway, heavily industrial, over an area of around 40' x 3'. This will be full of industrial buildings, my favourite modelling subject. The railway is being built with operating in mind rather than just going round and round.
This means I have a lot of buildings to make, the outdoor ones have to be weather proof, so restrict the materials that are suitable, the indoor section not so restricted.
This workbench is purely to cover the buildings construction as I progress and keep it all in one thread rather than get mixed up with the railway construction.
To give a rough idea of what is planned, although this does have a habit of changing as things progress, is this diagram. Stage 1 which is basically complete apart from some ballasting, point switches and some more buildings is 40' long.
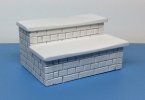
The first building, more a platform really is a cattle dock.
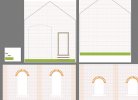
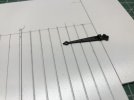
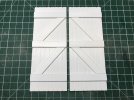
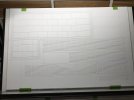
I drew this on computer first, then it was drawn up on a 600mm x 400mm sheet of 5mm PVC Foamex and scribed. I use this because it is UV and weather proof, used a lot in the sign making industry, cuts and scribes easy and glues up with CA.
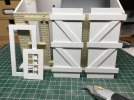
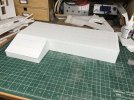
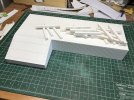
It did not take long to glue the main structure up, it has an extra 15mm depth to the sides to embed it into the gravel.
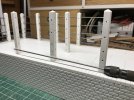
Some posts for the railings were made by laminating some 5mm and 3mm PVC Foamex, then trimming to final size with a bandsaw on it's slowest speed setting.
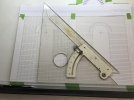
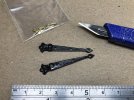
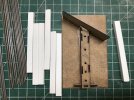
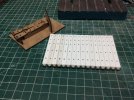
I wanted the posts to have a pointed top, I have some five bar gates on the driveway at home so measured the angle of the pointed tops of the posts which came out as near enough 30 degrees. My mitre saw block only had 45 degrees, so I laser cut a saw and drilling guide to help with batch processing, also makes it a lot easier to hold a post than a mitre block would in this size. The photo shows the laser cut 2mm MDF jig with 30 degree guide and one of the two drilling guides. Also some of the post blanks and a selection of 2mm mild steel rod for the rail, which I am hoping will rust nicely over time.
How the jig is designed to work, first a post is inserted up to the end stop, then the first cut is made.
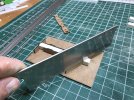
Which gives this first cut that gets a few passes with a file to smooth flat to guide.
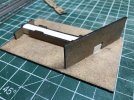
Then the post was withdrawn and rotated through 90 degrees away from me and inserted back thus...
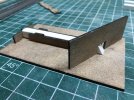
Another cut is made...
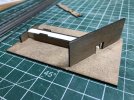 Untitled by Martin Coombs, on Flickr
Repeat until the fourth cut...
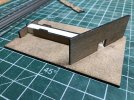 Untitled by Martin Coombs, on Flickr
Eventually I ended up with 15 posts...
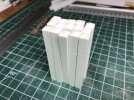
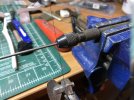
Each one was put in the jig and drilled with one guide, then each post was rotated 90 degrees and put back in the jig with the second hole guide in place and drilled.
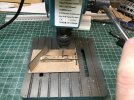
Ending up with 15 identically drilled posts, what I have not shown is the end stop also had a central hole to drill and tap the post base 8BA so they can be bolted to the main base.
Martin
This means I have a lot of buildings to make, the outdoor ones have to be weather proof, so restrict the materials that are suitable, the indoor section not so restricted.
This workbench is purely to cover the buildings construction as I progress and keep it all in one thread rather than get mixed up with the railway construction.
To give a rough idea of what is planned, although this does have a habit of changing as things progress, is this diagram. Stage 1 which is basically complete apart from some ballasting, point switches and some more buildings is 40' long.
The first building, more a platform really is a cattle dock.
I drew this on computer first, then it was drawn up on a 600mm x 400mm sheet of 5mm PVC Foamex and scribed. I use this because it is UV and weather proof, used a lot in the sign making industry, cuts and scribes easy and glues up with CA.

It did not take long to glue the main structure up, it has an extra 15mm depth to the sides to embed it into the gravel.

Some posts for the railings were made by laminating some 5mm and 3mm PVC Foamex, then trimming to final size with a bandsaw on it's slowest speed setting.

I wanted the posts to have a pointed top, I have some five bar gates on the driveway at home so measured the angle of the pointed tops of the posts which came out as near enough 30 degrees. My mitre saw block only had 45 degrees, so I laser cut a saw and drilling guide to help with batch processing, also makes it a lot easier to hold a post than a mitre block would in this size. The photo shows the laser cut 2mm MDF jig with 30 degree guide and one of the two drilling guides. Also some of the post blanks and a selection of 2mm mild steel rod for the rail, which I am hoping will rust nicely over time.

How the jig is designed to work, first a post is inserted up to the end stop, then the first cut is made.

Which gives this first cut that gets a few passes with a file to smooth flat to guide.

Then the post was withdrawn and rotated through 90 degrees away from me and inserted back thus...

Another cut is made...
 Untitled by Martin Coombs, on Flickr
Repeat until the fourth cut...
 Untitled by Martin Coombs, on Flickr
Eventually I ended up with 15 posts...

Each one was put in the jig and drilled with one guide, then each post was rotated 90 degrees and put back in the jig with the second hole guide in place and drilled.

Ending up with 15 identically drilled posts, what I have not shown is the end stop also had a central hole to drill and tap the post base 8BA so they can be bolted to the main base.

Martin

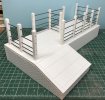
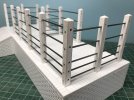
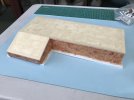
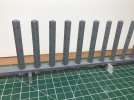
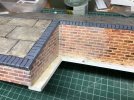
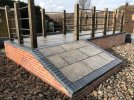
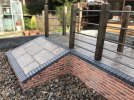
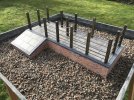
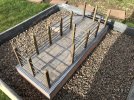
 But would the ramp not require some form of ribbing across it to give the livestock some purchase when entering the dock, especially since there is liable to be a bit of dung around.