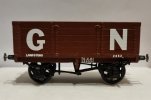
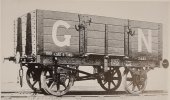
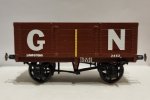
Liver & Fry's workbench

Liver & Fry

Western Thunderer
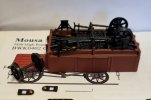
May I ask where you got the photo from? It looks like an official Midland Railway Carriage and Wagon Co photo

Apologies, I should have specified! It's a photo of a photo... You are correct in that it is an official Midland RC&W Co. Photo taken in 1919. It features on Page 26 of Issue 88 of 'Archive' Magazine as part of a 7 page article on the E.O.L operation. An interesting read if you can find a copy!

- James
 
Highland Railway open wagons

Liver & Fry

Western Thunderer
For once I have a live modelling update!

I'm currently working on a pair of Highland Railway Jones open wagon kits by Mousa Models and I figured I'd share my solution for adding weight to the wagons.

20231109_203843.jpg

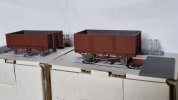
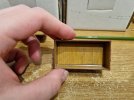
Liquid Gravity! Poured into the recesses of the wagon's frame and doused in glue, this sets like stone and sufficiently increases the weight of the wagon in a balanced manner without affecting the appearance of the vehicle.

For extra adhesion/sealing (and for aesthetic purposes if someone were to see the underside of the wagon) I then give a top coat of black paint to match the frame.

20231110_182716.jpg

This probably isn't revolutionary but I felt I ought to post an update about something I'm actually working on rather than going through my back catalogue projects!

- James
 

simond

Western Thunderer
Just in case there are some folks who are unaware of the problem, do avoid lead shot and PVA glue. Over time, (months, years) it reacts, and swells. If it has somewhere to expand into, then it'll likely be ok, bit if not, well, refitting loco smokebox doors and ends on tank wagons that have been finished, painted & weathered is a bit frustrating. It was recognised as a problem maybe ten years back, and I guess there’s lots on the forums about it.

I don’t know what “Liquid Gravity” is made from, perhaps it is not lead.

I can confirm that two part resins mixed with lead shot is ok, in my experience, as is blutak & shot (but it might fall out if fitted like the photos above).

And of course, sheet lead is denser than little balls!
 

Liver & Fry

Western Thunderer
Just in case there are some folks who are unaware of the problem, do avoid lead shot and PVA glue. Over time, (months, years) it reacts, and swells. If it has somewhere to expand into, then it'll likely be ok, bit if not, well, refitting loco smokebox doors and ends on tank wagons that have been finished, painted & weathered is a bit frustrating. It was recognised as a problem maybe ten years back, and I guess there’s lots on the forums about it.

I don’t know what “Liquid Gravity” is made from, perhaps it is not lead.

I can confirm that two part resins mixed with lead shot is ok, in my experience, as is blutak & shot (but it might fall out if fitted like the photos above).

And of course, sheet lead is denser than little balls!

To my knowledge Liquid Gravity is lead free and non-toxic, but yes, it is a valid point to raise! The bottle actually recommends using Rocket Cyano which is what I've used when I've done this so it should be fine (he says hopefully!).

- James
 

Mick LNER

Western Thunderer
Made fromTungsten according to a search. Maybe cheaper from Fishing Tackle shops as they are used for weighing fishing line.
 
  • Like
Reactions: AJC
Highland Railway open wagons

Liver & Fry

Western Thunderer
Happy New Year everyone!

I hope you all had an enjoyable festive season. Apologies for my absence in the latter weeks of 2023. Modelling took somewhat of a backseat in the game of life!

I am, however, back to it this evening by finally finishing off those Highland Railway Jones open wagons with some lettering:

20240102_204908.jpg

Really do need a brake van to go with these, if anyone happens to know where I might source one (preferably something suitable for the Jones/early Drummond era - i.e turn of the century). Loco wise, I confess to waiting on Rapido to release their Jones Goods - My modelling is nowhere near loco building standards just yet!

Hopefully 2024 will see me develop some more skills and become more active on here. Call it a new year's resolution, if you will...

- James
 

Wagonman

Western Thunderer
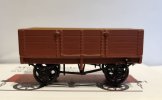
Continuing on from the lessons learnt in shaded lettering (see #28) I decided to model a quirky footnote of local history.

Did you know there used to be an oil refinery in Setchey, Norfolk? In 1918 'English Oilfields Ltd' was established to mine a known seam of oil bearing shale on a site bordering the A10 in the vicinity of what is now 'Beers of Europe'. The venture, fronted by a Dr William Forbes-Leslie, saw its capital increased to a ridiculous £1.5 million by the AGM of 1919, based on positive initial samples and promises of a further 2,000 million tons of shale in the ground. However, the whole venture was a massive fraud; the initial samples had been "salted" with Pennsylvania crude-derived oil and the shale oil later extracted in 1921 was found to have a sulphur content of 8-9% vs the industry accepted 0.25% meaning it had no commercial value whatsoever. Understandably the company rapidly saw a massive decline and the shareholders lost their money. That is except for Dr Forbes-Leslie who ran away to Somerset with his new found fortune... (He was later arrested for trying the same scam again).

So what of the wagon I've modelled? Well, to serve the new refinery, a long siding was built from Clarks Drove on the mainline to King's Lynn, across the fens to Setchey. 10 wagons were built by the Midland Railway Carriage and Wagon Co. and numbered 11-20 (a common practice made to make wagon fleets look bigger than they were). It is believed that these were to serve the refinery by moving freshly mined shale from the pits into the facility. In the end, it appears the majority of their use within E.O.L was for the extraction of gravel, which is all the site became good for following the collapse of the oil extraction side of the business!

View attachment 199789

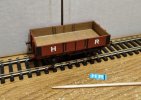
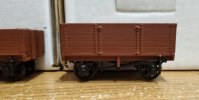
My interpretation is based on a Mousa Models kits of a Midland D.305 3 plank wagon, as the nearest "that looks the part" 3 plank wagon I could source. This was built as intended but painted and lettered to represent No.14 of the fleet. I also added the battens to the solebars that prevented the doors hitting the running gear beneath, aswell as a removable gravel load.

View attachment 199805
View attachment 199806

It's a quirky addition to the collection that I couldn't resist given the story behind it and the fact it is also a local tale.

Until next time...

- James

Anyone wanting more on this subject should read Archive 88 (from Lightmoor Press) or look at English Oilfields Ltd. - Scottish Shale All a bit recherché for me!
 
GNR open wagons

Liver & Fry

Western Thunderer
Time for a live update!

Having finished the last of my Mousa Models Highland wagon kits, I felt like change was needed, so my next build brings me back south to Great Northern territory.

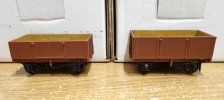
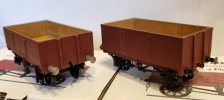
These are another pair of Mousa kits representing a standard Dia.1 4 plank wagon and a Dia.24 5 plank mineral wagon. I find if I have wagons from the same company, it's easier to batch build them and do all the painting in one go; that and I've got quite adept with these kits and so am able to build them quickly and efficiently, meaning I can clear two more off the long list of things to build!

20240114_122904.jpg

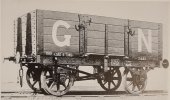
The Dia.1 was an integral part of the GNR wagon fleet and so it made sense for me to own at least one but my acquisition of the Dia.24 was accidental and I had to refer to Tatlow to identify it. Thankfully, there is a nice clear photo as seen below:

20240114_164649.jpg
(LNER Wagons Volume 1, page 33, credited W.O.STEEL CTY. R.J.ESSERY)

If nothing else it adds some variation!

Now, it's my understanding that the entire bodyside of GNR open wagons was painted brown, with only the ironwork below the solebar (and buffer casings) being painted black, but the photo leads me to question if mineral wagons were an exception this rule? Or if it's simply the effect of a metal surface reflecting more than wood? Any thoughts or discussion on that would be appreciated!

In the meantime, I'm off to paint the first coat of the interior/floor...

- James
 
GNR open wagons

Liver & Fry

Western Thunderer
Greetings, all!

I'm happy to report that the GNR wagons are proceeding nicely! Since last time, the ironwork below the solebars have been painted black and, initially, the base coat for the interior and floor 'wood' colour was applied. At this point there was a minor hiccup, insofar as I became aware that the 4 plank didn't sit level, with one W-iron riding up when the wagon was sat on my workbench as a result of the body being twisted. I overcame this by submerging the wagon in hot water ("hot" being whatever temperature the kitchen tap chucks out!) and then twisting it in the opposite rotation, before placing a weight on top of the wagon body to keep it pressed straight to the surface of the workbench. This certainly improved things!

Following that, I fitted the floor sections and have spent this evening painting the interiors in my usual manner:

20240118_222120.jpg

Once dry, I will look to fit weight underneath the wagons and then it'll be wheels and lettering; but more about those when they happen!

- James
 
GNR open wagons

Liver & Fry

Western Thunderer
I promise one day I'll actually make one of these update posts at a reasonable hour!

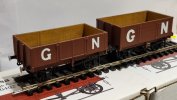
Anyway... W is the letter of the weekend as weight and wheels have been added to both the GNR wagons!

20240121_151151.jpg
20240121_151914.jpg20240121_203128.jpg20240121_203019.jpg

Bufferbeam detailing will follow next, but there will be a slight delay (Royal Mail dependent) on lettering. My sheet of GN transfers from Powsides is suitable for the Dia.1 but the Dia.24 requires something bigger for the main G and N, at least by the reference photo I posted above. I've ordered some 10mm high Franklin Heavy lettering in white from Fox Transfers and I will try make these work (a little bit of GNR brown here and there to tweak the font of the G and no one will ever know!).

- James
 
GNR open wagons

Liver & Fry

Western Thunderer
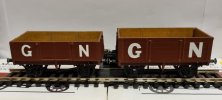
The first stages of lettering have been done (I.e the G & N on both wagons):

20240125_213148.jpg20240125_220234.jpg

The Fox Transfers Franklin font used on the Dia.24 is definitely "fatter" than the actual GN font provided by Powsides for the Dia.1, with the G having to be carefully cut to shape, but generally I feel it captures the correct look of the font used by the GNR. (See below an example of the true Franklin Gothic G):

Screenshot_20240126_121539_Chrome.jpg

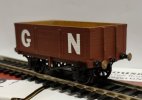
Certainly when viewed at a "viewing distance", as if over in a siding on a layout, or when positioned alone, it looks passable to me, and with no alternative for taller GN lettering in 4mm, this is what I have to work with.

20240125_213349.jpg

The next stage is to try an add additional details such as tonnage and running number. Again, the Powsides transfers don't seem wholly suitable for my specific needs in what examples are provided or the sizing (I must stress, I regularly use Powsides for my GE modelling and they have been very good for those projects). I'm going to experiment with a sheet of 1mm and 2mm high Franklin letters and numbers and see if they will work for me. I'll obviously share my findings with you all when I do!

- James
 
GNR open wagons

Liver & Fry

Western Thunderer
"Fiddly" is the word I'd use to describe yesterday's endeavours!

Using 1mm high transfers, I slowly applied additional detailing to one side of the Dia.24. This initially consisted of the running number and tonnage details on the lower edge of the bodyside. My attention then turned to the works plate on the solebar. Powsides provide pre-made transfers for this, including one with the running number left blank. However, they are too deep for the solebars of these wagons and so I had to make my own using the 1mm transfers. I edged these on each side with a white line to recreate the edge of the plate and I'm happy that my efforts match the look of what should be there, to me at least!

20240127_003625.jpg

Due to the weight of the font, the tonnage details are a little squeezed in, but I was trying to match the prototype by having this line of text between the two rivets along the bottom of the body, which they are, just!

So that's one side done, right? Right....?

Well, not quite... If we look again at the prototype, what do you notice about the wagon itself? Something I confess I overlooked until now:

20240114_164649.jpg
20240127_004058.jpg

I guess that adds weight to the theory that a project is never truly finished, especially when you think you're done, or that the finish line is in sight! Still, it's an easy fix and it'll do wonders for the finished wagon!

Now to do the other side... And then the Dia.1!

- James
 

AJC

Western Thunderer
Nice work on the wagon - but those big 'GN's are horrid (sorry). The weight of the diagonals is far, far, too heavy which completely ruins the look as the originals are based on a consistent width.

Note that this is only my view - it would really annoy me but we all have our hang ups. The transfer has gone on nicely though.

Adam
 

Liver & Fry

Western Thunderer
;)

I know it’s not for everyone, but I’d be in there with some white gouache and fine paintbrush, Geoff Kent style. Some weathering will always hide any rough edges. Of course, it depends on how steady one's hand is. Mine's not so steady these days…

I've just ordered another sheet so hopefully be sooner than later! I don't have the hand for such finesse painting sadly!
 
Top