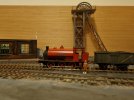
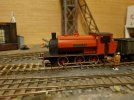
4mm Little Milton Colliery EM gauge. Primrose no 2 nearing completion

2996 Victor

Western Thunderer
Hey up Mark,

Are you local then if you shop at Frizinghall?


A quick video, she's now had her rods removed & the wheels painted red. I'll give her the white walls tomorrow.
Sadly, no, I worked in Bradford for a while recently, although it's only an hour and a bit away from home. Rails of Sheffield is nearer and my LMS is WD Models in Chesterfield.

Primrose is looking grand!
 

2996 Victor

Western Thunderer
I only moved to Derbyshire three years ago to be with my fiancée - I'm from Somerset originally! I've been into Marcway's current store, but it was a bit..... unusual! Frizinghall is great, better than Rails IMHO, well worth the trip for me but I need to save up a shopping list
 

34091 Weymouth

Western Thunderer
I've been working on Primrose no2 on & off most of the weekend & tonight I added the brakegear which was interesting to say the least. Apart from some cosmetic details she's now finished. All the etched parts are fitted & it's just a case of finishing her off.

20220926_212504.jpg
20220926_212509.jpg

I'm really pleased with how she's turned out. The whitewall tyres really make her pop. It's a lovely kit from Mike Edge & I must admit I'm looking forward to building a 15inch next named Airedale.

Other jobs I've completed over the weekend was giving the headgear some primer. I used the Chris nevard way of giving it a blast of grey, red & black. Its just given it a weathered look for now until I decide what colour to paint it. I've also completed all the trackwork & wiring now so the layout is finished in that respect. I might if I have time go to hobbycraft on Sunday & get some good mounting card. I'm going to get to work on the screens soon.

Si
 

2996 Victor

Western Thunderer
Primrose looks fantastic - great work! Loco building is a skill I've yet to try out.....but I want (need!) to!

The headgear is looking very good - a little weathering and added grime and it'll be perfect.

Cheers,
Mark
 

34091 Weymouth

Western Thunderer
Primrose looks fantastic - great work! Loco building is a skill I've yet to try out.....but I want (need!) to!

The headgear is looking very good - a little weathering and added grime and it'll be perfect.

Cheers,
Mark

Mark to chuck my 2 penneth in,

If you want to learn to build a kit that's great & I encourage you to have a go. If your not confident at soldering go to the local model shop & buy a small sheet of brass. Cut it up in the various pieces & teach yourself how to solder joints.

For building a chassis which is probably the hardest part I would suggest a jig of some sort. I personally use a Avonside chassis Pro its an expensive bit of kit but to dip your toe try a poppys woodtech jig. The cost around £30, I borrowed one to build an 0-8-0 chassis & I was impressed. I'd also suggest the use of markits wheels to start with. They self quarter & have stainless steel wheels. Gibson look better but need quartering & can be a sod to put on true.

Gearboxes are a personal choice, most of us use high level which are the best IMO.

Tools wise nothing special, a few files, a reamer for opening axlebush holes, a decent soldering iron, flux & solder. I have a lot of specialist tools for bending & rolling but these can be done with correct diameter tube & a ruler & some clamps.

A Mike Edge 230hp hunslet would be a decent kit to start with. It's 0-4-0 wheelbase makes it the easiest of chassis to build.

Si
 

2996 Victor

Western Thunderer
Mark to chuck my 2 penneth in,

If you want to learn to build a kit that's great & I encourage you to have a go. If your not confident at soldering go to the local model shop & buy a small sheet of brass. Cut it up in the various pieces & teach yourself how to solder joints.

For building a chassis which is probably the hardest part I would suggest a jig of some sort. I personally use a Avonside chassis Pro its an expensive bit of kit but to dip your toe try a poppys woodtech jig. The cost around £30, I borrowed one to build an 0-8-0 chassis & I was impressed. I'd also suggest the use of markits wheels to start with. They self quarter & have stainless steel wheels. Gibson look better but need quartering & can be a sod to put on true.

Gearboxes are a personal choice, most of us use high level which are the best IMO.

Tools wise nothing special, a few files, a reamer for opening axlebush holes, a decent soldering iron, flux & solder. I have a lot of specialist tools for bending & rolling but these can be done with correct diameter tube & a ruler & some clamps.

A Mike Edge 230hp hunslet would be a decent kit to start with. It's 0-4-0 wheelbase makes it the easiest of chassis to build.

Si
Si,

Thanks so much for your great advice, it's hugely appreciated!

I did pick up a Poppy's jig a little while ago, and got myself a new Antex soldering iron, solder and flux.

I've got several kits that I've collected, most recently a High Level GWR 14xx chassis kit, so an 0-4-2t of course, with one of their gearboxes. An 0-4-0 sounds like a good plan, though!

I need to get some more tools, decent files and reamers. Thanks for the advice on wheels as well!

Thanks again and all the best,
Mark
 

34091 Weymouth

Western Thunderer
Si,

Thanks so much for your great advice, it's hugely appreciated!

I did pick up a Poppy's jig a little while ago, and got myself a new Antex soldering iron, solder and flux.

I've got several kits that I've collected, most recently a High Level GWR 14xx chassis kit, so an 0-4-2t of course, with one of their gearboxes. An 0-4-0 sounds like a good plan, though!

I need to get some more tools, decent files and reamers. Thanks for the advice on wheels as well!

Thanks again and all the best,
Mark

No probs, if you get stuck with anything just give us a shout I can always help you out.
 

34091 Weymouth

Western Thunderer
I haven't done a great deal this week on the layout but I did address a few track issues this evening that have been bugging me for some time.

When I built this layout it was literally a few smp templates to hand, some lengths of track & half an idea what I was doing. Having never built my own pointwork properly this was a test piece if you will & I found that when I returned to it there was a couple of areas that were tight for markits wheels.

Having dug out my box of track gauges I've just eased a few sections where it was tight so that the austerity would run better. It's actually worked out well & the austerity is happier moving through the points now.

I'm not going to have much time this weekend to do anything but I would like to get some bits to start some scenic work. I might see if I can order some mounting card & some das off amazon.

I'll keep you posted

Si
 

2996 Victor

Western Thunderer
I haven't done a great deal this week on the layout but I did address a few track issues this evening that have been bugging me for some time.

When I built this layout it was literally a few smp templates to hand, some lengths of track & half an idea what I was doing. Having never built my own pointwork properly this was a test piece if you will & I found that when I returned to it there was a couple of areas that were tight for markits wheels.

Having dug out my box of track gauges I've just eased a few sections where it was tight so that the austerity would run better. It's actually worked out well & the austerity is happier moving through the points now.

I'm not going to have much time this weekend to do anything but I would like to get some bits to start some scenic work. I might see if I can order some mounting card & some das off amazon.

I'll keep you posted

Si
Great stuff, Si! Looking forward to seeing your next instalment!

Have you got any tips for track building?

I've just ordered an EMGS track gauge set plus an extra 3-point track gauge. Like loco building, this will be my first go at track building :) but I'm looking forward to it! It's light railway track with small section flat bottom rail, so at least there are no chairs to worry about

Cheers,
Mark
 
  • Like
Reactions: AJC

34091 Weymouth

Western Thunderer
Great stuff, Si! Looking forward to seeing your next instalment!

Have you got any tips for track building?

I've just ordered an EMGS track gauge set plus an extra 3-point track gauge. Like loco building, this will be my first go at track building :) but I'm looking forward to it! It's light railway track with small section flat bottom rail, so at least there are no chairs to worry about

Cheers,
Mark

Pretty straight forward is track building once you get the hang of it. Lots of people do things differently but this is my approach.

Tools I use.

Emgs vee & blade filing jigs.
Roller gauges
Triangle gauges
A large course file
A smaller finer file
Sand paper & polishing paper.
Sticky tape
Double sided tape

I use templot for drawing templates as this is simple. I can't draw layouts on that programme & after hours trying I gave up.

Once you have printed a template to gauge, smp kits usually have all the bits, rails, copperclad & a template ( a good start )

Lay you template on something flat, workbench, glass plate etc. Stick it down with some tape around the edges.

Cut your sleepers to length, I glue mine with a little pva glue. I leave it to set, if you use a tiny bit on a brush that cures quickly. I have used double sided tape equally as well but only on the edges of the sleepers. Take note where your tiebar is going to go & leave that out of the mix. I make mine as a sleeper, some make a tiebar separate. The glue btw is used so that when the turnout is made it can be boiled off with a kettle full of water. It goes a bit squishy under the sleeper but you can move it by rubbing it with your finger.

When you use the filing jig it has 4 angles which work with the templates, when you slip the rail take note of which side up it goes. You need to file 2 lengths & to make it work in the jig for soldering the lengths need to be opposite ways round in the jig. What I mean by that is one rail with the bullhead to the top & the other to the bottom.
Once they are filed flat, unscrew the jig & slot both rails into the vee section of the jig. Line them up so they meet perfectly & tighten the screw once again & solder.

That's it vee done.

If you bought the blade filing jig then it's much the same process by making sure the 2 rails lay in the jig with both bullhead pieces facing in or out, it doesn't matter which. Just files the top & eventually it'll go nice & flat & you'll have 2 blades.

As you get swarf from filing I use sand papers to clean the blades & vee components so they are smooth before assembly. You don't want any friction when the blades move.

A good move btw is to print or photocopy a second template for reference.

I start by soldering the vee onto the template, others will do it different but it's up to you. I then cut my stock rails & mark where the point blades will touch the rail. I mark the side of the rail woth a marker pen & then I file it back so the rail is smooth & not bullhead or base is showing. In essence you halve the thickness of the rail. This helps the point blade sit snugly against the stock rail.

I then solder a stock rail, starting at the vee end. Using roller gauges etc helps here. Do both of your stock rails as far as the vee. I then form the parts of rail leading into the vee. This is a tricky part & its better to form them with your separate template. Use a ruler to line them up with the vee & if you have all your jigs from the emgs you should have a length of steel. This is to check the flangeways. Stick that into the mix here too.

After those parts are fitted I usually work my way out one side at a time constantly checking with the gauges everything is to gauge. Keep an eye on the rail too, it can sit at an angle in a jig.

That's it in a nutshell, hopefully I've covered it a bit. The iain rice books are OK to help out. I've found it trial & error. Another good way to learn is join one of the emgs area groups.

I'd post pictures but I'm stuck on a loading bay in Bedford currently a few hundred miles away from the jigs ;)
 
Last edited:

2996 Victor

Western Thunderer
Pretty straight forward is track building once you get the hang of it. Lots of people do things differently but this is my approach.

Tools I use.

Emgs vee & blade filing jigs.
Roller gauges
Triangle gauges
A large course file
A smaller finer file
Sand paper & polishing paper.
Sticky tape
Double sided tape

I use templot for drawing templates as this is simple. I can't draw layouts on that programme & after hours trying I gave up.

Once you have printed a template to gauge, smp kits usually have all the bits, rails, copperclad & a template ( a good start )

Lay you template on something flat, workbench, glass plate etc. Stick it down with some tape around the edges.

Cut your sleepers to length, I glue mine with a little pva glue. I leave it to set, if you use a tiny bit on a brush that cures quickly. I have used double sided tape equally as well but only on the edges of the sleepers. Take note where your tiebar is going to go & leave that out of the mix. I make mine as a sleeper, some make a tiebar separate. The glue btw is used so that when the turnout is made it can be boiled off with a kettle full of water. It goes a bit squishy under the sleeper but you can move it by rubbing it with your finger.

When you use the filing jig it has 4 angles which work with the templates, when you slip the rail take note of which side up it goes. You need to file 2 lengths & to make it work in the jig for soldering the lengths need to be opposite ways round in the jig. What I mean by that is one rail with the bullhead to the top & the other to the bottom.
Once they are filed flat, unscrew the jig & slot both rails into the vee section of the jig. Line them up so they meet perfectly & tighten the screw once again & solder.

That's it vee done.

If you bought the blade filing jig then it's much the same process by making sure the 2 rails lay in the jig with both bullhead pieces facing in or out, it doesn't matter which. Just files the top & eventually it'll go nice & flat & you'll have 2 blades.

As you get swarf from filing I use sand papers to clean the blades & vee components so they are smooth before assembly. You don't want any friction when the blades move.

A good move btw is to print or photocopy a second template for reference.

I start by soldering the vee onto the template, others will do it different but it's up to you. I then cut my stock rails & mark where the point blades will touch the rail. I mark the side of the rail woth a marker pen & then I file it back so the rail is smooth & not bullhead or base is showing. In essence you halve the thickness of the rail. This helps the point blade sit snugly against the stock rail.

I then solder a stock rail, starting at the vee end. Using roller gauges etc helps here. Do both of your stock rails as far as the vee. I then form the parts of rail leading into the vee. This is a tricky part & its better to form them with your separate template. Use a ruler to line them up with the vee & if you have all your jigs from the emgs you should have a length of steel. This is to check the flangeways. Stick that into the mix here too.

After those parts are fitted I usually work my way out one side at a time constantly checking with the gauges everything is to gauge. Keep an eye on the rail too, it can sit at an angle in a jig.

That's it in a nutshell, hopefully I've covered it a bit. The iain rice books are OK to help out. I've found it trial & error. Another good way to learn is join one of the emgs area groups.

I'd post pictures but I'm stuck on a loading bay in Bedford currently a few hundred miles away from the jigs ;)
Hi there Si,

Hope you're back from Bedford! Apologies for not having replied sooner, I was a bit tied up yesterday as well, and wanted to read your post thoroughly!

Thank you for taking the time to go through the process in depth, it's really helped me get a good idea of what's involved. It sounds reasonably straight forward once you have get the hang of it!

I did see the vee and blade filing jigs, but didn't order them - I think I need to! Are they okay for flat bottom rail as well as bullhead? I ordered the Society gauge "set" plus an additional three-point track gauge.

I'm okay with Templot, so that's all good and I've got a big, thick flat plate of Perspex which might serve as a surface to build pointwork on. The rest sounds like being careful and taking your time.

While I'm waiting for the gauges to arrive, and ordering the filing jigs, I'll make a simple jig for building plain track, so hopefully that'll keep me busy for a few days.....

Thanks again for all your help, it's hugely appreciated. I'll keep you posted on how I get on - I ought to start a workbench thread, perhaps, so I don't keep hijacking your layout thread!

Cheers and very best regards,
Mark
 

34091 Weymouth

Western Thunderer
Hi there Si,

Hope you're back from Bedford! Apologies for not having replied sooner, I was a bit tied up yesterday as well, and wanted to read your post thoroughly!

Thank you for taking the time to go through the process in depth, it's really helped me get a good idea of what's involved. It sounds reasonably straight forward once you have get the hang of it!

I did see the vee and blade filing jigs, but didn't order them - I think I need to! Are they okay for flat bottom rail as well as bullhead? I ordered the Society gauge "set" plus an additional three-point track gauge.

I'm okay with Templot, so that's all good and I've got a big, thick flat plate of Perspex which might serve as a surface to build pointwork on. The rest sounds like being careful and taking your time.

While I'm waiting for the gauges to arrive, and ordering the filing jigs, I'll make a simple jig for building plain track, so hopefully that'll keep me busy for a few days.....

Thanks again for all your help, it's hugely appreciated. I'll keep you posted on how I get on - I ought to start a workbench thread, perhaps, so I don't keep hijacking your layout thread!

Cheers and very best regards,
Mark

Mark,

No problems. The vee & point blade jigs are very useful, no essential but worth the investment. They only do bullhead rail, flat-bottomed rail is very chunky & won't fit the jig.

Have a look on amazon for the iain rice books on building pcb track. They are worth the investment too.

Look forward to seeing your progress.

Si
 

2996 Victor

Western Thunderer
Mark,

No problems. The vee & point blade jigs are very useful, no essential but worth the investment. They only do bullhead rail, flat-bottomed rail is very chunky & won't fit the jig.

Have a look on amazon for the iain rice books on building pcb track. They are worth the investment too.

Look forward to seeing your progress.

Si
Thanks, Si, my first two "needs" for track building are an EM light railway and an 009 layout, so both light flat bottom rail! I wonder if I can fudge jigs for filing the vee and switch blades - they wouldn't need to be long lived! I'll see if I can find Iain Rice's books, too :)

I've got some PCB strip to start cutting plain track sleepers, but I need some wider strip for point timbers. I didn't get round to making my plain track jig today.....

Thanks again and best regards,
Mark
 

34091 Weymouth

Western Thunderer
Christ 009, peco do really good track you know ;)

Thing with flat-bottomed rail is its really chunky so it'll need a lot of filing as i think it is code 100 rail. To start with try using some bullhead. It's finer so you can get used to making points before progressing to flat-bottomed. I've never had any luck with code 100 track but then again when I did have a go I had all the gear & no idea. It was a long time ago.

Si
 

2996 Victor

Western Thunderer
Christ 009, peco do really good track you know ;)

Thing with flat-bottomed rail is its really chunky so it'll need a lot of filing as i think it is code 100 rail. To start with try using some bullhead. It's finer so you can get used to making points before progressing to flat-bottomed. I've never had any luck with code 100 track but then again when I did have a go I had all the gear & no idea. It was a long time ago.

Si
Si,

sorry I haven't replied sooner - thought I had but obviously lost the plot!!!

I'm not a great fan of PECO track, to be honest. I know its robust and it does look better than a lot of RTR, but its just too toy-like for my taste. The 009 crazy track looks a bit daft with huge girder-like rails.

My 009 project is based around a Lynton & Barnstaple quayside area, so some is inset track for which I've used a length of PECO N gauge Code 55 track. The rest will be Code 55 FB rail on correctly sized and spaced PCB sleepers, while my EM gauge light railway will also be Code 55 rail on 9' PCB sleepers, so a very light section rail more in keeping with those types of lines in the period I model, circa 1905.

My other EM layout uses the EMGS RTR B6 points and flexi track, so I've save myself a bit of bother there :D

I'm going to order some new Vallorbe files in the next couple of days! Maybe, over the weekend, I might try making a start.....

All the best,

Mark
 
Top