You are using an out of date browser. It may not display this or other websites correctly.
You should upgrade or use an alternative browser.
You should upgrade or use an alternative browser.
2mm Let's Build a Midland 0-6-0!
- Thread starter WM183
- Start date
WM183
Western Thunderer
Hi Folks.
I won't bin it, just very frustrated. Today was very much a 2 steps forward, 5 steps back sort of day. I cut the bottom of the boiler away so I could mount the gearbox on the center axle, but aside from that, everything has gone badly. Figuring out how to connect the engine and tender has been an actual nightmare. What size screws should I get for this? M10, or 12? How do I pivot the drawbar so it can still move when the screw is tight? Nothing I am trying seems to work, and no articles seem to cover these sort of questions. The bodywork seems to be the easy bit.
Humm.... BA10 or 12. Not m10. Whoops
Last edited:
Tim Watson
Western Thunderer
For the drawbar pivot use a relatively small screw and trim a bit of thin wall tube to go over it: make it slightly longer than the thickness of the draw bar. The drawbar pivots on this tube and the screw can be tightened up, but the draw bar will be loose.
Tim
Tim
WM183
Western Thunderer
J
I meant BA 10 or 12... whoops!Definitely not M10…. M1.0 perhaps
WM183
Western Thunderer
I probably should have thought of this.For the drawbar pivot use a relatively small screw and trim a bit of thin wall tube to go over it: make it slightly longer than the thickness of the draw bar. The drawbar pivots on this tube and the screw can be tightened up, but the draw bar will be loose.
Tim
Thank you!
WM183
Western Thunderer
An update!
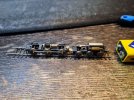
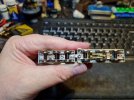
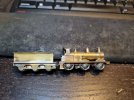
Work continues on our Johnson 0-6-0. I have sorted out the drawbar, how to mount the couplings (DGs) and assembled the bulk of the body of the loco. Footsteps and the front of the firebox are the latest details added. Soon, some handrails, a reversing linkage, and some boilertop pipework will complete the body.
The tender has a new frame. I've learnt a great deal about what to do and what not to do when making these split chassis, and this build has been a wonderful learning experience. I'm hoping to have it running in a few days. I need to find some cig papers - we actually do not have any - so I can insulate the footplate of the loco and tender. For my next one, I am confident I can use spacers of plasticard to lift the body .010 or so above the frame.
I am looking at a 2441 class 0-6-0 tank for my next build, or perhaps a 4-4-0? Or another 0-6-0, maybe a Belpaire. Hmm...
I also need to figure out how to build a rake of short 6 wheel coaches.


-missy-
Active Member
I need to find some cig papers - we actually do not have any - so I can insulate the footplate of the loco and tender. For my next one, I am confident I can use spacers of plasticard to lift the body .010 or so above the frame.
Hi.
Papers and superglue is a rather old skool method of insulating things. Try out some Kapton Tape, its significantly easier to find and use.
Julia

WM183
Western Thunderer
I have added more details; handrails, smokebox door and dart, and reversing linkage (other side of course) and am preparing to do the last few bits; injectors, whistles, and those... pokey bits by the dome.
The fiddliest bit will be the brakes. Not sure how to tackle those yet.
The loco and the engine modelled!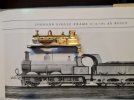
The fiddliest bit will be the brakes. Not sure how to tackle those yet.
The loco and the engine modelled!

WM183
Western Thunderer
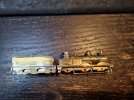
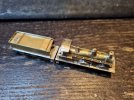
The engine is nearly done. I have finished most of the boiler/footplate/cab details, save the whistle and the linkage for the steam dome. The tender is also nearly done; I just need to add the brake stand and a few front end details yet. The top of the tender coal space will be covered in coal to conceal the lack of a coal compartment. I will be painting the frames today... and perhaps have a running model this weekend???


oldravendale
Western Thunderer
... and a very hot iron... But as Rob says - be quick. (I'm just building the innards of a Royal Scot tender with lots of linkages for the water scoop and the iron is at 300 degrees.) But you only have to touch the link with the iron and the solder is done without setting everything solid. I also use a spirit pen to cover all the parts I don't want soldered in black ink. (Other colours are available).Well done.
You have got much further than I did with 2mm.
Onwards and upwards.
Fag paper washers under the crankpin washer when you solder them and be quick!
Of course, I model in 7mm which is a little larger than your lovely loco and some of our 2mm constituency may have further and better advice...

Brian
WM183
Western Thunderer
Here's a video of the chassis running on 9v battery power! The gearbox wibbles about because I had originally planned to mount the gearbox on the rear axle, and install Simpson springs on the center axle, so the center axle holes are opened up to 1.6mm. I'll pack it with some card on either side to hold it a bit.
It runs!!! The rods hit the underside of the L-shaped stock I used for the footplate valances, so no body on just now. I will fix that tomorrow.
I used small pieces of paper with a drop of oil soaked into them beneath the little crankpin washers - that's how the 2mm SA video on the jubilee chassis on youtube shows it, so that's what I did. It works well!
Last edited:
garethashenden
Western Thunderer
Yay! Its so satisfying to see a chassis you made run isn't it?

