Jennifer Who?

NickB

Western Thunderer
Mike,

The story is complicated and the evidence is sparse, but as far as the LSWR was concerned, in the early years up to about 1850, locos were mainly bought from outside contractors and it is known that many of these were made with iron domes because there are records that they rusted in service. The company started building its own locos in the 1840s and the use of contractors dropped off within a few years. We don't know what Nine Elms did, but photos of Beattie engines in the 1860s and 70s suggest a mixture of painted body colour and polished brass, so presumably brass was used for many if not all of them.

Sorry, Jon, for diverging from your posts.

Nick
 

Jon Nazareth

Western Thunderer
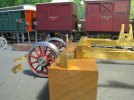
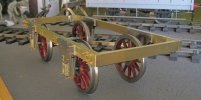
Mmm, after the above rejoicing, I found that I was a little premature. I carried out a bit more fettling and now all is well. I found that with the coil spring sitting on it's support collar and fully compressed, it was stopping the axle box moving fully upwards. I replaced the collars on a some of the boxes but soldering them just 1mm further down and found that that did the trick. Sorry for the out of focus picture but I'm sure that you can see what I mean. The pin locates in a hole drilled part way through the underside of the frame.

Jon

IMG_5196.JPGIMG_5198.JPG
 

michael mott

Western Thunderer
I don’t recall you mentioning what the materials are for the frames on this model are they look like they are brass and nickel silver is that correct?
Nice work so far.
Michael
 

Jon Nazareth

Western Thunderer
Michael
Yes, brass frames with steel axle box guides. I would normally use styrene but I had the brass so, decided to use that instead. I think that I’m making more work for myself. The brakes hangers are fixed to four separate bearers and the water tank sits on those. Because of the brass, I’m going to have to use mechanical fixings and soft solder to join all of the bits and pieces. If I’d have stuck to styrene, a drop of solvent is much, much easier to use. I’d like to have used 18 thou sheet for the tank but only have 22 thou plus a lot of 10 thou but , I think that the latter is too thin.

Jon
 

Jon Nazareth

Western Thunderer
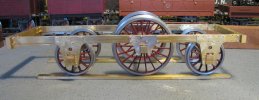
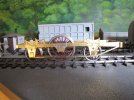
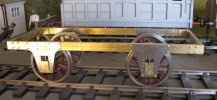
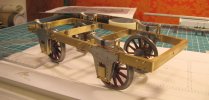
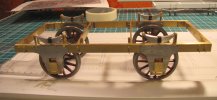
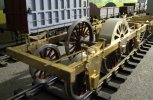
I wanted to work out how wide the tank on the tender should be and this meant that I had to refit the springs. Then, I thought that folks might like to see how they looked mounted onto the frames. The ali springs are courtesy of Mikemills who has recently posted a picture of his G3 industrial loco which uses the same springs.

Jon

IMG_5276.JPGIMG_5278.JPGIMG_5279.JPG
 

Jon Nazareth

Western Thunderer
Following on from 'How to Mark Out Splashers' on 'Questions and Queries'.
Using Brian McKenzies file which went to Mike Williams who then passed it on to John Smith who produce the splashers and then sent them to me. Thank you to you all, what team work.

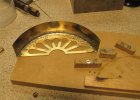
This is the jig that I made up to hold the parts for soldering. The first jig had a brass base to it and it wasn't until I liberally coated the joint with solder paste that I realised that this was wrong. If I had carried on with the brass part, once heated up, the whole thing would end up as one lump! I swapped it for a piece of wood as you see here. Too lazy to use my soldering iron and being close at hand, I used the gas torch. As you can see, quite a bit of scorching took place. For the next one(s), I'll be using the soldering iron. For some reason, the paste spits and bubbles when heat is applied. The only reason that I can think of for this is because I mixed a little bit of water with it in the tube as it had gone quite hard.


IMG_5298.JPG

IMG_5300.JPGIMG_5303.JPG

Here is the splasher simply propped up in place. For the width of the frames, I used a measurement from the original drawing hence, it is quite wide. because of this, I had to make the splasher cover wide too and this came out at 20mm and looks much too wide from an aesthetic point of view. I didn't want to make up a footplate but, from an aesthetic point of view and to reduce to width of the made up splasher, I think that I may have to. My original idea was to fit a small bracket to the lower edge of the splasher. The other end of the bracket would be fitted to the side frame. I thought that one at each end of the splasher would hold all in place. It would work but now my eye keeps going back to the width of the bloomin' thing. I can very easily apply a drop of heat to the splasher and it will come apart making it possible to re-use the ornate part. Anyone have any ideas??

Jon
 

Jon Nazareth

Western Thunderer
What I should have said was that the only way of improving the look of the splasher, in my opinion, is to have some form of footplate.

Job
 

NickB

Western Thunderer
Jon,

If I understand you correctly, the splasher looks too wide because in the absense of a footplate the front face has to be located on the outer frame?And if there were a footplate, it could be moved inwards to closer to the wheel? To state the obvious, if it were moved inboard it would have to sit on something: either a footplate, some form of stretchers to an inner frame (assuming such a thing exists), or brackets attached to the inner surface of the outer frame. On the real thing a footplate has to be supported by something structural hidden underneath it, so from a modelling point of view having one avoids such complications. Alternatively, move your timeframe earlier - many 1830s locos didn't have splashers at all!

I like the soldering jig. I fiddle about with lots of clamps but I might try something like that next time.

Nick
 

Jon Nazareth

Western Thunderer
Simon,
Yes, I think that you are right there but I had a free afternoon and wanted to have a play. As you say, boiler next.

Nick
Yes, you are right too on all counts. It would seem a shame not to use the splashers but, if I did, I'd have to build another loco, with a lot more thought put behind it, where the splashers could be used :) .

Jon
 

Jon Nazareth

Western Thunderer
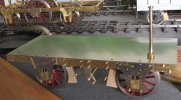
Brakes and brake rods et al fitted and the brake standard just balanced more or less in position. Because of the spring hangers passing through the base plate of the tender, this part will be fixed in position first. My idea is to have some captive nuts soldered inside the upper part of the tender which will enable it to be bolted to the base plate after all has been painted.

JonIMG_5306.JPGIMG_5308.JPG
 

Jon Nazareth

Western Thunderer
I’ve moved back to this project and have spent a few hours cleaning up the tender etches. Having decided to push the rivets out in the strapping and then solder in pace, I ordered three different solders varying in melting point. The idea being that the highest would be used first followed by the others as work progressed. The first strap to have its rivets pushed out was the single piece on its own. As riveting progressed, I noticed that it was starting to curl up. I kept going with the thought that I would gently flatten it before soldering it onto the side. Not only had it curled but, it had also deformed sideways and worst of all, it had stretched! When I offered it up to the side, of course the corresponding rivets no longer lined up. Also, I was unable to get rid of the sideways kinks to my satisfaction. Luckily, I have a spare so, all is not lost.
Thinking how to get over this, I decided to rivet all of the straps in place with 1/32” copper rivets yes, I know, after ordering the solder too. For the tender alone I will need a minimum of 1,024. I have managed to order 900 from Polly Engineering (their complete stock) but will still need at least 124 to finish off the tender. I’ll still need som as spares and, I don’t know how many, for the loco. I did search the interweb and Polly was about the only supplier of 1/16” copper rivets. Brass are available but with copper being softer there is less likelihood of distortion from hammering. If anyone knows of a supplier of 1/32” copper rivets would they please post their address here.

Jon

Ps. I did take a picture of the bent strap end on but for some reason it wouldn’t attach here. There is the one below however.

IMG_3294.jpegIMG_3292.jpeg
 

mswjr

Western Thunderer
Jon, I would only get your rivets from the same supplier if you can, I have got rivets from different suppliers in the past and the heads have been quite different, and it showed on the model, Also rather than rivet all of them , what i have done in the past is rivet say every 6 or so holes to do the strength work, and the ones in-between were soldered on the back, saves a lot of work. and anneal them in a tin before you start as the copper ones are quite hard as well.
 

Jon Nazareth

Western Thunderer
Gary
I think that you are right on all counts. As I’ve cleared out the supplier of the rivets, I’ll have to give them a call on Monday to ask about new et al.

Jon
 
Top