jonte

Western Thunderer
Constructed Irony
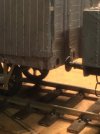
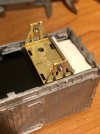
I’ve folded up some MJT GWR/RCH units. And fettled out their accommodation from inside the solebar using my trusty 3-sided scraper;a good device, and a purveyor of soothing shiny curls of whitemetal in this instance.
View attachment 210391
The W irons area trial fit at the moment. They sit on a false floor of 60 thou plasticard.

Cheers

Jan
Clever stuff once more, Jan :thumbs:

I’ll wager you’re making it look easier than it is, especially- and respectfully- using your kitchen table tool shop :eek:

I’ve scrutinised the attached photo, Jan, but can’t seem to make out the 3-sided job. If you’ve time, would you be able to tell us more/attach a shot of it, please? Sounds a handy implement :)

Jon
 

Lyndhurstman

Western Thunderer
Clever stuff once more, Jan :thumbs:

I’ll wager you’re making it look easier than it is, especially- and respectfully- using your kitchen table tool shop :eek:

I’ve scrutinised the attached photo, Jan, but can’t seem to make out the 3-sided job. If you’ve time, would you be able to tell us more/attach a shot of it, please? Sounds a handy implement :)

Jon
Hello Jon
Thanks. It's actually my WB; a computer desk I got gratis from a work colleague some moons ago. The "grain" can be a bit of a pain, but it's flat and relatively easy to keep clean (not that I do that much, it seems!). And - as I know to my cost - I can spill glue with impunity ;) (sorry!). The kitchen table would be better; it's smoother. And we're not at all precious about it. But the Tiny Train Room has a radiator... :)
The scraper I will not photograph; it - like a lot of my steel gear - is prone to rust. Such is my personality. I do have a box of latex gloves, but I find them to be a pain when working on the tiny brass bits and pieces, and so my tools suffer collateral damage... . However, it is very similar (I would say identical) to this one from Chronos Soba Triangular Scraper - Chronos Engineering Supplies . I find the point very handy - particularly in this instance, where my failure to plan properly meant I put the floor in before checking to see if the MJT units would fit!

Cheers

Jan
 

jonte

Western Thunderer
Hello Jon
Thanks. It's actually my WB; a computer desk I got gratis from a work colleague some moons ago. The "grain" can be a bit of a pain, but it's flat and relatively easy to keep clean (not that I do that much, it seems!). And - as I know to my cost - I can spill glue with impunity ;) (sorry!). The kitchen table would be better; it's smoother. And we're not at all precious about it. But the Tiny Train Room has a radiator... :)
The scraper I will not photograph; it - like a lot of my steel gear - is prone to rust. Such is my personality. I do have a box of latex gloves, but I find them to be a pain when working on the tiny brass bits and pieces, and so my tools suffer collateral damage... . However, it is very similar (I would say identical) to this one from Chronos Soba Triangular Scraper - Chronos Engineering Supplies . I find the point very handy - particularly in this instance, where my failure to plan properly meant I put the floor in before checking to see if the MJT units would fit!

Cheers

Jan

It’s your preferred method of working, Jan, not a failure on your part. At least that’s the way I like to think of it ;)

Many thanks for the link.

Jon
 

Lyndhurstman

Western Thunderer
It’s your preferred method of working, Jan, not a failure on your part. At least that’s the way I like to think of it ;)

Many thanks for the link.

Jon
Hello Jon
I think it’s more something I’ve become accustomed to accepting and accommodating :)

Cheers

Jan
 

Lyndhurstman

Western Thunderer
The Giddy Heights
IMG_1306.jpeg

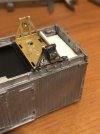
Setting the packing beneath the compensation unit. It’s a bit of 60 thou plasticard, superglued onto the bottom of the unit. The white plasticard is a temporary spacer to ensure the W iron legs match up with their representation on the cast solebar, and are square to to the centre line.

Here, I’ve trimmed off the tab that sat at the top of whitemetal W iron (that fitted behind the solebar in the original design) in order to make sure that the spring anchors meet well with the bottom of the solebar. Which they do. It’s getting to the point where I’m going to have to take the piercing saw to the casting, to isolate the axlebox for rehoming on the MJT W iron…IMG_1307.jpeg
But before I do that, I’ll make sure that the vertical buffer centre line is OK… it should be, if the axlebox/spring casting sits well..

Cheers

Jan
 

jonte

Western Thunderer
The Giddy Heights
View attachment 210454

Setting the packing beneath the compensation unit. It’s a bit of 60 thou plasticard, superglued onto the bottom of the unit. The white plasticard is a temporary spacer to ensure the W iron legs match up with their representation on the cast solebar, and are square to to the centre line.

Here, I’ve trimmed off the tab that sat at the top of whitemetal W iron (that fitted behind the solebar in the original design) in order to make sure that the spring anchors meet well with the bottom of the solebar. Which they do. It’s getting to the point where I’m going to have to take the piercing saw to the casting, to isolate the axlebox for rehoming on the MJT W iron…View attachment 210455
But before I do that, I’ll make sure that the vertical buffer centre line is OK… it should be, if the axlebox/spring casting sits well..

Cheers

Jan
A coincidence with mention of your piercing saw, Jan.
I’ve just changed the blade in mine for a little job this morning :)

Good luck lining things up.

Jon
 

Lyndhurstman

Western Thunderer
A coincidence with mention of your piercing saw, Jan.
I’ve just changed the blade in mine for a little job this morning :)

Good luck lining things up.

Jon
Hi @jonte
Good luck with it. I have a game with myself to see how short a piece I can use (as well as trying my best not to break them in the first place :)) ).

Thank you. I was tempted - seeing as the floor is plasticard - to try and make it adjustable. But that was ditched as being Above & Beyond Over-Engineering! And providing the potential for it to work loose, of course.

Cheers

Jan
 

Lyndhurstman

Western Thunderer
Slimmers Journal
IMG_1335.jpeg

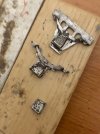
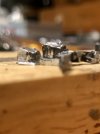
Excavating GNR axleboxes from their castings. One at a time. Piercing saw, jewellers bench, and files.

I’ve thinned the depth of the axlebox by removing some of the excess meat of the casting. IMG_1337.jpeg

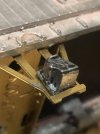
And here it is mounted loosely on the W-iron. The closeup shows it still needs a bit of finessing on the back.
IMG_1338.jpeg
Cheers

Jan
 
Last edited:

Lyndhurstman

Western Thunderer
They look ready for the cat walk, Jan :thumbs:

Jon
Hello Jon
Thanks. It’s an interesting moment, I think. One of those opportunities that make me feel like a ‘proper’ modeller. Lots of wastage, of course.

Apropos of nothing; In the background of all this is me actively trying to overcome the ‘Don’t Use It Or You’ll Lose It’ mindset that has seen me accrue a stock of such things - although I don’t have any more of these GNR axleboxes, I have plenty of others (mostly RCH, of course). So (maybe) there will be more of the same in the future…

Cheers

Jan
 

AJC

Western Thunderer
Coming on, Jan - from my current D&S experience, extracting paint from those GNR axleboxes is a right swine to do, isn't it? Handsome van, too.

Adam
 
Top