4mm Farleigh - Southern Railway in 00, circa early 1930's

Terry

Western Thunderer
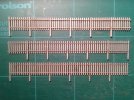
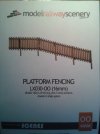
I pondered over platform fencing. The various plastic items available always appear to be too thick and chunky. Step forward Model Railway Scenery who produce a finely finished product, laser cut from .75mm greyboard. Yes, it's actually cardboard! My initial surprise was quickly overcome when I assembled the first piece however, as it makes up into a sturdy item. After all, you are not going to jump on the platform fencing, are you? In the pack you get 120cm of fencing, four ramp sections, and double and single gates.
20200327_165645 (2).jpg20200327_165711 (2).jpg20200327_192737.jpg

I gave the fencing a spray of some Humbrol light grey paint which I had to hand. On raiding the wife's crafting shed, under cover of darkness, and rummaging through her collection of acrylic paints, I came across one which was not far off the Southern Railway Light Stone which I was seeking. I smuggled out this paint together with a tube of white which was knocking about, just to lighten the other slightly.

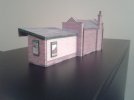
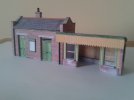
I required a station building which would fit the very small area available, and decided to use Scalescenes' Small Station Building. It would take a small amount of work to make it into an acceptable Southern Railway building, Herewith a couple of photos of the finished building. Additions to the basic kit are plastic downpipes, white-metal chimney, Peco track pin door knobs, and a card valance. The posters and signs come with this excellent Scalescenes' kit..

20200116_182124.jpg
20200116_182018.jpg


Houston, we have a problem! In my ignorance of all things Southern I assumed that Scalescenes' cream clapperboard, as included in the kit, would suffice for the station building, and I made the valance to match. And then the penny dropped. Having done a small piece of research and painting the platform fencing a light stone colour, I discovered that the cream clapperboard of the station building and valance was incorrect. These too should be finished in the same light stone colour. Fortunately, I always varnish the finished buildings with a matt varnish to protect the printer inks from moisture. Accordingly, it was a simple job to give a wash of the light stone without fear of the ink running. Here's the station building in its new colour..
711_301558_030000000.jpg

Terry
 

Terry

Western Thunderer
Sorry to give you that job. Of course, if you were modelling modern era you could say it was McDonald’s packaging. But there aren’t any red-flowered plant species that your red could represent. Red flowers are associated with bird pollination, as per hummingbirds in the Americas. In Europe, plants rely on insects and bees don’t see red (they do though see ultra violet). Hence, purples, yellows etc, but not red.
No problem. Thanks for sharing your knowledge with us.

Terry
 

Terry

Western Thunderer
The platform fencing was glued in place. Here it is together with the station building which had not been fixed down as yet..

20200330_195234.jpg
20200331_195059.jpg


The white metal running in board required a name so having consulted my road atlas, I decided on a name fairly local to my area.. Farleigh. The name was printed off courtesy of Scalescenes' station signs. The Ratio SR concrete platform lamps were then put together. A fiddly job this but well worth the effort. A couple were enhanced with the addition of bullseye signs, again from Scalescenes.

20200401_194304.jpg
20200401_195104.jpg
20200401_195009.jpg


The little scene was gradually coming together..

20200401_195820.jpg

Terry
 

Terry

Western Thunderer
I wasn't too happy about the expanse of grey baseboard opposite the platform, so decided to extend the grass embankment to cover it..

20200403_170927.jpg


My thoughts now turned to the lineside fencing. I acquired a couple of packets of these rather nice fence posts from Scale Model Scenery..

20200320_113258.jpg

Whilst still on the sprue, I gave them a couple of thin washes of diluted brown/grey mix of acrylic paint. I blew hard on them which cleared any paint from the holes. On reading the instructions, I found that the posts had to be spaced at 24mm (6ft in 4mm scale), and 2mm diameter holes had to be drilled in which to fit them. Enter the unpatented Terry's fence post measurer and hole jig! Simply hold the arrow against a previously fitted post, and using the pre-drilled holes as a guide, drill four holes into the baseboard/scenery, remove the jig, glue in the posts and start again..

20200324_165755 (2).jpg


So, the contractors moved in to start the roadside fencing. My fencing jig worked a treat. I was able to drill all the holes required, correctly spaced, within five minutes. There's something quite satisfying about dabbing a blob of glue on the bottom of the post and plonking it in a hole. Each post has a laser cut line to show the depth of planting. The wire supplied is very fine and passes through the laser cut holes quite easily. When finished, the wire will require a lick of paint to remove the bright silver finish.

20200404_211355.jpg
20200407_145437.jpg

Terry
 

Terry

Western Thunderer
I bought a pack of Shire Scenes Southern Railway platform seats from Dart Castings. They are on an etched brass fret (three seats) together with four handcarts and barrows. As you would expect the seats are quite fiddly, but with patience and a blob of superglue applied with a cocktail stick, they make up into fine models. I thought that a little styrene jig might help the proceedings along a bit..

20200407_155417.jpg
20200407_161402.jpg
20200408_162127.jpg

Terry
 

Heather Kay

Western Thunderer
Terry, you have pointed me at a supplier of parts suitable for a little project I have planned. That, and a lovely little layout brewing. What more can one ask?
 

Terry

Western Thunderer
Thank you Heather. Of course I have no connection with any of the manufacturers mentioned, other than as a very satisfied customer. I'm glad that you have found this thread useful.

Terry
 

Terry

Western Thunderer
Don't you just love the Southern Railway? Most other companies were quite content to paint their buffer stops red. But with no thought for the poor 4mm scale modellers who would follow, the Southern decided to paint their buffer stops white with a red stripe along the centre. Thanks for that! No matter how steady your hand with a paint brush, the red stripe is never going to look right, is it? Right, no point in prevaricating. I painted the faces of the Peco buffer stops with white acrylic paint purloined from the wife's crafting shed. Whilst I was there, I pinched her red paint too! I had a rummage around near our computer and found a pack of self-adhesive address labels intended to go into the printer. Here's the plan: paint one of the labels red, slice off a thin strip with the scalpel, and stick to the centre of the white buffer face. Well actually, it was three separate strips for each buffer stop, plus touching up the corners and ends with red paint.

20200409_132502.jpg

20200409_150626.jpg


Two of the three buffer stops in situ on the, as yet, undeveloped goods yard end of the layout..

20200409_171844.jpg


The very overgrown sidings eventually received some more detail..

20200530_141815.jpg

Terry
 
Last edited:

Yorkshire Dave

Western Thunderer
20200408_162127.jpg

Nice little SR diorama/layout - instantly recognisable as SR.

In my pedant mode I would note the Arial typeface/font is incorrect for BR(S) and SR (and apologies for this as it's one of first things I notice having spent ages tracking down the correct typefaces/fonts for 1948-65 and post 1965 British Rail, P22 Johnston London Underground and 1950s-89 Deutsche Bundesbahn). Pedant mode now switched off :).

For BR(S) 1948-65 it should be Gill Sans which is available as a free download from here. British Railway Fonts and Typefaces - ScotRail & British Rail Fonts - Railway Modelling & Tutorials

For pre-1948 SR they had their own typeface/font. Bespoke signs in the closest typeface/font - including the psuedo SR Roundel - are available from Sankey Scenics 4mm Bespoke Southern Railway Combination Pack | Sankey Scenics Signs
 

Terry

Western Thunderer
Thanks for that Dave. I'll investigate the Sankey Scenics offerings.

Terry

Edit. Appropriate signs have been ordered.
 
Last edited:

Terry

Western Thunderer
As Scalescenes' small station building is being used and the layout is quite small, I didn't want a large goods shed which would dominate the scene and make it look unbalanced. I also wanted a building which has character and is not the usual block with office attached. Whilst perusing some old books I came across a drawing from 1955 in Modelling The Old-Time Railways by Edward Beal, page113.

Out came the mount board and I made a start using Scalescenes' papers from their Scratchbuilder's yard range. I usually construct my buildings so that they are complete from whichever side is viewed. However, in order to speed up construction, and as the rear of this building will not be seen when in place on the layout, I decided not to include any detail which would not be seen. In this picture the upper part of the building is not yet fixed to the base..

20200419_212038.jpg


Windows were made by the self-adhesive label technique..

20200501_202341.jpg


All doors were fitted..

20200501_202437.jpg


There are six doors on the front (railside) and this next photo shows how I cheated with the four centre doors, making each pair from one piece of card..

20200501_175345.jpg


Interior roof detail was added. The roof trusses were printed from Scalescenes' Single Road Engine Shed, modified to fit the goods shed..

20200503_211653.jpg


On went the roof which was subsequently covered with Scalescenes' Grey Roof Slates..

20200504_214347.jpg


I pondered over the wooden brackets supporting the awning, not really wanting to revert to using plastic if possible. How to cut thin strips of card without it delaminating and ensuring it was firm enough to retain the shape of the bracket? I made each bracket and then gave them a coating of superglue to harden the card..

20200513_132331.jpg


I made the two awnings from mount board and fixed the brackets in place once they had been painted..

20200513_175908.jpg
20200513_175839.jpg

Terry
 

Terry

Western Thunderer
The wooden platform on the rail side was fabricated from a strip of 1mm greyboard covered in Scalescenes' clapboard to match the floor of the shed. The supporting wooden posts were cut from mount board and coated with superglue to harden them before painting. They were glued in place and aligned by eye.
Problem requiring a solution: how to represent the open wooden steps at each end of the wooden platform? I required some thin (but not too thin) card. A discarded tissue box was ideal. Firstly, I took some measurements from the model to work out the length and width and to establish the correct angle of the stairs. The measurements were transferred to the card and a simple diagram was drawn. A strip of the card was cut off and from this two side rails and five steps were cut. The side rails were offered up to the diagram and the angle of the steps marked thereon. The procedure was repeated for the second set of steps.

20200523_161229.jpg


An end of each step was glued to one side rail on each pencil line and levelled-up by eye. When dry, the other side was glued in place. Once the second side rail was firmly attached the whole staircase was given a light covering of superglue, using a cocktail stick. This was to harden the card and to firm-up all joints..

20200523_160305.jpg


Both staircases were given a couple of coats of paint and glued in position on the model. Job done!

20200523_193404.jpg

Terry


Terry

Western Thunderer
Earlier in this thread I made mention of making an extra wing wall for the bridge, in order to carry the scenery into the fiddle yard. This was my first attempt, intended to be removable when transporting the layout. Unfortunately, once it had dried out it took on the shape of a banana! Consequently, I was forced to glue it into place on the fiddle yard board.

20200521_160940.jpg


This is the illusion created from the scenic side of the bridge..

20200521_161202.jpg


However, I was not totally satisfied with the result when viewed from further along the layout, so I decided to extend it. You will notice that the hut has been moved from the scenic section, for reasons I will come to later..

20200821_171537.jpg

Terry
 

Terry

Western Thunderer
I thought that the goods yard should have a coal merchant's office, so why look further than the Scalescenes' model? I paid for the model some time back but it is now offered as a free download, so no excuse for you not to give it a go.

Here is the completed building in cruel close-up. Added features: plastic downpipes, cast metal chimney and a track pin door knob. Two pieces of metal rod have been glued to the rear of the roof sign, which pass through corresponding holes in the roof, thus giving a more secure fixing than simply gluing the sign to the roof as advised in the instructions..

711_111548_330000000.jpg
 

Terry

Western Thunderer
I decided that a small signal-box or ground frame was required. I assumed that it should be located somewhere near the bridge end of the layout in order for the imaginary signalman to exchange the imaginary staff or token with the imaginary driver or fireman of all trains arriving or leaving.
A box mounted on the platform would have been ideal, but the platform end near the bridge was already rather crowded. After discussing the matter with other interested parties, I decided to locate the box in the position occupied by the lineside hut. Thus the reason for the hut ending up in the fiddle yard.

Whilst perusing my copy of Southern Signals by G.Pryer, I came across a beautiful 'Brighton' ground level signal-box formerly situated at Adversane Crossing, situated between Billingshurst and Pulborough. In the photo, the signalman is obligingly stood outside the box which gave me a rough idea of the dimensions. The model measures 44mm x 38mm.

20200717_105506.jpg
20200717_105528.jpg

Constructional details: 1.5mm thick mount board mainly used, covered in Scalescenes' white clapboard paper, varnished and painted with a self-mixed stone colour in acrylic paint. Roof slates from Scalescenes. Postcard for barge boards. Windows made from discarded plastic packaging with thin card frames and self-adhesive label glazing bars. Gutters and downpipes from plastic strip (Evergreen). Fixing brackets on downpipes from self-adhesive label. The rather fine fire buckets together with supporting brackets come from Dart Castings. The finials presented me with an interesting problem. None appeared to be available commercially during the Covid-19 lockdown period when this was built, so I resorted to using my mini-drill as a lathe and did a spot of miniature wood turning. They are made from the ends of wooden cocktail sticks, secured in the mini-drill and fashioned with needle files whilst being turned.

This building features, along with others, in my thread on card buildings:


Here is the signal box placed in its intended position, not yet glued in place in case it had to be repositioned..

20200718_182418.jpg

Terry
 

Terry

Western Thunderer
Not often modelled, but I caught sight of it in the background of the photograph of Adversane Crossing signal box. The signalman's privy..

20200802_150258.jpg

As usual, made from mount board (1mm thick), postcard door and corners with a Peco track pin as a door knob. Scalescenes' papers for the clapboard and slate roof. Painted with thinned acrylics. Just some slight weathering required using watercolour paints. The base is a square measuring just 24mm.

I observed this coal bin in a photo in the book previously mentioned, hiding under the stairs of a Southern signal box. Modelled in card with Scalescenes' clapboard paper. Measuring just 16mm x 16mm. Somewhere for the signalman to keep his coal. Just needs topping-up with coal and a handy shovel nearby.

20200805_081840.jpg

Like this..

20200810_195505.jpg


This is how the scene was shaping up..

20200829_091715.jpg

Terry
 

Terry

Western Thunderer
Fencing was fixed along the rear of the yard and a gate was installed. More products from Model Railway Scenery.

20200907_113523.jpg

I decided to install the signal cables, represented by 0.25mm nylon thread. The pulleys are 3D printed products available from here:

3Dprintingcorner

There are two signal cables, one leading to the starter signal and the other disappearing under the bridge to an imaginary home signal. The foot crossing had to be re-modelled to give clearance to the cables..

20200914_201555.jpg
20200914_210414.jpg


The posts are short pieces of styrene..

20200914_201613.jpg

Terry
 
Last edited:

Terry

Western Thunderer
A telegraph pole (altered Ratio item) was glued in a hole near to the signal box and insulators, cut from the same pole, were attached to both the arch of the bridge and the station building. The telegraph wire is a product called EZ line which apparently stretches up to 700% when pulled, thus preventing it breaking or the telegraph poles being damaged. Here is the line to the signal box. The other line will cross the track to the station building but was delayed until the point rodding was installed.

20200925_174134.jpg
20200925_174146.jpg
 
Top