1/32 Devoran Quay

Simon

Flying Squad
Thank you very much Michael, I suspect the pictures flatter my efforts...

Today went well, enjoyable fabrication that will help to "frame" the garden and aspects of the railway.

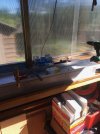
Starting with Dave bringing a kit of parts for a rose arch and his welder...
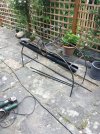
IMG_1935.jpg

Setting it all up with a combination of wood, g-clamps and looking at it from various angles;
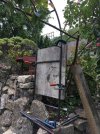
IMG_1939.jpg

The finished arch looks really great, thank you Dave. Here with red oxide primer applied and a slightly ominous looking sky.
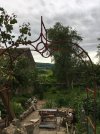
IMG_1950.jpg

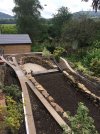
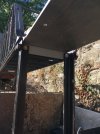
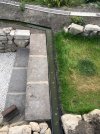
We finished by making up and attaching to the track base some support structures, first for the station platform:
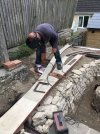
IMG_1949.jpg

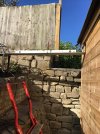
And then the signal box, which will sit above a small waterfall from the upper stream to the lower stream that turns right and goes under the railway, probably an improbable situation in the real world...
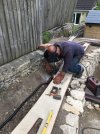
IMG_1955.jpg

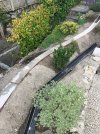
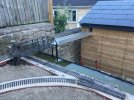
A view of both structures in place, I have just come in from finishing priming the rose arch and both of these additions.
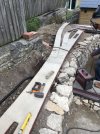
IMG_1957.jpg

Another enjoyable and productive day, nothing done in a hurry and time spent with a good friend and mostly outside - I feel very fortunate.
 

Simon

Flying Squad
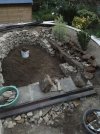
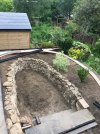
This evening I dug out the central "pillar", liberating quite lot of stone, including some really useful bigger pieces. The dark looking stone in the picture all came from tonight's work and I think gives me enough material to complete the job, hopefully tomorrow.

IMG_2157.jpg

I am now working from "both ends"...

IMG_2159.jpg

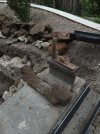
Tonights work also liberated a quite nice decorative bracket, albeit very rusty, and a very heavy piece of metal which looks a lot like a locomotive firebar - part of an old range perhaps?

IMG_2158.jpg

And last night I had the great pleasure of visiting Rob Mabbett's 1/32 Elmbridge stabling point, which was very inspiring indeed...

IMG_1987.jpg
 

Simon

Flying Squad
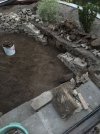
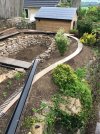
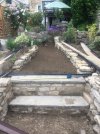
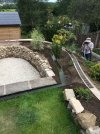
At last, the heavy groundworks are over! The wall isn't perfect, but it functions and is good enough I think. I managed to use up all of the stone that was dug up, which I didn't believe would work out.

IMG_2165.jpg

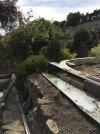
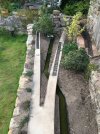
In this view, you can see what will be a "valley"of sorts in which the stream/river/gutter/thing will run, the ground will rise to the top of the new wall from where it is now to give this effect. It will go to the left of the first tree in this view and to the right of the new Pittisporum behind it, before burrowing under the quay track and then discharging in to the "dock".

IMG_2169.jpg

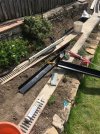
So the next job is to actually lay the watercourse, for which I have all the required materials to hand.
 

Simon

Flying Squad
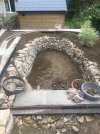
This morning I shovelled all of the residual material left over in the centre of through a sieve onto the "baseboard", removing all broken glass and roots and collecting all of the stones into containers.

IMG_2200.jpg

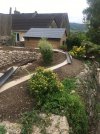
I also raised up the Pittisporum and distributed the sieved soil to suggest the "valley" that the watercourse will run through.


IMG_2202.jpg

After distributing all of my collected small stones back over the newly lowered area and tamping them down, I started work on the watercourse itself. The first part of which, having had an angle cut into it on the left hand end in this picture, is now glued and g clamped together in the shed. I also prepared the upper area for grass seed.

IMG_2207.jpg

I raked the soil over, spread grass seed around, covered it all with sieved soil, and it began raining, lovely soft solid drenching warm rain, which has continued for the last hour or so - the garden Gods are smiling on the venture, maybe...

IMG_2209.jpg
 

Simon

Flying Squad
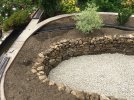
This morning I went in to town and bought some cotswold stone and deployed it across the lower "operating well", thus marking the end of the "donkey work" phase of this project. I will now sit back for a while and watch the grass grow!

IMG_2211.jpgIMG_2217.jpgIMG_2219.jpg

In the afternoon I did a spot of painting..

IMG_2237.jpg

Time for kip!
 

MarkR

Western Thunderer
Hi Simon,
Really enjoying seeing your dream develop, and thankyou for publishing the second edition of "In Search of a Dream",
I am enjoying my copy, courtesy of Wild and Homeless Books, a bit of local interest too, with the Lillington project, and Roye's wartime home at Chilton Cantello, within earshot of RNAS Yeovilton, and certainly 30 years later when 767 and 892 Squadron Phantoms were based there! Many happy hours spent at the end of the runway with my patient girlfriend, now my wife of 48 years!
Apologies for the thread drift!
Mark
 

Simon

Flying Squad
Thank you very much Michael, this is also a lovely time of year with everything bursting in to life and it all be nice to start some planting alongside the railway.

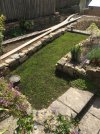
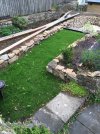
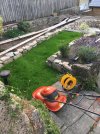
In the meantime watching the grass grow is much more relaxing than digging and rock shifting. This is the view this morning, a mere week since the seed was put down, we have had a great combination of rain and sun, aided by a bit of watering too.

IMG_2406.jpg

Three watering cans will "do" the whole patch, but getting around is a bit difficult without walking on the seeded area, I sort of play "Pirates" starting on the boundary post then around the walls, track base and soil, mindful of Mick's concerns about the "security" of the concrete cast into steel frames:eek: It will be good to get the use of the ground back - a couple of weeks time should do it I think.
 

Simon

Flying Squad
Well, as advertised I have mostly been watching the grass grow...

IMG_2412.jpg

IMG_2538 (1).jpg

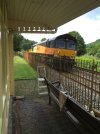
While waiting took an excursion to lovely Clevedon, found another railway and gulls...

IMG_2433 (1).jpg
IMG_2473 (1).jpgIMG_2480.jpg

Back in the garden I have deployed some slate samples along the trough, stabilised the floppy fence and started thinking about bridging the chasm of doom...
IMG_2413 (1).jpg
IMG_2484 (1).jpg
IMG_2493 (1).jpg
IMG_2491.jpg

Some more plants...
IMG_2550 (1).jpg
And today I finished painting the front of the big station.
IMG_2572 (1).jpg

Hopefully some time will be spent in the garden tomorrow.

Simon
 

Simon

Flying Squad
Pop riveting the bridge over the chasm of doom in the shed.

IMG_2627.jpg

Set in place, all level etc.

IMG_2637.jpg

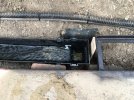
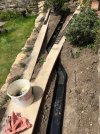
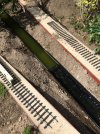
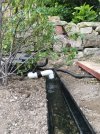
Armoured cable deployed and terminated in shed, Flashband and guttering combined, stage one of water feature in operation.

Discharging into the dock.

IMG_2656.jpg

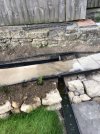
Quite chuffed with the angled joins achieved with Flashband and cut guttering.

IMG_2661.jpg

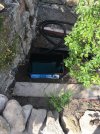
And here is the site of the waterfall behind the signalbox, temporary gutter end downpipe in use, the upper section still to be cut and laid out.

IMG_2665.jpg

And out the other side.

IMG_2670.jpg

It all works pretty well, very interesting observing the behaviour of the water over different sizes "dams", the idea being that whilst water flows through, all sections of river remain fairly full - there is very little drop across the system. Pump is possibly a bit OTT and I may fit one that ships less water, but either way the sound of water and the reflection of light off the moving surface of the water is a very nice feature to have.

Finally, the Ruston came out of hibernation and made a very brief appearance in the evening.

IMG_2664.jpg
 

Simon

Flying Squad
Thanks Chris, it is quite a long slog....

Given that tomorrow and the following are supposed to be unbearably hot, I today got out there early and set to in order to try and get the water feature/circuit completed.

It was warm and sunny, but pleasantly so, I drank a lot of water.

I started by cutting the guttering to length and with suitable angles. The first joint I was able to do "on the bench" before posting the joined section under the track base.

IMG_2730.jpg

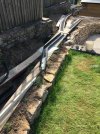
Here is the finished section in place, with the next section also attached. Forming the joints "in situ" was fiendishly difficult, not least because the Flashband is unbelievably sticky in these high temperatures. Everything got very hot! In this picture I am gluing the end stop to the final piece of guttering that will be used.

IMG_2736.jpg

The last section fitted into place and joined.

IMG_2739.jpg

The first live test, there is a bit of an art to getting the guttering "level", there are interesting differences in water level when everything is flowing and I have put a couple of dams in place so that the water is sitting quite high in the guttering but without overflowing. This was quite good fun, a bit like a school physics experiment and putting ones hands in the running water was nice on a day like today.

IMG_2741.jpg

I also planted out the Myrtle, given that I was doing various earth moving type things. Which makes me wonder whether "Myrtle Hill" might be quite a good name for something round here...

IMG_2745.jpg

I next fitted the filter box and associated piping, all very Heath Robinson and using all sorts of dubious plumbing bits, but it works!

IMG_2747.jpg
IMG_2749.jpg

Here is the completed new section in operation.

IMG_2757.jpg

And the "waterfall" below the second dam, the signal box will sit on the frame.

IMG_2758.jpg

And flowing across the garden and down towards the dock and the sea....

IMG_2759.jpg

Quite a satisfying day, track laying getting closer.....

Simon
 

Simon

Flying Squad
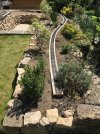
I got out there very early and the first section of the light railway is now shaped, wired and spot glued in place. There is a very gentle cant on the curve and I reckon the track "top" is about right along the length.

Soldering in the sunshine was quite warming....

IMG_3316.jpg

All now ready for ballasting, which I may well start later on as it is a bit hot out there at the moment. The block on the track is holding down the next physical joint, which is yet to be stuck down.
 

Simon

Flying Squad
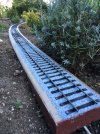
Well, ballasting is as time consuming as ever, but quite therapeutic, albeit hard on the elbows given the setting.

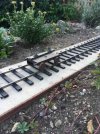
Here is the first section, the white wire under the end of the track base is the feed to/from the end of the track. I intend to build a demountable "terminus" or something which will attach here.

The track gang were out earlier in the week trimming the lavender back in preparation(!)

IMG_3318.jpg

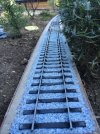
The good thing about this heat is that it makes the SBR go off quite quickly, it will be pretty solid after tomorrows sun and the edges are already quite firm. Which is good as it is the ballast that is really holding the track down.

IMG_3319.jpg

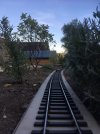
A second section completed.

IMG_3320.jpg

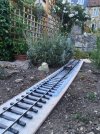
It does feel good to be actually laying some track at last!

IMG_3321.jpg

And over on the "main line"is the paraphernalia of ballasting...

IMG_3323.jpg
 

Simon

Flying Squad
Thank you Simon, one of the things I really like about ballasting in this bigger scale is that you can easily create the "gap" between rail underside and ballast in between sleepers, which it is very hard to do in the smaller scales.

I reckon it is one of the features that should set any G1 model apart, that said most outdoor G1 layouts don't bother with ballast at all, far too fiddly don't you know...

Ahem, I managed a bit more ballasting this evening and also "fired up" the water feature to test a new piece of flashbanding out. There has been a lot of loss of water from the system from evaporation in the heat we are enjoying - I fantasize that it makes the area around the system just that bit more plant friendly(!)

IMG_3343.jpg

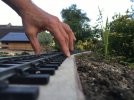
I also epoxied down the next track joint and contemplated the cant on the next section (little orange spirit level in picture), I need to slightly lift the outer sleeper ends on the outside of the curve on the joint I stuck down yesterday. to avoid an undesirable drop in cant, which would otherwise look a bit rubbish if nothing worse.

In the meantime the section from yesterday is completely cured from the day's heat - perfect!

Hopefully more ballasting tomorrow evening, making use of this unusually warm weather.

I could now run a train, but I think I will wait until I have laid and ballasted the bulk of the "light railway". The first loco to run will have to be the 48DS, which needs a couple of minor repairs after its photographic session a couple of weeks ago.
 
Top