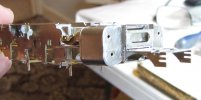
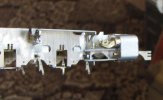
Brassmasters Blk 45026

Dave Holt

Western Thunderer
Yes, yes, I know; I haven't finished 45232, nor the repaired Jubilee, nor the Scot, Ivatt 2 tank or the Bradwell B1, but my mind has been turning to another Brassmasters Black 5 kit I have in stock.
Why another 5? Well, like some claim about Western Panniers, you just can't have too many Black 5s.
Perhaps inevitably for such a large class of locos, there was considerable variation between batches and even individual locos, some differences being quite obvious - different valve gear types and top feed position, for example, whist others were less obvious - firebox length, coupled wheelbase, tender types, etc. So far, I've done a Caprotti, a standard short wheelbase with long firebox and front top feed, short con rods and long anchor links with a semi-welded tender and a "standard" long firebox type with long con rods and short anchor links with a fully welded tender.
As a subtle variation I now want one of the early Vulcan Foundry examples, originally built with a short firebox but later modified to take a long firebox (required some frame stretchers to be moved). I also wanted an example which had the frames modified to take the later spring hanger arrangement with spring links in tension (as fitted to the later Ivatt locos) but retaining the early cranked, plain Horwich style combination lever and short plain anchor links. A fully rivetted tender is also wanted.
Browsing various literature, I came up with loco 45026, which was shedded at Wigan Springs Branch in the mid 1950s. However, photos of this loco seem quite rare and, until today, I couldn't determine the bolt pattern on the front drop portion of the running plate. The kit provide four quite different versions. This bolt pattern seems to have changed over the years on many locos and the preceding loco 45025 (preserved?) has had a different arrangement of bolts since new. However, today, I found a photo of 45026 on ebay, taken later than my period, but clearly showing that it had retained the bolt pattern it had when new.
Not totally conclusive, but good enough for me.
Construction probably won't start straight away, but at least I now have all the various optional details sorted out.
Dave.
 

Gadgie

Western Thunderer
Happy Birthday!

I totally understand why you might want to build another, different, Black 5. There’s something compelling about making several models of the same type of engine, wagon, or whatever; each subtly (or not so subtly) different. This aspect of the hobby really floats my boat. So now you have a picture, go for it!

Richard
 

Dave Holt

Western Thunderer
Thanks for the good wishes.
The cake might not have been too impressive (it was home made, however) but my partner treated me to a superb meal at our favourite restaurant last night, Probably consumed a bit too much lovely Portuguese wine, but what the heck? Hasn't stopped me further pondering and planning for the new project this morning.
Dave.
 

Dave Holt

Western Thunderer
I've been contemplating the contents of the kit and identifying the relevant optional parts to suit the specific loco intended to be portrayed - 45026 in mid 1950s condition.
I so doing, I have established that some detailed white metal casting are missing - there may be others I haven't identified. Sketches have been prepared to allow 3D printed replacements to be made.
I also appears that the thicker nickel silver sheets have been over etched - not sure about the thinner N/S and brass parts - so that slots and holes are too large. The most concerning aspect is that the crank pin holes in the coupling rods are already a sloppy fit on the Ultrascale crank pin bushes not to mention the jig axles I've got. The axlebox slots in the frames may well be too wide for the axleboxes but I haven't checked this, yet. The only viable solution to this is to open out and bush the holes, including the knuckle pin holes, which are larger than the rivets used for the pin, and to re-drill to the appropriate sizes.
The design of the Brassmasters frames, with the axleboxes sliding directly in the frames, does not provide for any adjustment of wheelbase and relies entirely on the accuracy of the etched parts. The two Black fives and Jubilee previously made caused no problems and free running chassis were achieved but the over etching on this example undermines the accuracy of the frame/coupling rod match.
In an attempt to overcome the issues, I've set up my Avonside Works chassis jig using the etched axle holes with 1/8" axle bushes inserted, these latter being a good fit in the etched holes and on the jig axles. Although the original artwork was, I believe, hand drawn, it is a testament to the basic accuracy that both frame plates align nigh on perfectly and have the exact same axle spacings. Fingers crossed......
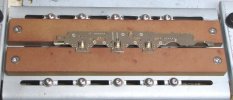
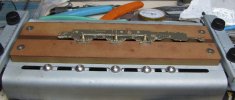
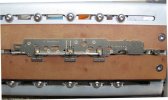
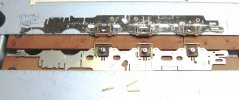
Here are the two frames, with the bushes through both layers, set on the jig. With the jig axles locked in place, they can be used to check/fix the coupling rods to suite and locate the axleboxes, if loose, for guide angles to the fixed either side.
BM_Blk5_45026_001.JPGBM_Blk5_45026_002.JPG
Dave.
 

Dave Holt

Western Thunderer
We're looking at the back face of the rod and the working part of the knuckle pin is buried in the wood.I've started work on the coupling rods. First, some 1 mm O/D tube has been fixed into the rear layer of the front rods to act as the pivot for the knuckle joint. Originally, I was going to bush both layers and then drill out to take the steel rivets used in the kit. However, as the tube was such a good fit in the over etched rod holes, I decided to use it as the pivot and will use a brass lace pin to act as a retainer after trimming to length.
The crank pin holes were opened out to take 2 mm O/D by 1 mm bore tube. The front hole was bushed only in the back layer to give a recessed hole for the Ultrascale recessed crank pin. The centre and rear holes have the bush through both layers. To keep the bushes (and knuckle pin tubes) square to the rods, a 1 mm drill was set into a small wooden soldering aid using my vertical drill.
So far so good, The first (RH) rods have been done and fit directly onto the assembly jig pins.
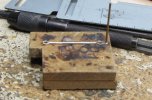
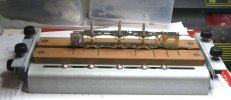
Front rod having the knuckle pin tube fitted. We're looking at the back face of the rod and the working part of the knuckle pin is buried in the wood.
BM_Blk5_45026_003.JPG
Two views of the completed RH rods on the chassis jig pins. Obviously, the knuckle pin tube needs trimming to length to leave a loose, but not sloppy, joint.
BM_Blk5_45026_004.JPGBM_Blk5_45026_005.JPG
Dave.
 

Dave Holt

Western Thunderer
The horn slots have been opened out and guide strips (1 mm square brass) soldered each side of the axleboxes, using the chassis jig to locate the components. I've now got smoothly sliding axleboxes with no appreciable end play and, hopefully, set at the exact same spacing as the coupling rod bush holes. Time will tell.....
BM_Blk5_45026_007.JPG
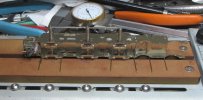
Here we see one side frame complete and the other set up in the jig ready to fix the front guide strip. A short packer was required to allow use of the set square to clear the folded up horn keep. The axleboxes have been blackened to help avoid accidentally soldering them to the frames and/or guide strips.
Dave.
 

Dave Holt

Western Thunderer
In between planning a further adventure in chassis design and commissioning of etched parts, I've made a bit of progress with the new Black 5. Brassmasters very kindly provided some replacement etches and, although I've decided to keep the existing, over etched, mainframes, I'm using the replacement etches for all the other parts. The various stretchers have been prepared, folder where necessary and the rear drag-box assembled with some details added.
I was just about to assemble the frames, using my Avonside Works chassis jig to locate the two mainframes, when I realised that I haven't fitted the pick-up bus-bars and their mountings, which will be much easier to do before the chassis is soldered together.
Here are the frames, with some of the stretchers, set in the jig before I decided not to fix them together just yet.
BM_Blk5_45026_008.JPGBM_Blk5_45026_009.JPG
The lengths of 0.8 mm brass wire under the lower frame are to lift the external protruding axleboxes clear of the jig.
Dave.
 

Dave Holt

Western Thunderer
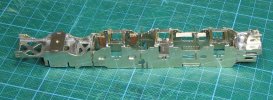
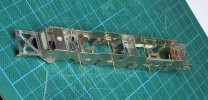
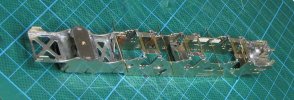
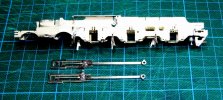
The main assembly of the frames is now complete. Brassmasters very kindly supplied some replacement etches and, although I decided to keep the original over etched main frames, bearing in mind the work done to achieve good axlebox fit and wheelbase accurately set to the rod centres, I used the new etches for all the frame stretchers. Assembly was done using the Avonside Works jig previously shown to ensure the axlebox bore were dead square across the frames. The stretchers were tacked in place and lots of checking for squareness and straightness of the frame plates before fully soldering. The bottom edge of the frames have been stiffened by fitting tee section cross ties (pin jointed on the prototype but soldered on the model) and the brake hanger pivot wires. I'm modelling a loco that had modified frames to provide Horwich style horn clips and revised spring hangers. On these frames, all the cross ties have the web of the tee facing upwards except the fore tie on the middle axle, where the web faces down (to clear the exhaust injector exhaust steam supply pipe). The standard early Black 5s had all the tees with the web facing downwards.
Whether or not the middle tees survive the fitting of the final gear in the gearbox is a moot point. I've cut away part of the web and one side of the flange on these tees in the hope of clearing the gear teeth.
The middle section of the central frame stretchers will have to be cut out to clear the gearbox. To aid this, the stretcher components were partially cut before assembly.
I'm quite pleased with the progress so far. Here are some shots of the current state.
BM_Blk5_45026_010.JPGBM_Blk5_45026_011.JPGBM_Blk5_45026_012.JPGBM_Blk5_45026_013.JPG
Dave.
 

Dave Holt

Western Thunderer
The central frame stretcher has been cut out to clear the gearbox and the LH brake hangers have been assembled and fitted to the frames.
BM_Blk5_45026_014.JPG
RHS to do next. Then the rear brake mounting wire can be cut between the frames and the pick-up bus bars fitted.
Dave.
 

Dave Holt

Western Thunderer
Not much to show from recent work, interrupted by other interests, but some progress with the chassis.
One of the drawbacks with keeping the over-etched frame plates is that the working coil spring mountings and depth of the spring seatings are over-etched. I've commissioned some washers to go above the springs to correct for this, but till they are done, the axleboxes cannot be fitted, so other parts have been started.
The basic structure of the slide-bar support and motion plate has been folded and test fitted into the slots in the frames. The slide-bars have been laminated and tack soldered and the con rods, crossheads and anchor links assembled. The crossheads are rather nice N/S castings but included the later Derby style drop link, having the familiar three bolt mounting. However, this loco had the earlier, Horwich style drop links, which are provided in the kit as etched parts. So, the front of the crossheads had to be filled flat and the etched parts bent to shape and fitted. To reinforce the soldered joint, I drilled and pinned the drop links to the crosshead. Unfortunately, on the final hole, I snapped the drill off almost flush with the surface, so that link only has one "bolt head", but at least the broken drill is acting as a dowel!
Here's a general shot showing this progress.
BM_Blk5_45026_016.JPG
Dave.
 

P A D

Western Thunderer
Nice work as always Dave.
I dont know how you 4mm boys can get so much into such small spaces. I must start catching up with your stuff now that I'm back.

From what I've seen of them, the Brassmaster kits look very well designed and I've always fancied their Royal Scott. However, that would be another digression from 7mm locos and I've done that with the 1:18 cars!

The Avonside jig is a wonderful piece of kit. My brother has the 7mm version which I have free access to and I use it on all my builds. He inherited an LMS 4F from a friend who passed away and he asked my to rebuild it for him. His friend was new to modelling and made a bit of a fist of it, especially the chassis which didn't even run like a dog. Without the Avonside, I'd have never got it running properly.

Cheers,
Peter
 

Dave Holt

Western Thunderer
Peter,

Thanks for your kind comments. Much appreciated from someone who builds such wonderful models such as your 2-6-4 and 2-6-2 tanks.
The Brassmasters Royal Scot builds into a very fine looking model of these superb locos but does have some issues. I wrote up my efforts, the problems and my solutions on this forum some while back under, I think, Brassmasters Rebuilt Royal Scot 46109 (July 2020?).

Dave.
 

Dave Holt

Western Thunderer
A start has been made on the cylinder assembly. A slight change to the kit design is the use of through brass tubes to guide and provide decent bearing area for the piston rod and valve spindle. Drilling through the cast nickel silver valve guides proved problematic. Not the actual drilling, using my Proxxon vertical drill, but rather that the holes wandered off square and took a fair bit of rectification to overcome.
Here the cylinder unit and motion frame are temporarily in position. Sorry one of the shots is a bit blurry.
BM_Blk5_45026_017.JPGBM_Blk5_45026_018.JPG
Dave.
 
Top