4mm An EM Workbench: plastic steels

Dave F.

Western Thunderer
Someone said to me earlier today, why don't you put up the vid of your party piece with that train....
Okay then here it is.


Yes it's become a bit of a party piece for visitors to the clubrooms and asked for again and again just to see if it's not a fluke.
All wagons have AG wheels set to 16.65 B2B and three link couplings with Jacksons at the ends of the two 30 wagon rakes, a few sprung buffers down the train help to smooth out any shocks.
Apologies for the jumpy download, now got a new phone.

Dave F.
 
Mr Lycett-Smith's mogul

AJC

Western Thunderer
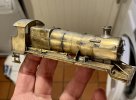
All is, relatively, quiet at the modelling bench at the moment, but I have busied myself with prepping the Mogul for its repaint. The tender is already completed, and posed only very minor issues. The loco body needs a bit more work - though nothing very important dropped off - as most of the boiler fittings had been superglued in place (perfectly securely, until now).

89A2144C-2DA4-479F-9326-021528C73D33.jpeg

Supergluing the handrails, however, was a step too far, so I’ve soldered them back in place once the glue had been painstakingly removed. While the iron was hot, I slipped in a bit of scrap etch to keep the steps square and extracted front coupling hook and buffers for replacement with Collett-pattern ones from @Dave F. (of incredible reversals). There’s a few other scruffy elements to tidy up, and a new safety valve/top feed to fit, but I’m not too concerned.

Adam
 
Last edited:
Mr Lycett-Smith's mogul

AJC

Western Thunderer
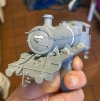
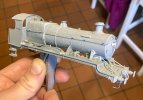
Rain has stopped painting play, but here's the refreshed Mogul to date. I've added a new vac' pipe, a replacement safety valve cover, Collett buffers and couplings. All the loose whitemetal bits were soldered back on and, as can be seen, the primer revealed a few spots where some Milliput was necessary. Yes, I could have dismantled the splashers and resoldered them, and perhaps I should. I decided against. Finally the smokebox number plate was added from scraps of 10 thou' - I'm using some 3D transfers from Railtec here so a backing plate is essential. That was tacked in place with superglue and filleted with epoxy.

Churchward_Mogul_002.jpg

Churchward_Mogul_003.jpg

When it dries up again, 5380 will emerge.

Adam

EDIT: a big step backwards courtesy of not paying attention in Halfords. The Black Workshop Primer I bought in error spattered black everywhere so into the cellulose thinners it's had to go, taking a couple more superglued components with it. Drat.
 
Last edited:

Daddyman

Western Thunderer
It's starting to look good, Adam. A couple of tricks you may or may not be aware of, which could help. One is to mix Milliput with water; you can then apply it with any implement to hand, and then immediately wipe over it with a cotton bud to remove the excess and force the filler into gaps. That way, you get the filler exactly where you want it, with no cleaning up or repaint required. The other trick is the one of joining the boiler handrail inside the top knob on the s.box front - that way you can shape the handrail together as two pieces, giving more chance of their being symmetrical (you're working with 3 curves at a time rather than 5).
 
Last edited:

AJC

Western Thunderer
Sometimes, being a modeller is useful in the day job, and so it proved recently. Last year, my friend and colleague, Glen, died suddenly. Among the things he left behind - with many great memories for just about everyone in the place - was a model of the Institute where we work which needed a bit of finishing.

Now, my colleague Justin (who does 2mm Finescale things up to and including supporting Copenhagen Fields) and I found ourselves outed to make the thing available for display and, as of this evening, it is. It’s a work of love, for Glen for his workplace and many friends, and it is for us, in Glen’s memory. You can have a look via the link below. All the best, old friend.


Adam
 
Last edited:

David Waite

Western Thunderer
Hi Adam
Sorry for your loss of your friend
Thank you for the history link of the IHR building and model that was fascinating.
David.
 
  • Like
Reactions: AJC

AJC

Western Thunderer
Hi Adam
Sorry for your loss of your friend
Thank you for the history link of the IHR building and model that was fascinating.
David.

Thank you, David. One of the good things about working somewhere like IHR is having this sort of thing available (and, under the current management, being allowed to be creative with it). Of course, our current building has a railway connection - Charles Holden, the architect, was also responsible for 55 Broadway and half the stations on the Piccadilly Line. Learning this fact made Glen very happy.

Adam
 
LSWR B4

AJC

Western Thunderer
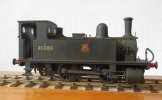
I've almost finished something (it needs a driver). Early developments are shown here, but here's the finished loco. Plymouth Friary's B4, 30088, modelled as it was at withdrawal, in July 1959. A bit early, really, but many did go into industry by sale or hire and I imagine that it how it will be used. It's the Dapol body with minor modifications on a SE Finecast chassis (with some modifications, notably new crossheads), Gibson wheels, High Level gearbox with a Mashima and a flywheel. Absolutely conventional finescale spec', really.

30088_002.jpg

Handsome (not so) little thing.

Adam
 

Jeremy Good

Western Thunderer
Hi Adam,

That B4 looks great. Just wondering whether you were able to source new crossheads or whether they were scratchbuilt. I’ve got one I was building in P4 but didn’t think the white metal versions would work reliably.

Jeremy
 
  • Like
Reactions: AJC

AJC

Western Thunderer
Hi Adam,

That B4 looks great. Just wondering whether you were able to source new crossheads or whether they were scratchbuilt. I’ve got one I was building in P4 but didn’t think the white metal versions would work reliably.

Jeremy

Scratchbuilt - the etch has the face plate (not the proper name!), and I built the rest up from offcuts of milled angle. A fiddle, yes, but if you assemble the slidebars and cylinders and use these as a jig, it’s relatively straightforward. What I would consider, were I using this approach, especially in EM or P4, would be to use some slightly thinner material for the slidebars (or to take 0.5mm or thereabouts off the back), the clearances on these are fiendish and, while you can’t do a lot about the back of the steps, that would ease things twixt the coupling rod and the back of the crosshead.

Adam
 
Last edited:

AJC

Western Thunderer
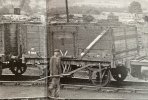
In the latest edition of Bylines - the first I've bought in a while - I alighted upon an interesting wagon which looks to be of Midland origin (numbered M8014), with unusual asymmetric strapping. Can anyone with Midland wagon books enlighten me as to the diagram and dimensions? This one is firmly for the future, if at all...

MR_Mineral.jpg

Adam
 

Dog Star

Western Thunderer
In the latest edition of Bylines - the first I've bought in a while - I alighted upon an interesting wagon which looks to be of Midland origin (numbered M8014), with unusual asymmetric strapping. Can anyone with Midland wagon books enlighten me as to the diagram and dimensions? This one is firmly for the future, if at all...

View attachment 186874

Adam
One for Stephen Lea (@Compound2632).
 

AJC

Western Thunderer
Diagram 673 - Pages 94/95 in Midland Wagons Vol 1.

19' over buffers, 16' outside length over ends, 15' 7 1/4 inside.
7' 10" outside width, 7' 5 1/4 inside width.
9' 6" wb, 4'6" side door width, 4' wide bottom doors
8' 3/4" height above rail, body 4' 1 3/4" to floor

Thank you! That's sufficiently off kilter to be interesting - not quite a 'normal' 7 plank.

Adam
 
Top