4mm An EM Workbench: Mineral allsorts

Rapido SECR Van

AJC

Western Thunderer
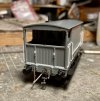
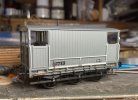
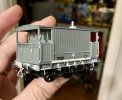
A simple (ahem) bit of regauging to start the year. Three victims here, the first is the lovely Rapido SECR brakevan, more on the other two later.
06C01617-E4E7-4A7A-A9CB-42020EB14C12.jpeg

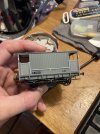
Happily, the engineers had a few of these and Ted West photographed one at Axminster in the early ‘60s, and with the minimum of alteration - a vac' pipe strung along the solebar and a new number - a handsome addition to my PWay fleet will result. I have had one on the shelf looking reproachfully because I wasn’t sure what to do about the fully modelled brake rigging. The axles, I’m happy to report, are the standard length allowing a simple drop in of Gibson wheels running merrily in proper brass bearings.
2960A750-066C-4B87-A2BA-3AFB5F898EF7.jpeg

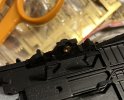
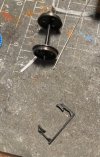
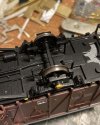
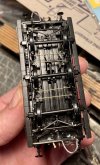
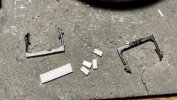
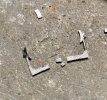
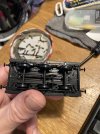
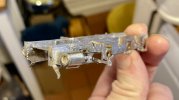
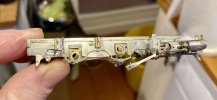
As you ought to be able to work out, the brake mouldings are a positive fit (see those 'T' shapes on the floor, above) secured with glue. Actually quite good design, allowing tricky details to be mass produced consistently if a bit of a problem for those of us in EM. We're not the main bit of the market, of course, so have to live with that and the brakeshoes can be extracted, though those on the end put up a fight, I haven't actually broken anything critical! It should be apparent that one side had a bit more glue than the other...
8563E6EA-8877-456E-A843-16A613E996BE.jpeg

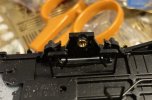
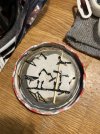
So the plan of campaign is to drill out the brake yoke locations at 0.5mm for wire, perhaps reusing the end yokes, adjust the fit of the shoes and then the small matter of vac' pipe, couplings, and so on to taste.

Adam
 
Last edited:
Sonic BR Ferry Van

AJC

Western Thunderer
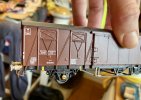
And now the second one, a present, in the form of the Sonic Models BR Ferry Van. Yes, there’s a Rapido version, too (and it’s likely the better model, but this was the family secret Santa and this was in budget!). The mechanics of getting an EM model out of this one are probably more involved, but easier, because the brakes are easier to remove - you can see to location holes, the shoe assemblies just prise out.

008358DD-73A1-4E10-AB48-BB2BA085692A.jpeg

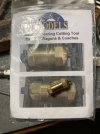
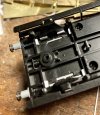
The regauging was slightly complicated because the original axles are a bit shorter than the standard 26mm and mounted in moulded plastic cones which stand proud of the back of the W iron. I trimmed these off and let in some brass bearings making use of this rather neat little tool which bores out a nice 2mm hole for putting proper brass bearings in.

8932E693-F5BF-4466-8C8E-F79A2EEE9C96.jpeg

For some reason, the safety loops are modelled (they're a bit heavy, but they're there) but also represented in relief as part of the brakeshoe mouldings - very LIMA - so I trimmed them back a bit, and drilled them for new wire yokes removing the locating pins. I can be a bit light touch with the brakegear on this because it's a big wagon and they're hard to see.

E6AF6ACD-BC7E-42F3-98DD-5E9A03CDD039.jpeg

7390B50F-8FEE-4597-BB49-02A9D8AC9FE7.jpeg

Reinstatement is also pretty crude - I've just superglued them in with a 15 thou' spacing strip...

6EFFD136-AA29-4A4E-AD94-10ADE3C761ED.jpeg

Just a couple of bits of wire to add and all done. Obviously, there's details and proper couplings to add, but the basic conversion has been done.

Adam
 
Last edited:
Sonic BR Ferry Van

Yorkshire Dave

Western Thunderer
Ah - it's a BR built VIX Fährbootwagen..

....rather hoping it would be a Gmbhs 51 (Hfrs 312) or even a Tbnhs Fährbootkühlwagen with the prototypical incorrect spelling of Großbritanien (Großbritannien). :)

When you start looking a photos quite a number of FS and DB Fährbootwagen were seen in the UK either arriving through Dover or mainly from the Hook via Harwich, the latter being the primary freight route. Though haven't come across photos of BR VIX Ferry vans or any BR Ferry vans or wagons operating in Europe.
 
  • Like
Reactions: AJC
Sonic BR Ferry Van

AJC

Western Thunderer
Ah - it's a BR built VIX Fährbootwagen..

....rather hoping it would be a Gmbhs 51 (Hfrs 312) or even a Tbnhs Fährbootkühlwagen with the prototypical incorrect spelling of Großbritanien (Großbritannien).:)

When you start looking a photos quite a number of FS and DB Fährbootwagen were seen in the UK either arriving through Dover or mainly from the Hook via Harwich, the latter being the primary freight route. Though haven't come across photos of BR VIX Ferry vans or any BR Ferry vans or wagons operating in Europe.

Sadly your wish (and mine!) for a good RTR version of a continental wagon in 4mm is probably going to come to naught… Living down the road from Paddock Wood (there’s a road called Transfesa Way, a big blue van would be nice), there's a local interest. Hornby, via Rivarossi, do a nice rendition of some of the Italian ones for UK traffic. In H0. I have seen a pic’ of a BR one somewhere of one of these in Austria, I think.

Mine does have proper UIC type couplings though:

429FDABC-3671-4255-A24C-6F9D4352384C.jpeg

Adam
 
Last edited:
Sonic BR Ferry Van

AJC

Western Thunderer
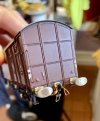
Ends now complete: buffers (modified LMS RIV types - I fitted oval heads to these, leftover from I know not what), vac’ and air pipes (copper wire). A quick test showed it was necessary to add the longer link to the couplings.

3287875D-88A2-462E-9ABE-E77CB6C33DC8.jpeg

I need to replace a couple of bits that have dropped off, but nothing very serious.

Adam
 
Rapido SECR Van

AJC

Western Thunderer
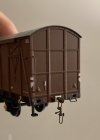
Going backwards to the SECR brake, my chosen prototype had gained a through vac’ pipe by 1960, screw couplings, and a buffer beam hook to keep them out of the way.

AEF056A4-257D-4DDD-93DD-C3531C0084CC.jpeg

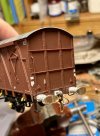
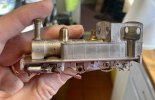
Adding the run down the solebar was tricky. Leaving aside the pair of right-angle bends and the more gentle angles following from them, there was the small matter of threading them through the brackets. Obviously the real thing didn’t do that on one go and neither did I! The little wrap of shim you can see halfway along is the solution: it’s functional. The slight bow has been straightened out since, however...

DC6F70D8-4FA1-4826-B8C3-C4D2B5448398.jpeg

This done, I can think about putting the brakes back in.

Adam
 
Last edited:
Rapido SECR Van

AJC

Western Thunderer
Putting the brakes back on. Easier than I thought.

CC355B65-9303-4AA5-A9C4-BDC8C2A13004.jpeg

First drill the location holes for the yokes on the back of the brakeshoes to 0.5mm. Then scrape the paint off the mouldings, trim 0.5mm off the front, put a bit of 20 thou’ at the back of the existing slots and add drop of solvent - these bits are styrene, thank goodness. Come back the next morning and thread some 0.45mm wire through the holes. I’ve amended the existing yokes for the outers, but I’m not sure it was worth the hassle… all of five minutes hassle, but nonetheless.

Ready for renumbering and weathering.

Adam
 
Last edited:
Hornby LMS Brake

AJC

Western Thunderer
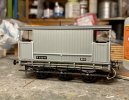
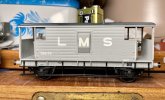
And the third, a brake for the ‘30s freight (well, when it’s not running with Thomas), in the form of a heavily discounted Hornby model. This is a simple drop in conversion - if you ignore the fact that the brakes are miles from the treads. I can’t, and so…

DC9BD615-71E0-45C3-AD6F-4A7FEDB79865.jpeg

The ‘shoes just lever out, though they’re glued in. The modifications needed are in two stages, which pictures show better than words. The key detail is that the plastic sheet used is 30 thou'.

96850DEA-DEB3-41BE-ADB1-B3D6C7787348.jpeg

83A41C3A-5D43-4DBA-8411-A6F37B231C08.jpeg

And back the right way up.

56DD5C48-E64F-4B08-8EDC-2B29E8D70031.jpeg

New handrails needed, because the Hornby ones (steel wire) bowed all over the place.

All pretty simple. Rigging to add once the solvent is hardened.

Adam

PS - anyone know what colour the LMS painted their tail and side lamps? White and black respectively per BR?
 
Last edited:

AJC

Western Thunderer
I am pretty sure that the LMS lamps (body ) were white, midland were red.

Thank you! I've unearthed my copy of Jenkinson's 'The Big Four in Colour' - white it is, side lamps on goods brakes aren't shown there, but they appear dark in B/W shots so I assume that, like LMS loco lamps, the bodies were black.

Adam
 
Last edited:
Rapido SECR Van

AJC

Western Thunderer
A couple of details that I’d missed on the SECR van. Clearly the through pipe also came with a valve and a gauge, with accompanying pipe work into the cabin. The neat beading fitted along the bottom of the sides had also been replaced with strip by the ‘40s looking at pictures, so out with the 5 thou’.

34A767A7-5F7D-4A1F-8541-470D64D9D9B7.jpeg

Now it’s ready for paint!

Adam
 

David Waite

Western Thunderer
The pipe work looks lovely it just looks like you have used real BSP fittings,
“I hope you used plenty of hemp and paste ”.
David.
 
  • Like
Reactions: AJC

David Waite

Western Thunderer
Yes worth the effort for sure,
I still have the stock and dies that I used when I ran steel pipe work and these originally belonged to my father my adjustable dies that went to 4” I sold a couple of years ago I found it hard just to lift them off the floor ( called age )
David.
 
  • Like
Reactions: AJC
Rapido SECR Van

AJC

Western Thunderer
There’s always one more thing, isn’t there. Ok, two. I couldn’t live the handrails so replaced them with 0.3 nickel silver wire. The other is much harder to spot - there was an etch with some label clips on it in the box - they moved about on the real thing and my prototype had lost one: simple dab of super glue. I’ve put the spares to one side!

6A5F931F-9775-4606-B46B-28A3037B8843.jpeg

White prime, touch up and weather. Some time.

Adam
 
Last edited:
A Dübs called Clio

AJC

Western Thunderer
And now something completely different, a proper shelf queen, which started out as a Branchlines kit for the Manx Northern Railway’s Dübs and Co. Caledonia. It’s been going for so long I can really remember why I bought it, but it’s evolved into a small standard gauge 0-6-0T (one of the options the kit sort of allows for - along with outside frames on 9mm gauge! That would probably straighten a few curves...). The M&SWJR had a couple of broadly similar - but a bit bigger - locos and of course, as @ullypug knows, the WC&P had a diminutive 2-4-0T (ex-Jersey), so this sits between the two, borrowing details from each.

It’s required quite a few modifications, only some of which can be seen here.

0DA79F6B-5305-4781-8DC4-5FACB4F4F4AA.jpeg

We’ve seen the crossheads and cylinder assemblies before - 4mm - An EM Workbench: Shelf Queen Dübs - but here they’re assembled to the frames. The latter have been made deeper to accommodate slightly larger wheels, needed to bring the buffer height up to the realms of acceptability. They’re still not big (3’ 6”), and have a bigger crank throw which have necessitated modifications to the connecting rods, and so it goes on. @Stevers will be pleased to hear that I have gone for twin beam compensation on this one.

D51A2C2D-DFE8-46A9-9966-61CE83CF881A.jpeg

It’s beguilingly close to being ready for paint at this point, not that the body is anywhere near done, but it will probably need another spell on the shelf first, partly because I have another loco chassis I want to get to the same stage.

Adam
 
Last edited:
A Dübs called Clio

AJC

Western Thunderer
Having fished the bits out of their box, a sense of the loco to be:

66921BA7-9629-4637-A04F-1A3A87B308F4.jpeg

Petite, I think, is the correct word. Obviously I’ve made a new footplate and bufferbeams to account for the wider gauge. Like Thomas, there’s certain amount of bit box content, too. The cab front and rear come from the leftovers from my Gibson O2, the steam brake fittings from the Brassmasters bits for a Jinty, and so on. The Ramsbottom safety valves might well be O2 leftovers as well, just as a variation, the Branchlines Ross Pops (and all the other castings), are very good.

Adam
 
Last edited:

Lyndhurstman

Western Thunderer
There’s always one more thing, isn’t there. Ok, two. I couldn’t live the handrails so replaced them with 0.3 nickel silver wire. The other is much harder to spot - there was an etch with some label clips on it in the box - they moved about on the real thing and my prototype had lost one: simple dab of super glue. I’ve put the spares to one side!

View attachment 207882

White prime, touch up and weather. Some time.

Adam
This is - as with all your work - very nice, Adam.

Cheers

Jan
 
Top