4mm An EM Workbench: Mineral allsorts

AJC

Western Thunderer
Hi Adam,

For loose heel switches read the following thread especially the first post:-
Building Yeovil Pen Mill in EM - Trackbuilding topics - Forums - Templot Club
This shows hinging bullhead rail, so should work well for flat bottom rail.
I intend to use this with broad gauge bridge rail in 7mm.
Regards,

Les.

Hi Les - thank you: that looks a much more elegant solution than any I've yet come across (and the bones of a model of one of my favourite stations - from my home town), Yeovil Pen Mill, too. Excellent!

Adam
 

Les Golledge

Active Member
Hi Les - thank you: that looks a much more elegant solution than any I've yet come across (and the bones of a model of one of my favourite stations - from my home town), Yeovil Pen Mill, too. Excellent!

Adam

Hi Adam,

One thing I forgot to add is that if the screws are long enough it should be possible to solder flexible wire to the bottom of the screw to ensure electrical continuety.
If holes are drilled in the baseboard wires soldered on before installation coldbe fed through from above as the turnout is installed.
Glad to be of help.
Regards,

Les.
 
  • Like
Reactions: AJC
Peckett: The Marshal

AJC

Western Thunderer
Thanks again, Les. Back to the Peckett. Since the last update, I've knocked up the bottom half of the boiler - I managed to mangle the half-etched original which, in any event, wasn't quite long enough - from nickel silver sheet, and added the centre ring of the tank barrel from shim.

Peckett_009.gif

Obviously, I'll have to re-drill a couple of handrail holes, but the effect is far better than the half-etched grooves that represented the overlap originally. I have now straightened the wingplates...

Here's the last survivor of the real thing. Lord Salisbury: Peckett 0-6-0 Lord Salisbury NCB Norton Hill colliery Somerset 1964 by John Wiltshire

Adam
 
Peckett: The Marshal

AJC

Western Thunderer
Bringing things together. I do wonder whether it's easier to do a neat job (and this really isn't one, at this stage) on neat kits? This is certainly true of plastic wagons - my efforts with modern Parkside productions tend to look better before the paint goes on than those from, say, Cambrian. With proper location designed in, I'd probably have splashed a lot less solder around and the result would be tidier. I am pleased that it looks properly 'Peckettesque' - the shape of the saddle tank and pattern of handrails are key to this.

Peckett_010.gif

This three-quarter view is pleasing since it demonstrates those features. The side on view is less so, since it shows up the somewhat squashed look of these locos. No matter, at this point it couldn't be the product of any other builder.

Peckett_011.gif

Adam
 
Peckett: The Marshal

AJC

Western Thunderer
The Peckett now has a set of boiler fittings. Those supplied were fine, to an extent, but were very tall, showing up the late 19th century origins of the design. Several later X class Pecketts were fitted with chimneys and safety valves rather lower in height - and some locos, presumably reboilered, had Ross pops rather than Salter type safety valves; this was latterly Peckett's normal practice and that's my preference.

Peckett_013.gif

Peckett_012.gif

The lower picture shows that the right hand corner of the cab needs to be reseated, though the left looks sound.

Moving on. So how to achieve correct and convincing boiler furniture? The whitemetal chimney was distinctly oval in section and, though reducing it in height is possible, making a neat job proved impossible without a lot of filing and produced a less than happy end result. I wasn't even going to start doing anything similar with the valves so required a plan B. Plan B came in the form of spare sprues from Heljan, intended for their GWR 1361 available from Howes. This offers a neat plastic moulding in two parts, base and top, representing the composite nature of the real thing. I had to thin the rim a little and the base quite a lot, but the result is better than what it replaced. The safety valve cover was hacked from a dome in a similar way. Both are now epoxied in place, as is the chimney-mounted lubricator (from Branchlines). A suitable tank filer is on order and when I'm feeling brave, I'll think about the whitemetal smokebox door. Time for the big file?

Adam
 
Last edited:

AJC

Western Thunderer
Hi Adam,

Much sterling work to be seen here. Congratulations on your excellent MRJ article on the Lowmac WV too - just picked up a copy of the journal today.

Colin

Thank you Colin - it's good to hear that it was appreciated; as with more or less anything I write for print (for work or about modelling), it's difficult to tell how it's been received! I'm enjoying your voyage into complex trackwork on the other channel too; singularly impressive.

Adam
 
Peckett: The Marshal

AJC

Western Thunderer
Inching ever onward, and two sub assemblies are complete. One, admittedly, is the cab roof, but that's one less thing on the list. The overall impression, however, is nicely Peckett like, though pictures of progress to date does show up how relatively crude the kit is.

Peckett_017.gif

Having boiler fittings and a roof on does make a difference, however, and the remaining work - pipes for the injectors (supplied as etchings: hmm, but they are the correct size and Peckett injectors are hexagonal in section. No, still not using them!).

Peckett_016.gif

Peckett_014.gif

The front end shows that there is a little more work needed - one side of the footplate needs a tweak for a start...

Peckett_015.gif

Still, we're heading to the point where the frames need to progress beyond the basic assembly, and soon. Well, maybe.

Adam
 

Lyndhurstman

Western Thunderer
Mmmmmm.... More Marvellous Mineral Mundanity. Gets my vote

Lovely stuff. And well done on completing something

Cheers

Jan
(currently hopping around the hobby like a cat on a hot tin roof!)
 
  • Like
Reactions: AJC

AJC

Western Thunderer
The last Ealing-built wagon splodges off the workbench and the 24 1/2 tonner is more or less complete.

24_half_004.gif

The rustwork will need to be revisited here and there to sharpen things up a little but the underframe has come out quite well, I think. Meanwhile, it, and everything else, will be boxed-up and heading to Tonbridge. See you on the other side...

Adam
 
LMS Signalbox (Ratio/Scratch)

AJC

Western Thunderer
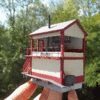
The other side of the move, thank goodness, and with a view to ensuring I know where everything is, the time has come to work through a handful of projects to completion. First up, Canal Junction 'box.

Box_004.jpg

Note that before reaching its current state, primed and with a first coat of cream applied by brush, I saw fit to add some foundations which will locate it in the baseboard - 60 thou' plastic sheet. The roof is in position for context and the toilet door will be added after painting as will the fire buckets.

Box_005.jpg

At the other end, the water butt has sprouted a stud of wire to represent the tap - since this will be at the bottom of the cutting constrained by retaining wall, I didn't see fit to go further, or to add rivets to the water bit itself. Even I have to draw the line somewhere!

Meanwhile, I've added a retaining nut to the roof and drilled an accompanying hole through the floor. This isn't especially exciting but brings us up to date.

Box_003.jpg

Adam
 
LMS Signalbox (Ratio/Scratch)

AJC

Western Thunderer
Raspberry ripple? Anyone? The fun bit - adding the contrasting colour to the framing - has now been accomplished and the general effect is to make it look as though it should be perched atop an ice cream cone! I've used Humbrol's matt wine, no. 73 for the red which looks about right to my eye. I've also fitted the lever frame and stove before I misplaced/damaged them. The interior treatment will otherwise be fairly minimal since so little of it will be visible.

Box_006.jpg

Weathering will tone this down a fair bit and I expect addressing the areas that should be a bare wood colour will make a difference as will attending to the fenestration. The next job to be tackled, I think, is to attend to the fire buckets and their rack.

Box_007.jpg

Adam
 
LMS Signalbox (Ratio/Scratch)

AJC

Western Thunderer
Moving through the phases now and this time, I've completed basic detail painting, added fire bucket and name boards and made a start on the remaining interior details. More on the latter anon, but I will admit to being quite pleased with how it looks thus far. A week to harden off, afforded by going on holiday, and I'll come back to that though I may manage to sort the windows out over the weekend.

Rear_clean_001.gif

Canal Junction 'box, labelled:

Front_clean.gif

And - sort of - how a member of loco' crew coming to surrender the single line token from the branch might see it.

front_thre_quarter_clean.gif

Adam
 

Lyndhurstman

Western Thunderer
Smashing, Adam.
A very nice piece of art.
And - sort of - how a member of loco' crew coming to surrender the single line token from the branch might see it.

It would be the Fireman, undoubtedly. Every Driver I've fired to was of the 'Why have a dog and bark yourself' School

Cheers

Jan
 
LMS Signalbox (Ratio/Scratch)

AJC

Western Thunderer
Just before heading off to Norfolk on holiday, success! The 'box is now complete and ready for weathering (there are a few finishing touches needed - a bobby for a start). But for the mo' that'll have to do.

Complete_001.gif

The window frames started off as Midland Railway pattern and, with most of the glazing bars removed, work for LMS versions. Later LMS 'boxes had squared top corners, and these were seemingly more common. Modifying etched frames, however, made the job much, much quicker and for this job, speed was an important consideration. Next time I'm down in Somerset, it will be installed on the layout and I can cheerfully declare 'job done'.

There are a few more South Junction jobs still to do, prior to its appearance at the Taunton Railex in October, but this was by far the biggest and perhaps the most satisfying.

Adam
 
Last edited:

AJC

Western Thunderer
A holiday snap from north Norfolk. Especially for @Simon, Wisbech and Upwell no. 7 as restored and - by sheer dumb luck on our part - in service on the North Norfolk Railway. For those familiar with the film which lends its name to a certain bookshop, the knowledge that this coach now contains a bar (modelled on the one installed for the film) which, yes, we took advantage of.

W&U_001.jpg

The ride is, erm, lively at 25mph (obviously, rather more than the original design speed). In a nod to the other cultural impact of the carriage, the good folks at Weybourne have named it: Irene.

Adam
 
Last edited:

Simon

Flying Squad
How very lovely, here's a Bristol Evening Post picture of the "sister" coach whilst being used in the filming of The Titfield Thunderbolt.

BEP picture.jpg

Original picture with permission from collection of Geoff Alford, now lodged with Swindon Steam museum. Geoff is the Grandson of Harold Alford, standing immediate right of coach verandah above.

Simon
 
Plastic Bedford (Airfix QL)

AJC

Western Thunderer
While the 'box wants for a spot more weathering and touching up, I've moved on to the next job, another component for the vehicle breakers next to South Junction 'box. Part of it is shown here - my intention is to partially balance the cliches in the scene; the KeilKraft Foden, the rather unlikely bits of signal gantry, that sort of thing. No wagon wheels, thankfully.

southjunctionnov09032.jpg

Now the Foden is at least plausible and quite charming and the CMP Ford was one quick win so it's time for a second in the form of a Bedford QL from the recent Airfix kit, or bits of it, at least (the chassis from the pair of them are under a pair of Commer-cab Fords which will be wagon loads). So one scrap Airfix Matador that's sat in the bits box for years, and...

QL_001.gif

QL_002.gif

Here's the mocked up element of the scene which is more or less what I'm after: a few bits of foliage will finish it up. As a model, the cab and wheels are exquisite, the bodies are a bit clunky in my view but I'm not too concerned about that. Tarp supports next!

Adam
 

AJC

Western Thunderer
The complicated bit (relatively speaking) is making up the tarp' rails for the tilt. Making the 'U' shape loops was fun but the length-ways ribs were straightforward since they could be soldered on in situ using the full length of wire and trimmed once securely soldered in place. Just the stirrup step on the back to replace and a couple of etched details to add (once I can find them) and it's ready for primer and then the fun bit, painting a weathering.

QL_003.jpg

Adam
 
Last edited:
Top