You are using an out of date browser. It may not display this or other websites correctly.
You should upgrade or use an alternative browser.
You should upgrade or use an alternative browser.
8N diesel servicing point
jonte
Western Thunderer
Probably a case of ‘either, or’, gents.
I think the ‘starting with stock rail first’ method was from the early days of track building when rail was soldered directly to the sleepers. The rail was initially soldered from the inside allowing the outside to be nestled up against a straight edge to ensure that all would be true.
Jonte
I think the ‘starting with stock rail first’ method was from the early days of track building when rail was soldered directly to the sleepers. The rail was initially soldered from the inside allowing the outside to be nestled up against a straight edge to ensure that all would be true.
Jonte
simond
Western Thunderer
I’m not sure if it matters really
me neither, and I don’t know if either approach is better in any objective way: it’s pretty much why I asked!
Dog Star
Western Thunderer
Simon,Are there advantages to doing it from the stock rails inwards?
I believe that there is an advantage to be had by starting with the straight stock rail and that advantage is to do with alignment.
If the start is made with the common crossing then fixing that crossing sets the alignment of the entire turnout - hence the positioning of the stock rails is dependent upon fixing the crossing accurately with respect to the template. Locating a crossing which is (say) 6 inches in length is potentially more difficult than placing (say) 20 inches of stock rail... any error in the location of the crossing can impact upon the placing of the stock / closure rails and hence the turnout geometry.
Starting with the straight stock rail is more likely to lead to the crossing being placed as per the template and hence more likely to lead to smoother running through the switches / closures.
regards, Graham
Last edited:
Tim Humphreys ex Mudhen
Western Thunderer
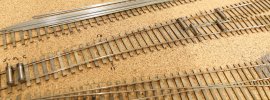
My method is to cut the two stock rails too length and hold them on the template with a couple of track gauges at toe of the point. I then place the common crossing unit on the template and use track gauges to align it with the stock rails. I've quickly cobbled together a crossing and stock rails to try to illustrate my method. The whole unit can be manoeuvred into position and then the gluing can begin.
Tim
Tim

JimG
Western Thunderer
I would just add that when you are laying complexes with several crossings which have to relate accurately to each other, then starting by laying out the crossings is the best way. For example, a scissors crossover, where the crossings in the diamond and the four crossings of the turnouts have to line up exactly. I remember my first attempt at a scissors many years ago where I started with the stock rails and that was doomed when nothing would line up when it came to making the diamond in the middle. It doesn't take much of a slight misalignment of a stock rail to move the crossing nose a significant distance along the length of the turnout. It's a fair bet that the crossing nose will not lie properly on the timber which is supposed to support it if there is any stock rail misalignment.
Jim.
Jim.
Tim Humphreys ex Mudhen
Western Thunderer
Nice track work there Tim, I’m guessing that is 7mm?
Nice track work there Tim, I’m guessing that is 7mm?
Yes and to S7 standards.
Tim
jonte
Western Thunderer
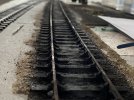
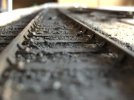
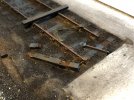
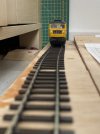
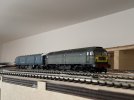
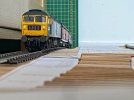
Nicely observed, Paul. I wonder how many Diesels have leaked on those tracks over the years? 
The powders and varnishes are used to great effect here, Paul! However, if you want to save yourself a bit of time - if not expense - check out the Mig range.
They used to produce a monthly mag which I took abroad one time, and what an enjoyable time perusing. The products produce the most fabulous effects.
Jonte
John57sharp
Western Thunderer
Nice work Paul.
John
John
PjKing1
Western Thunderer
Thanks JohnNice work Paul.
John
PjKing1
Western Thunderer
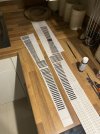
A little bit of an update which might settle the question where to start when building the turnouts. When I can to fit the first vee yesterday I realised to my horror (bit extreme maybe) that the Templot had not printed to scale now it I would if fitted the straight stick rail then the vee I would of realised a bit soon. Never had this problem in the past so had to re-calibrate the printer and printed them off again. Could of been worse it could of been the entire track plan!
Paul
Paul
PjKing1
Western Thunderer
John57sharp
Western Thunderer
I really like the way this works too
PjKing1
Western Thunderer
Thanks mate I’m really happy with how it’s turning out, think this is the first track plan I’ve ever truly been happy with in a good few years.I really like the way this works too
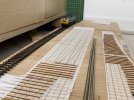
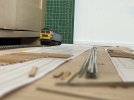
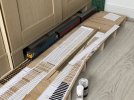
All timbers were cut any glued into position the other day dvd last night I fixed into position the first stock rail and vee although I forgot to take pics of last nights efforts.

Paul

