You are using an out of date browser. It may not display this or other websites correctly.
You should upgrade or use an alternative browser.
You should upgrade or use an alternative browser.
Brian McKenzie
Western Thunderer
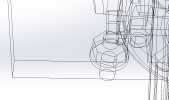
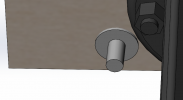
Simon,The nut with washer, and bolt end, has a "stalk" which would be the shank of the bolt.
If viewed in wire-frame mode, can you see the nuts buried inside the buffer beam?
-Brian McK.
Brian McKenzie
Western Thunderer
Aside from not 'mirroring' correctly, the nut has also flipped 90degrees on the stalk !!??
Could this be caused by some oddball 'Mates' associated with the original nut/bolt/washer ?
-Brian McK.
Could this be caused by some oddball 'Mates' associated with the original nut/bolt/washer ?
-Brian McK.
simond
Western Thunderer
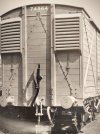
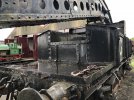
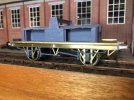
I guess you can see if one becomes loose...This is how the Premier Line did it. Other companies may have worked to different standards...View attachment 190901
Match Truck
simond
Western Thunderer
simond
Western Thunderer
simond
Western Thunderer
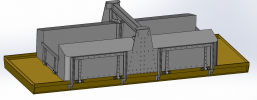
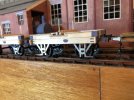
In a brief moment of madness, I counted the rivets, I make it 556 between the two sides of the wagon, not including the cross beam, the T strapping or the doors, nor anything on the chassis. Happily the CAD does a good job of patterning & mirroring, and I have probably only modelled a tenth of a quarter of them. ( I only modelled half of one side, and mirrored the rest) Still, three reasonably relaxing evenings so far, and probably an hour or so more to go.
For comparison, I regularly read @Michael Osborne , Arnimal's thread on RMWeb - his wagons are lovely, all made from plasticard, with stuck on rivets. He gets his in line without a computer, I don't think I have the skill, and I know I don't have the patience...
At least when I have this bit done, I can then hit the "print" button, (after all the supports etc are done) and my rivets will be nicely spaced and all lined up too...
And whilst I'm a it, I will reprint some of the bits for the bolster wagons. Wagon fest approaching!
simond
Western Thunderer
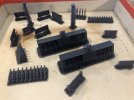
First attempt on here, rather than reposting. Results positive, but work still required.
Post in thread '3D Printing - whether to buy, what to buy and how to use it?'
3D Printing - whether to buy, what to buy and how to use it?
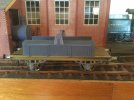
As I noted in the other thread, but thin in parts, and the rivets need more weetabix. There’s a large number of them, and you can’t see ‘em
this is probably a result of drawing full size then scaling. Scale thicknesses don’t print well, so I need to now go back and add some thickness. Unfortunately, I didn‘t use global variables for the rivets, lesson learned there, as I’ll have to amend lots of them. This is a bit of a pain, as obviously, I’ll have to review all the SldPrt files, then save as SLT, then put them into a new Chitubox file.
I note @SimonT ‘s comment about an alternative slicer. I’ll have to try it out, but mine’s “not broken” so I’m inclined to the devil I know.
one other thing that seems odd, the cross beam is too long. Not by much but it doesn’t fit properly. Not sure if this is a sum of adverse tolerances or some “negative shrinkage”. Anyway it’ll all need adjusting, and then I’ll have another go.
Post in thread '3D Printing - whether to buy, what to buy and how to use it?'
3D Printing - whether to buy, what to buy and how to use it?

As I noted in the other thread, but thin in parts, and the rivets need more weetabix. There’s a large number of them, and you can’t see ‘em

this is probably a result of drawing full size then scaling. Scale thicknesses don’t print well, so I need to now go back and add some thickness. Unfortunately, I didn‘t use global variables for the rivets, lesson learned there, as I’ll have to amend lots of them. This is a bit of a pain, as obviously, I’ll have to review all the SldPrt files, then save as SLT, then put them into a new Chitubox file.
I note @SimonT ‘s comment about an alternative slicer. I’ll have to try it out, but mine’s “not broken” so I’m inclined to the devil I know.
one other thing that seems odd, the cross beam is too long. Not by much but it doesn’t fit properly. Not sure if this is a sum of adverse tolerances or some “negative shrinkage”. Anyway it’ll all need adjusting, and then I’ll have another go.
simond
Western Thunderer
Having played around with the individual parts, which are individually ok, but together don’t quite fit the brass, I ran a one-piece version last night.
As you can see, I printed it flat to the build plate, and there is unfortunate warping and distortion right on the edges of the “roof” where it is most unwelcome
I’m inclined to try again but with a big angle between the plate and the part horizontal - maybe 70 degrees longitudinal.
I can’t print with a transverse angle as it will trap resin
Apart from adding more supports in this area, and maybe increasing the thickness slightly, any other suggestions?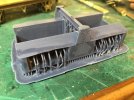

simond
Western Thunderer
Thanks Rob, I thought that too, I’ve just finished doing the supports with the model at 75 degrees, and I added loads of supports.
It says it’s going to take 10h8m, but that’s always an underestimate, (I know I can fix it somewhere but never got round to it) so it’ll hopefully finish in time to wash up and leave it to cure at bedtime.
It'll be a disappointment if it doesn’t work, but I’ll have the consolation of another set of five figures from the Modelu Patreon subscription. I haven’t finished painting the last lot yet…
simond
Western Thunderer
Checked out how to adjust the timing, adjusted it, and it’s gone up again…
still it’s nearer. I suspect I’ll be taking the model out of the Saturn tomorrow morning unless something very interesting keeps me in front of the telly ‘til midnight…. Doesn’t sound very likely!
still it’s nearer. I suspect I’ll be taking the model out of the Saturn tomorrow morning unless something very interesting keeps me in front of the telly ‘til midnight…. Doesn’t sound very likely!
simond
Western Thunderer
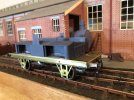
At risk of this thread becoming yet more boring, herewith the latest iteration
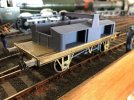
Printed at 75 degrees, lots of supports, pretty good but…
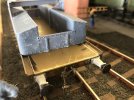
The end nearest the build plate has not drained very well, and consequently is a bit lumpy. It might be possible to clean up with scrapers and files, but I decided to have another go. V5 is printing, should finish around 8pm. If it works a bit better, I’ll be very happy to call it a wrap. The doors, stanchions and brakes are all ready & waiting. I haven’t drawn or printed the roller and its support yet, that simply sits on the cross girder, so can be added later.
Fingers crossed.

Printed at 75 degrees, lots of supports, pretty good but…

The end nearest the build plate has not drained very well, and consequently is a bit lumpy. It might be possible to clean up with scrapers and files, but I decided to have another go. V5 is printing, should finish around 8pm. If it works a bit better, I’ll be very happy to call it a wrap. The doors, stanchions and brakes are all ready & waiting. I haven’t drawn or printed the roller and its support yet, that simply sits on the cross girder, so can be added later.
Fingers crossed.

