7mm Rob's Rolling Stock Workbench

Connoisseur NER Brakevans
  • Rob Pulham

    Western Thunderer
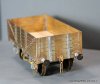
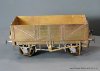
    In between messing about getting my DCC working I have made further progress on the two NER Brake vans. I have been quite impressed that I have managed to add almost all the detail to sub assemblies before making up the main units and adding the solebars. The only things to add to the upper bodies are some corner plates that fold around the corners, some handrails that also go around the ends, the cast end posts and the lower footboards which I need the W Irons in place before I can cut the supports to final length.

    IMG_2607_zpsyxcwxabu.jpg

    The roof is still loose. Jim recommends leaving it loose to glaze and making it clip on afterwards I need to explore how I can do this yet.

    IMG_2613_zpsqdqpntcx.jpg

    IMG_2619_zpspnx9i9et.jpg

    Although I have the birdcage for the second one assembled it's not soldered to the roof yet.

    IMG_2631_zpstqtabjxc.jpg

    Paul Gallon over on RMweb kindly reminded me that the example that I am trying to reproduce with this one also had windows in the birdcage end.
    In the photo above you can seem my error. I cut out the windows using those at the other end as a template but didn't think about the fact the the side duckets have sides which protrude into the van internally and that the sides nearest the end windows partially obscure it. - Why is it that you never notice these things until you have made nice job of soldering the body together, made much more difficult by the fact that on this end I couldn't get to the inside so I had to solder it from the outside and clean up.

    IMG_2637_zpsk7n4crlx.jpg
     
    Connoisseur NER Brakevans
  • Rob Pulham

    Western Thunderer
    Not much modelling done over the weekend due to a combination of not feeling well on Saturday and a trip to Pontefract show on Sunday. Which was very enjoyable even if I did come back with etches for 4 Pullman coaches which Chris spotted and encouraged me to buy that I hadn't planned on...

    A few hours last night had the first van almost complete (I had thought it complete until I remembered that I hadn't fitted a couple of hand rails or any guard irons under the brake yokes.

    IMG_2806_zpspmsxigim.jpg

    IMG_2789_zpslledebop.jpg

    The hand rails that are missing are the two small ones above the wrap around rails in this view - the other end should have similar fitted about a quarter of the way up the windows.

    IMG_2795_zpsu4ofpbps.jpg

    IMG_2801_zpsomxiat19.jpg

    I didn't fancy trying to drill out the rather nice cast chimney because it's very slender so I scratched a pair of replacements from telescoping tube and a cover plate from the spares box, completed them.

    I also noted on the drawing that the sliding doors had a hasp so I made a couple from scrap etch.

    IMG_2788_zpsyezjsn8w.jpg
     
    Powsides GER 5 Plank Open
  • Rob Pulham

    Western Thunderer
    Some minor surgery combined with Sinusitis has laid me up for the best part of two weeks so the work bench has been quiet. Filling a little more in the way of head space I opted to finish a long time inhabitant of the queens shelf, a Powsides GER 5 plank Open. Before placing it aside I had built it all apart from adding the castings and I am not really sure why I hadn't completed it.

    It proved a fairly straightforward build apart from the fact that the brake shoes were miles from the wheels so I had to split them and move them out towards the wheels. Then make a brass strip to represent the tumbler which I soldered to the rear of the castings after filing a slot. The only other changes were (after reviewing photos in Tatlow) to add some ex Connoisseur GER ratchet brake lever guides instead of the supplied hole/pin version.

    IMG_2832_zpskfqjhiri.jpg

    http://i1181.photobucket.com/albums/x437/Robpulham/7mm%20scale%20rolling%20stock/IMG_2826_zpsliacgddc.jpg[img]

    [ATTACH=full]74704[/ATTACH]

    [ATTACH=full]74705[/ATTACH]

    Next its back to the NER Brake vans.
     

    Attachments

    • IMG_2820_zpsuovm26r6.jpg
      IMG_2820_zpsuovm26r6.jpg
      75.9 KB · Views: 0
    • IMG_2814_zpsdibjizkh.jpg
      IMG_2814_zpsdibjizkh.jpg
      115.7 KB · Views: 0
    NER Brake Vans
  • Rob Pulham

    Western Thunderer
    Isn't it always the way? You look at the photos and realise that you have missed something. In this case it was the pins and chains for the side doors.

    IMG_2853_zpsxr1plb4q.jpg

    I got the second NER Birdcage brake to a similar state as the first one - just needing buffers and working out how best to fit the roof post painting.

    IMG_2859_zpspolhqimd.jpg

    And then something that came together almost as a surprise. As I was doing the two V1 vans I started to clean up and make the various folds in a V4 van and before I knew it, quite a bit was to was ready to solder up.

    IMG_2865_zpsltriotqq.jpg

    The doors are sliding doors and the way that Jim has portrayed them made leaving one of them partially open almost irresistible. It means that I will need to model an interior but that doesn't faze me.

    IMG_2883_zpsvzjsoe7z.jpg

    IMG_2889_zpsfyf6jwmn.jpg

    Again it's a Connoisseur kit and to that I have added square brass rod to beef up the vertical and horizontal framing and some internal planking to the veranda ends.

    IMG_2895_zpsqgykmwgb.jpg

    It all needs a good clean up before I go much further with it.
     
    NER Brake Vans
  • Rob Pulham

    Western Thunderer
    Due to recovering from minor surgery, I haven't felt like venturing into the workshop since early February and apart from a bit done on the Kirk coaches a couple of weekends ago I haven't done any modelling at all.

    Last night I ventured forth and got stuck in with the NER V4 brake van again. I added the remaining corner patches, the guard irons across the door ways and added the foot boards. I had done the roof at the last session that I did but forgot to take any photos of it.

    I think that apart from the brakes and remaining handrails that fit into the end posts all the brass work on the outside is complete so whitemetal fittings next.

    IMG_3088_zpsvfe65gkb.jpg

    IMG_3094_zpsebu9dnz8.jpg

    IMG_3093_zpsokj0hgqt.jpg

    IMG_3077_zpsremwbr46.jpg

    IMG_3083_zpsb3y3fkf4.jpg

    IMG_3070_zpsopmn3dom.jpg
    As on the other NER brake vans I made a replacement for the cast chimney from tube.
    IMG_3104_zpswqxibfzf.jpg

    IMG_3103_zpspcp4hn5e.jpg
     
    NER Brake Vans
  • Rob Pulham

    Western Thunderer
    Last night saw more small steps - quite literally in that I made up the rather nifty etched steps for the Tevan

    IMG_3229_zps9x7liwyr.jpg

    Then I did a bit more on the V4 brake van getting the floor cut and fitted ready for soldering in once I have fitted the brake gear etc. - I made the floor from a scrap etched part and I have yet to decide whether to fill the holes with rod or leave them. - There are only 5 and they are less than a mm in diameter and will they be seen with the roof on, I doubt it.

    IMG_3235_zpsistm0k9p.jpg

    I also made a couple of inserts for above the veranda which once soldered in place will increase the gluing area for sticking the roof on once painted.

    IMG_3241_zpsikxe4lfk.jpg
     
    Top