2mm Modbury

Ian Smith

Western Thunderer
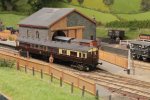
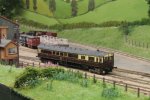
I've just realised that I didn't post some photos I took of the Steam Rail Motor after she'd been released into her natural habitat ...
64.JPG
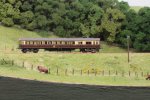
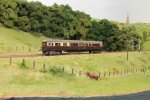
Approaching Modbury along the embankment heading towards Plymouth having just passed the Down Home.

65.JPG
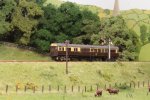
On a return trip working awaiting signal clearance before resuming her journey towards Newton Abbot

Thanks for looking
Ian
 

Joe's Garage

Western Thunderer
Hi Ian

I am currently persuading my Wife that a day in Wells would be very nice especially the 12th August! It is not far from Axbridge and I would certainly love to see Modbury in the flesh. I can then inspect that railmotor......

All the best

Julian
 

Ian Smith

Western Thunderer
One of the things I've always intended adding to Modbury are the manual yard point levers for the cattle dock siding and the long back siding.

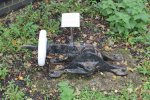
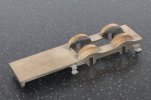
Around the turn of the 20th century the GWR used at least 3 different types of point levers, two of which look like a relatively upright lever with a support frame either semi-circular or a much more decorative support frame. Although I think that either of these types would be suitable for Modbury, I discounted them both as I feel they would be particularly vulnerable when track cleaning. Therefore I've elected to make a couple of the much lower type :
0.JPG
There are a couple at Didcot, and I took the opportunity to take a few photos of one of them last time I was there a couple of years ago. In addition to the above photo, I also took some with my camera's lens cap balancing on the lever. As I didn't have anything to take any measurements with, the lens cap allowed me to estimate the dimensions from the resultant pictures.

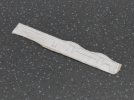
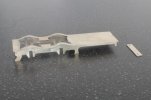
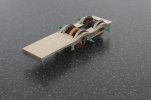
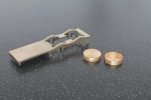
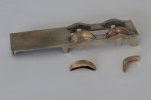
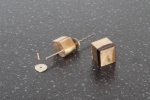
The rough size of the main casting seems to be about 2'6" long, 9" wide and about 9" high. With those dimensions in mind, I felt that I could make a reasonable rendition out of a bit of 1.5mm square brass bar.

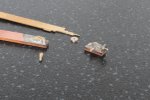
Therefore, the rough shape was filed up from the end 5mm of said bar before cutting off. The bit with the lever sticking out of the side was filed up from a bit of 1mm square bar, and included the flat swinging link and a short round peg at the back to facilitate fixing to the main block. The large weight on the handle was a simple turning of brass rod to a little over 2mm diameter with a 0.5mm hole drilled down the middle, and sliced cut off and cleaned up. The lever itself was filed out of a piece of 0.18" brass etch waste.

1.JPG
The various components for one lever and a completed one along side.

2.JPG
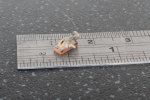
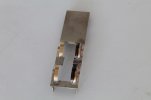
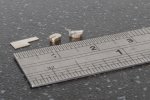
And just to indicate how dinky the finished lever is I've managed to pose it on a 6" rule.

Although not a completely accurate model, I feel that once painted and stuck in place on the layout it will certainly be adequate for my needs.


The above was a bit of a distraction from working on my Duke!!
The last image I shared of the Duke was a photo of the frames (looking for all the world like a bit of cardboard (it was however two pieces of 0.010" nickel silver sweated together with an outline of the frames superglued on) :
1.JPG

Since then I have managed to form the footplate - this was just a strip of 0.010" nickel silver sheet the width of the footplate, which was thumb-forced around bits of bar to effect the various changes in level. Once happy with the fit the excess length was cut off the rear of the footplate. That simple statement actually took the best part of a couple of hours to do!! Once happy, the area around and between the wheels was fretted and filed away until it could sit properly on the chassis. The front buffer beam was a simple fretting/filing and drilling exercise as usual.
2.JPG

3.JPG

The next stage will be to add the splashers, and in readiness for this I've turned a couple of "splasher disks". These will be cut in half and then the lower edge carefully filed until the resultant splashers sit properly over the raised sections of the footplate.
4.JPG
As can be seen, I have formed the splasher disks with a small bead around the edge to represent the beading on the splasher faces of the prototype.

Thanks for looking.
Ian
 

Ian Smith

Western Thunderer
Last weekend Modbury made it's first physical appearance at an exhibition this year at RailWells. I think it's fair to say that myself and fellow operators John and Steve enjoyed our weekend but is was flipping hot!!

Modbury performed reasonably well despite the heat, over the course of the weekend 2 of the signals failed, both with the same fault - the guitar wire actuators became unsoldered from their respective levers (I use servos for the signals which have a drive rod from the rotating servo horn to a simple pivoted lever to convert the rotary motion into a linear one. The lever having a piece of springy guitar string to compensate for any excess throw).

The 6 wheeled brake van decided to regularly throw itself off the track on one of the points by about lunchtime each day (it seemed fine in the cooler morning!!). Once home I was able to test thoroughly (and closely) and as assumed there was just a little binding as the van went through the offending point. Therefore I applied the soldering iron to the affected area to provide a little gauge widening through the area.

The rake of 6 wheeled coaches were also temperamental on occasion coming off the Plymouth end train table. They were prone to derail every now and then or uncouple themselves. I think that in setting up the layout we (I) had introduced a bit of a hump across the two boards. The learning here is to make sure I include a 6" rule in my box so that I can check that the track work across the board joints is level.

The final problems were at the board joint of the other fiddle yard board. There was a step of about 6-8 thou across one rail which caused the odd derailment. We decided to live with the problem over the weekend as once we knew what the problem was we were able to shepherd the stock across the joint. The resolution once home was to lift the offending rail and solder a slip of nickel silver shim beneath the offending rail. The other issue at this board joint related to the mouse hole and the Steam Railmotor - when coming off the outermost (tightest curved) train table road the rail motor just rubbed the side of the mouse hole. The weekend fix was not to use the outermost the railmotor on tighter outer roads of the train table, the permanent fix was to carve a little off the side of the mouse hole once home.

Now some photos from the weekend :

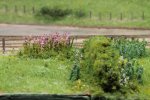
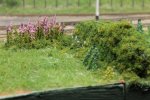
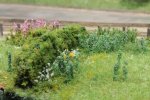
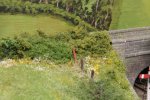
Some of the additions to the layout prior to the exhibition - firstly I have added a little more colour to the layout with the introduction of some white and yellow flowers at the font of the layout. The rose bay willow herb, nettles and thistles have been there for a while. To achieve this, some small pieces of Woodland Scenics Polyfibre were pinched off the main wad to give me little pieces about 3-4mm in size, the tops of which were brushed over with matt varnish and some Woodland Scenics "flowers" were sprinkled onto the wet varnish. Once dry the resultant flowery clumps were set onto a little more matt varnish within the existing scenery. Hopefully, this gives the impression of the flowers floating above the surrounding grasses and weeds in a natural way. I have to thank Steve Martin for this method of adding colour to a 2mm scale landscape.
1.JPG

2.JPG

3.JPG

4.JPG

The second addition to the layout are the two point levers for the points not controlled by the signal box. The construction of these was detailed a couple of entries back in this thread.
5.JPG
The point lever controlling the turnout for the cattle dock/goods shed sidings.

Finally, some images of the latest motive power addition to the Modbury roster - the Steam Railmotor. This attracted a lot of interest over the weekend, probably helped by Jerry Clifford (who was immediately across the room from us) encouraging visitors to "have a look at the steam railcar" :)

Anyway here she is :
6.JPG

7.JPG

8.JPG

9.JPG

Thanks for looking!

Ian
 

Joe's Garage

Western Thunderer
Ian, as always lovely photos. Rosebay willow herb is also known as "fireweed" I believe, definitely sets the month as late July?
As I have said before I never tire of seeing the railmotor.
Thanks again for sharing.
Julian
 

Ian Smith

Western Thunderer
A little more progress on the Duke ... (shown in a sequence of photos) :

5.JPG
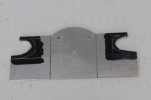
Firstly, the "splasher disks" that I previously turned were cut in half, then carefully filed such that their lower edges followed the profile of the curved footplate over the wheels.

6.JPG
As I had (purposely) turned them over wide, once soldered in place the correct width was scribed using a locked off Vernier Calliper before they were carefully filed back to the scribed line.

7.JPGThe steps were then added to the uprights - these were cut and folded up from strip of 0.004" nickel silver.

Thoughts then turned to the cab. The basic outline of the two cab sides and the cab front were marked out onto a sheet of 0.010" nickel silver, the corners where the sides and front meet were initially scribed as part of the marking out process before being gouged out as a bend line with a skrawker. The centres of the cab windows were carefully marked and a depression to start the drill made with my usual tool for this, a sharpened gramophone needle ground with 3 facets (and therefore 3 cutting edges). The cab spectacle centres were then drilled 0.8mm and the part cut and filed to shape.

8.JPG The cab sides and front cut to overall size and shape before the side cutouts were filed to shape. The rough shape of the cut outs was marked on the part with a needle so that the majority of the waste could be removed with a piercing saw to save filing time.

9.JPG
While the side cut outs were being filed to shape, the part was constantly compared to a photograph to ensure that I was getting curves that looked reasonable.

Prior to folding up the cab, the previously scrawked bend lines were made a little deeper with a square escapement file, trying not to break through to the other side of the metal! Even so, when the bends were actually made, the fracture lines caused nearly separated the cab into its 3 parts! A quick application of 188 degree solder gave the corners sufficient strength to allow the fairly rough handling that was about to descend.

LET THE FILING BEGIN!!

10.JPG
It was then a simple (although time consuming) task to employ a half-round file to the areas of the cab sides until the cab could sit comfortably over the rear splashers.

11.JPG
And the other side showing where the solder had leached through the fractures at the bend line. As can be seen the cab spectacles have been opened out from their initial 0.8mm to about 2mm by using ever increasing sizes of tapered broaches. Even so, they are still undersize so will need final opening out with a rat tail file.

12.JPG
And finally, a shot to show that all of that filing was worth it as the cab now sits snuggly over the tops of the rear splashers (although not yet fixed).

The next phase will see the cab beading fitted around the cab cutouts, and of course the cab front needs a hole putting through it to allow a cardan shaft to go through it.

Thanks for looking
Ian
 

Ian Smith

Western Thunderer
Further progress on the Duke ...

Before the cab could be secured in place on the footplate, the cab beading had to be installed around the cab side openings. As is my wont, I did this in the same way as all of the other locos I've built by cutting a narrow strip of 0.004" nickel silver and soldering it around the inside of the cut outs. Once secure a gentle filing operation ensues to reduce the thickness of the strip so that it is just proud of the outside faces of the cab sides and pretty much flush with the inside faces. Little tongues of the strip are left protruding from the lower edge of the cab cutout to later attach the vertical handrails to.

Before fixing the cab in place a couple of holes were drilled in the footplate just behind the cab sides to accommodate aforesaid handrails. The cab was then soldered in place over the rear splashers :
13.JPG

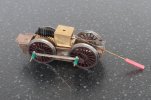
I then decided that it was about time that I progressed the chassis! Therefore a block of brass was cut which would provide a bearing for the worm shaft, a horizontal 1.5mm hole was drilled for the shaft, and a 1mm hole drilled perpendicular to it to provide an oiling hole. I could have milled the resulting block to shape but elected to do it the old fashioned way with initially a large coarse file, then a finer file to clean it up. The bottom of the block was filed at an angle so that the worm shaft would be inclined as the centre line of the motor in the tender will be lower than a horizontal worm shaft. The idea being that I will incline the cardon shaft slightly, thereby accommodating the height differential through two smaller angles. If it doesn't work out, I'll simply make a new worm bearing block with a horizontal hole. The worm shaft itself is a length of 1.5mm silver steel, one end having a pair of flats filed on it through which a 0.5mm hole was drilled to accept the looped end of the cardan shaft. To prevent the shaft disappearing inside the bearing block (as far as the loop will allow), a small brass washer was soldered to the shaft - to make sure said washer doesn't come adrift at any time in the future, a further 0.5mm hole was drilled across the shaft and a piece of nickel silver wire was inserted, the washer actually being soldered to this wire rather than the steel shaft. The finished product can be seen below with a temporary cardan shaft which allowed me to connect the ensemble to a mini drill to make sure it all worked. The bearing block is secured to the frame spacer between the driving wheels with a pair of 14BA bolts :
14.JPG

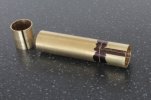
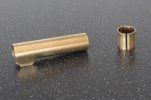
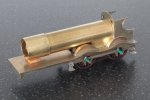
The boiler is next on the agenda, so a piece of suitable sized tube was cut for the boiler/firebox, and a further piece of the same tube was cut for the smokebox. The smokebox piece was cut along its length to allow it to be opened out to fit over the end of the boiler. The boiler/firebox length was cut with a fine piercing saw (an 8/0 blade) across, then a lengthways cut was made to meet the cross cut. These cuts allowed the round topped firebox sides to be bent down. This took a little time to ensure that the firebox was formed with its correct waisted form. Once I was happy with the shape, the boiler/firebox were offered up to the cab front/footplate/splashers, and marked so that I could remove a little material around the wheels, but more importantly to gauge the height of the boiler. Where necessary, a small amount of material was carefully filed and sanded from the lower edges of the firebox to allow the boiler to sit at the right height. The photos below show the various steps :
15.JPG
The two pieces of tube with the various saw cuts made - down the length of the firebox tube to allow it to fit over the boiler tube, and across and along to allow the firebox sides to be formed.

16.JPG
Bending and filing operations complete on the firebox.

Finally, a couple of photos that show the boiler assembly temporarily plonked in place (with a small piece of PCB to support the smokebox end) :
17.JPG


18.JPG
Thanks for looking
Ian
 
Last edited:

michael mott

Western Thunderer
You do make building these tiny locomotives look easy, much the same way George Daniels describes the making of watches in his fabulous book. However we all know that working with such thin material requires a delicate and steady hand. looking forward to the rest of this build.

Michael
 

Ian Smith

Western Thunderer
A couple of weeks ago I went along to TINGS (The International N Gauge Show) to help my friend Benn with his "Barton Road" layout. While there I had a look at what was on offer on the Dapol stand - not something I would normally do as RTR N Gauge holds little to no interest for me - however, on sale was a "Wobbly & Stuttering" 45xx for £25. I parted with the necessary cash and with Modbury's next outing just a few weeks away (now just a couple of weeks), I thought I could do a "quicky" to add to the Modbury loco roster. This post relates the progress so far.

I have to say that I was a bit disappointed when I opened the box as it purports to be 4518 (an early member of the class with straight tanks), but what I actually got was a 4575 class (a 45xx with larger sloping tanks).

I've always had a bit of a soft spot for these small prairie locos, and a 45xx was one of my failed attempts at 2mm Finescale loco building from the 1980's. A result of that failure is that I still have a full set of wheels in readiness for this project, albeit the old white metal wheels with steel tyres.
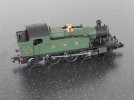
45-1.JPG
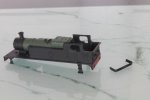
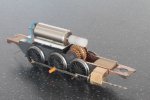
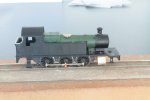
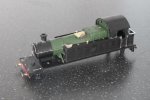
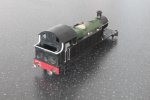
The Dapol loco as purchased (or nearly so, as I have stripped and rebuilt the N Gauge chassis so that it will actually move - although not well). Obviously, I didn't actually give a hoot about the N Gauge chassis as I will be replacing it anyway!

The first thing (after fixing the N Gauge chassis) was to measure the loco and compare it to drawings of the 45xx class in Great Western Journal's Now 2 & 16. It was then a simple matter of drawing up in CAD a set of frames that will fit under the N Gauge body. I had decided to scratch build a chassis rather than purchase the chassis David Eveleigh has produced, I don't quite know whether David's chassis is "wrong", but I have seen at least three 2mm Finescale 45xx's all suffering from the same affliction - the cylinders don't line up correctly with the outside steam pipes (the pipes should line up with the centre of the cylinders whereas the models I've seen have the pipes offset toward the front of the cylinders!)

I will be using a Nigel Lawton 8mm motor in this engine, driving a 30:1 worm/gear, then using 18/22 tooth spur gears onto the leading driving axle. This arrangement was also included in the CAD, and once happy with the arrangement the drawing was printed out (at scale). The drawing was superglued to a couple of laminations of 0.25mm phosphor bronze strips, and the piercing saw and files brought to bear.

Before cutting the frames out however, I had to cobble up some coupling rods by cutting and splicing from Association etched coupling rods. To aid in this, I set up my lathe with the vertical slide so I could attach a sheet of tufnol to it to drill a set of three 0.5mm holes at crankpin centres. Putting chemically blackened pins in these holes allowed the coupling rods to be assembled without getting soldered to the pins.
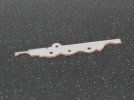
45-2.JPG
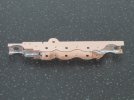
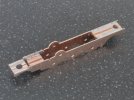
The basic frames fretted out of a laminated pair of phosphor bronze strips. The axle holes were pilot holed 0.5mm using the previously made coupling rods, then opened out to 1.5mm for the axles. The slot in the top of the frames just forward of the leading driving wheel axle hole is where the motionn bracket will eventually attach.

A couple of lengths of 6.4mm wide double sided PCB were cut for the chassis spacers (1.6mm thick), and an extra 0.5mm thick piece of double sided PCB was cut to go above the front pony truck.

A couple of photos of the resultant chassis - although before it was assembled, I drilled further holes for the brake hanger pivots and also for "Simpson" springs. I've also drilled a couple of holes where the outside cylinders will eventually go - I intend to file the cylinders from solid brass blocks, which will be pegged and glued to the frames, the holes are for the pegs.
45-3.JPG

45-4.JPG

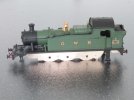
And finally for now, the chassis sitting below the Dapol body :
45-5.JPG

Earlier today, I trial fitted the wheels and was absolutely astonished that when once quartered all I had to do was open out the crankpin holes to 0.55mm to have smoothly rolling chassis. It seems a shame that I've got to strip it down in order to paint it!!

Thanks for looking
Ian
 

Ian Smith

Western Thunderer
Modbury is now all packed up and ready for loading into the car tomorrow. This weekend's outing is to the Farnham & District Model Railway Exhibition in Aldershot : Exhibition | F&DMRC

Looking forward to the weekend. I've just about managed to get the 45xx ready for the weekend - it runs. I haven't got any photos of it at the moment, as I've been too busy getting it into a running state to actually take any snaps. Suffice to say that all did not go to plan - the major fly in the ointment was that two of the white metal centred driving wheels decided to part company with their respective stub axles (all my own doing, in that I had glued them into the wrong muff (with a worm gear wheel on rather than a spur gear), and trying to break the bond managed to effectively destroy the wheel set!!) A quick order to the 2mm Association's shop 3 furnished me with a bright shiny new set of Mk5 wheels but they didn't arrive until Tuesday.

Getting the chassis running as an 0-6-0 was a doddle, but the two pony trucks have proved a little troublesome. In the end I've employed small amounts of lead where ever I could put it and some springy wire to get them to stay on the track. The wire springs-cum-pickup wires were tricky little blighters to adjust as too strong and the drivers were lifted slightly off the rails so it barely moved, and of course too soft and the pony trucks would derail on almost anything but plain track.

Hopefully for the weekend it will provide an extra item of motive power, but I may well borrow John Russell's 2251 again just in case.

Thanks for looking, and if you're anywhere near Aldershot this weekend pop along to the show. I haven't looked to see what else is on offer layout-wise, but I do know that Dave Stone will be there with Sherton Abbas (another GWR Edwardian layout but in 7mm scale) - but do bring your platform shoes as Dave displays his layout at about (my) eye level, although for him it's probably about waist level ;-)

Ian
 

Ian Smith

Western Thunderer
Modelling over the last few months has taken very much of a back seat, indeed very little has been done at all!!

However, when I have returned to the workbench I have been progressing the 45xx that I started. The basis being a Dapol later 4575 sloping tank top version which will be completely inappropriate for Modbury's circa 1906 period but could be pressed into service on St. Ruth.

It transpired that my friend Chris Carlson had a couple of Dapol flat top tanked 45xx bodies in his collection, one of which he was prepared to donate to the cause. This came as a collection of bits and pieces that he had purchased from DCC Supplies when these things were available as spares from them. In reality all I needed was the main body element comprising the footplate, tanks and bunker. I intended to separate the 4575 body I had to salvage the boiler assembly and the cab, and then fabricate any other bits as necessary.

With a suitable donor body at my disposal, I set about looking at it to decide what I wanted to do with it - the view now being to build a model of the prototype 45xx (No. 2161). The body was compared to the drawings and photos I had in my collection to try to establish what I would need to do to back date it to original condition. The list was quite extensive :
  • Remove all of the handrails (to be replaced with wire examples)
  • Remove smokebox door handles (to be replaced)
  • Remove the lamp irons (to be replaced with finer examples)
  • Convert the lower footplate to a straight drop (rather than curve drop) example
  • Remove the cab side sliding shutters
  • Remove the safety valve casing and top feeds (to be replaced with a turned brass example)
  • Remove and replace the whistles
  • Replace the tank top furniture with better home-made examples (the tank fillers are of the later tall design anyway)
  • Replace the buffers with a "Dean" tapered type rather than the parallel version Dapol have provided
  • Shorten the smokebox (in the end I've decided not to do this as I think I stand more chance of making a complete hash of it than a good job) - it only needs about 0.5mm removing anyway
  • Shorten and lower the bunker
  • Lower the cab roof
  • Convert cab roof from steel type to canvas covered wood
  • Remove rear cab window grills and open out the windows
  • Lower the cab doors - they should be 3'0" tall but the modelled ones are about 3'6" so about 1mm too tall
So, quite a list (which will probably develop as the project progresses)!

Firstly, the handrails were all carefully carved and scraped away, and while at it the cab side sliding shutters were carefully scraped off trying to preserve the raised cab beading around the openings. While working in the cab area, a fine square file was introduced into the cab openings to file down the cab doors to be 6mm tall too.

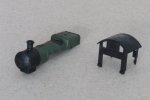
The boiler assembly was removed from the original 4575 body (Chris didn't have this in his collection of bits and pieces), this involved drilling away the footplate mounting peg from below the footplate under the smokebox. Once separated, the smokebox door handles and the handrails were removed, and the safety valve/top feed assembly prised out of the huge recess in the top of the boiler.

The clip on cab assembly was addressed next, the roof surface detail was simply filed away to leave a smooth surface. Then the grills over the rear cab windows were carefully pared away, and finally the cab windows were drilled out and filed to shape and size. In an effort to lower the cab roof slightly, the tops of the cab sides above the side cut outs were carefully filed down as much as I dared (probably lowering the cab roof by at least 0.5mm).

45-14.JPG
Boiler assembly after handrails, door handles and safety valves and top feeds removed. Cab assembly showing the attention given to the rear to remove the widow grills and open out the windows.

Then came the fun!!! Sorting out the bunker. As originally built, the 45xx had a much smaller bunker, being the same height as the tanks and also being 9" shorter. Therefore I had to give consideration as to try to modify the Dapol model or simply fabricate a whole new bunker area from scratch. In the end, I elected to try to modify the Dapol bunker and if I failed then employ the build one from scratch approach!

45-12.JPG
Firstly, lower the bunker. This was a simple piercing saw exercise of cutting away the raised bunker extension, then making good with fine files. As can be seen, the buffer housings have been pared off ready to be replaced with some of my own turnings which will represent the tapered version that the first of the class originally sported.

45-13.JPG
Secondly, shorten the bunker by 1.5mm. Again the piercing saw was employed to carefully cut away the rear of the bunker (whilst also preserving the chassis mount below the bunker). Then fine files were used to get rid of the excess length in the bunker whilst also maintaining a good set of mating surfaces so that when reassembled the bunker rear would be vertical and need a minimal amount of filling. You can see that I had forgotten to complete the removal of the top of the near side cab door at this point - luckily I remembered later!! I took the opportunity to remove the steps and lamp irons from the bunker rear too.

45-15.JPG
Thirdly, reinstate the bunker rear. As the Dapol body is plastic, I elected to try DLimonene as a solvent to re-join the parts. As this solvent is relatively mild compared to some others, it was necessary to hold the parts together while the joint made good. Placing the boiler assembly in place gave the elastic band somewhere to anchor itself to whilst preventing it from pulling the tank sides inwards. The twist of fine copper wire ensured that the cab sides and hence the bunker sides were held vertical and in alignment with the bunker rear (they had a slight tendency to splay outwards!). The curved valance was subsequently made good by gluing in a small noggin of 0.020" black plasticard which was filed to shape once secure.

45-16.JPG
Finally, the beading around the top of the bunker needed to be re-instated. However, before I did this I tried to re-shape the flare at the top of the rear bunker sheet a little - The bend should be a bit sharper than what I had been left with after removal of the top bunker extension. It's not prefect but will have to do! Anyway, back to the beading. An oversized piece of 0.005" plasticard was welded in place around the top of the bunker sheets. I've also filled all of the various holes in the footplate, tank top and boiler assembly with milliput.

45-17.JPG
The beading was then carefully pared back to be a little proud of the outside faces of the bunker by using a piece of 0.006" nickel silver sheet as a fence against which a sharp razor blade was run to remove the excess. The inside was then trimmed flush with the Dapol sides. Obviously it's over scale but is in keeping with the tank beading of the original model. I will run a file around the inside edges of the bunker to try to thin them a little before I glue the cab in place though.

The above was done before Christmas, but I forgot to post an update here!

Thanks for looking
Ian
 

Ian Smith

Western Thunderer
Over the last couple of weeks or so I have made a little more progress on the 45xx build...

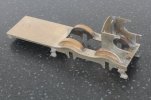
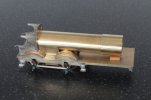
Firstly, the cylinders have been hacked out of solid brass bar :
45-18.JPG
One cylinder formed, and a block of brass has been prepared in order that the other can also be filed to shape. As can be seen, I've also made some cylinder ends from nickel silver bar - these were turned down to the correct diameter, a 0.6mm hole drilled down the bar and some slivers of some 0.010" parted off. The small piece of phosphor bronze wire is one of the mounting pins used to site the cylinder on the side of the chassis.

45-19.JPG
The formed cylinder temporarily hanging on the chassis from its mounting pins.

45-20.JPG
Same again but with the body resting in place for effect.

Over the last few days, attention has been turned to the body :
45-21.JPG
The tank fillers have been formed. The main element of these is a piece of brass bar that was filed to the outside shape then a pair of 1mm thick slices taken from the bar. Once cleaned up, these were soldered onto a scrap of 0.006" nickel silver sheet, which in turn was carefully filed such that it formed the lids by being slightly larger all round than the main body of the filler. A piercing saw cut was made about halfway along each embryonic filler, and a piece of emery used to widen the slot to accept an "L" shaped piece of 0.008" nickel silver. Once this little piece had been soldered into the slot and along the top of the filler, it was filed away to leave the central rib of the lid and the locking handle.

45-22.JPG
This view shows the tank filler placed in position on the forward end of the tank. Also in evidence are the new mushroom vents - these were turned from a piece of brass bar, being 0.6mm diameter for the pipe of the vent, and 1.2mm diameter for the head. Once parted off the dome of the mushroom was formed with a fine file while spinning the part in a pin chuck mounted in an ER16 collet of the lathe (my mini drill chuck is so badly worn that it would not grip the 0.6mm stem of the vent). Also apparent in the view are the replacement handrails. The holes for the handrail stanchions were jig drilled (using 0.3mm holes in a scrap of etch to ensure the holes were consistently positioned on both sides). The handrail knobs are etched 2mm Association items, with the handrails themselves being 0.008" guitar string. Normally I would solder these together on the loco body, but with this body being plastic, the handrails were soldered up offsite as it were on a piece of Tufnol (the previously used jig being used to drill holes in the Tufnol to hold the handrail knobs). The handrail (guitar string) was purposely slightly over-long when soldered in place, but a careful rub on my diamond EZlap sharpening "stone" removed the excess with ease.

45-23.JPG
This final view shows that I have also made and fitted the lamp irons (although I still have to fit some little slips of 0.005" plasticard to represent the fixing plates for these. The lamp irons themselves were formed from 0.31mm nickel silver wire, which was bent to an "L" shape then squashed in my vice. One leg of the flattened L was then bent up to represent the lamp iron, and the unflattened bit sited in a 0.3mm hole in the body (being secured with cyano on the inside of the body).

That's all for now. Hopefully over the new couple of weeks I'll get it into a state where it can be used at Modbury's next outing at Abrail (Abingdon & District MRC's exhibition) on the 4th March.

Thanks for looking.
Ian
 
Top