You are using an out of date browser. It may not display this or other websites correctly.
You should upgrade or use an alternative browser.
You should upgrade or use an alternative browser.
Liver & Fry's workbench
- Thread starter Liver & Fry
- Start date
Liver & Fry
Western Thunderer
Liver & Fry
Western Thunderer
Liver & Fry
Western Thunderer
And now we have letters...
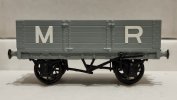
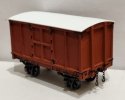
Somewhere (but where is anyone's guess) I'm pretty certain I have some spare works plate transfers from the Slaters kit I built previously (indeed, trying to locate said wagon is proving difficult enough!).
Until then, aside from a coat of varnish, this one is considered done by all accounts.
And so, aside from finishing off the GN and GC wagons, my pile of Mousa kits is complete and I no longer have an excuse not to start working with metal (@Herb Garden has been pestering me about this for some time now!). I have a few more 3D print and resin bodied kits from other sources, but they will require brass W Irons. Small steps eh?
- James
Liver & Fry
Western Thunderer
OK, so I might have found something else to do instead...
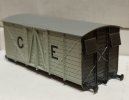
There's a photo that was posted on the GERS members forum a while back showing GER van No.32379 in what appears to be a staged ex-works view. The van has been embellished with white tyres and black ironwork on the bodyside - Not a common feature on the standard livery for these vans, but, an excuse for me to make something of the final Oxford Rail van I've yet to find a use for...
This'll be quite a quick job (well, until I have to pick out the ironwork...) and so far this afternoon I have already corrected the Morton brakes, repainted the solebars on the chassis, removed the bodyside numbers and repainted the ends of the van as seen below (glistening because the paint is still wet)
Oh and I've also been working on something else today alongside this, but more on that tomorrow!
- James
There's a photo that was posted on the GERS members forum a while back showing GER van No.32379 in what appears to be a staged ex-works view. The van has been embellished with white tyres and black ironwork on the bodyside - Not a common feature on the standard livery for these vans, but, an excuse for me to make something of the final Oxford Rail van I've yet to find a use for...
This'll be quite a quick job (well, until I have to pick out the ironwork...) and so far this afternoon I have already corrected the Morton brakes, repainted the solebars on the chassis, removed the bodyside numbers and repainted the ends of the van as seen below (glistening because the paint is still wet)

Oh and I've also been working on something else today alongside this, but more on that tomorrow!
- James
Last edited:
Liver & Fry
Western Thunderer
Another job done!
With the most welcomed assistance from @Overseer (thank you once again!) who kindly made up and provided me with a set of correct/appropriate GNR wagon transfers, I have finally been able to finish off my pair of GNR wagons:
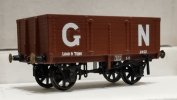
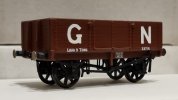
I'm really pleased with how they've turned out and the correctly proportioned GN on the Dia.24 really makes the difference compared to my, er, bodge that I'd attempted previously!
- James
With the most welcomed assistance from @Overseer (thank you once again!) who kindly made up and provided me with a set of correct/appropriate GNR wagon transfers, I have finally been able to finish off my pair of GNR wagons:


I'm really pleased with how they've turned out and the correctly proportioned GN on the Dia.24 really makes the difference compared to my, er, bodge that I'd attempted previously!
- James
Liver & Fry
Western Thunderer
Progress has also been made on No.32379 since yesterday, with the chassis being refitted, the tyres being painted white and a start made on the fiddly task of picking out the bodyside ironwork in black... One side has been done so far, but I couldn't resist a photo!
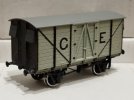
I'll do the other side tomorrow and then I'll likely do the numbers on Saturday.
- James

I'll do the other side tomorrow and then I'll likely do the numbers on Saturday.
- James
Liver & Fry
Western Thunderer
Spot the difference!
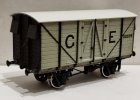
A day early but who's complaining eh?
Since last time, I've repainted the roof an off white, painted the door mechanisms black and added the running numbers to the bodysides and solebars.
With No.32379 is done, this marks my 6th (and to my knowledge, final) rendition of "everything you can make with an Oxford Rail GE van" - It had better be anyway as I've now run out of spare one to mess around with!
Hopefully this particular mini-series has been interesting and insightful! I've certainly had fun!
- James
Liver & Fry
Western Thunderer
Hi all!
I was taking a short pause from modelling after my run of wagon building previously, thinking I'd start something new after the York show, but, I found myself with little to do last night and so I've started on something I've been keen to build - A HR Jones 8T goods van.
This was a fortuitous find on a well known auction site, consisting of a resin body, some MJT W-Irons and some white metal components (HR buffers and axleboxes). The resin body is, I believe, a product of the Highland Railway Society.
So far I have cleaned the body and painted it in an undercoat of grey:
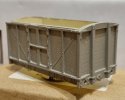
It seems to be a straight forward build, but I'm also in no rush to finish this one. I want to take my time learning how to put W-Irons together and making sure I get it right. Probably sounds silly, but it's all new to me!
- James
I was taking a short pause from modelling after my run of wagon building previously, thinking I'd start something new after the York show, but, I found myself with little to do last night and so I've started on something I've been keen to build - A HR Jones 8T goods van.
This was a fortuitous find on a well known auction site, consisting of a resin body, some MJT W-Irons and some white metal components (HR buffers and axleboxes). The resin body is, I believe, a product of the Highland Railway Society.
So far I have cleaned the body and painted it in an undercoat of grey:

It seems to be a straight forward build, but I'm also in no rush to finish this one. I want to take my time learning how to put W-Irons together and making sure I get it right. Probably sounds silly, but it's all new to me!
- James
Liver & Fry
Western Thunderer
Posting this while I'm riding the high...
Progress has been made on the Jones van, and for me, this feels big: W-Irons!
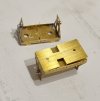
Tonight was my first foray into working with brass, and soldering, during which I was able to put together some MJT W-Irons; one fixed and one as a compensation unit. All whilst under the guidance, over a video call, by @Herb Garden (who has been pestering me for years to take this first step and, in all honesty, I wouldn't have done it without him and his encouragement, so thank you!). And I know this must sound silly, me getting this excited over one set of W-Irons, but honestly, I'm so pleased with myself! I genuinely feel I've achieved something. They're not perfect. I quickly learnt things as and when I made mistakes. But I did it! And now I know I can do it again, and surely the only way is up, right?
I've also painted the body in red oxide since last time:
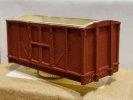
Weight has also been added internally.
I suddenly feel like this might get done quicker than I expected, although I do need to source some appropriate brake gear. I'll be at the York show on Saturday so I'll see what's available there...
- James
Progress has been made on the Jones van, and for me, this feels big: W-Irons!

Tonight was my first foray into working with brass, and soldering, during which I was able to put together some MJT W-Irons; one fixed and one as a compensation unit. All whilst under the guidance, over a video call, by @Herb Garden (who has been pestering me for years to take this first step and, in all honesty, I wouldn't have done it without him and his encouragement, so thank you!). And I know this must sound silly, me getting this excited over one set of W-Irons, but honestly, I'm so pleased with myself! I genuinely feel I've achieved something. They're not perfect. I quickly learnt things as and when I made mistakes. But I did it! And now I know I can do it again, and surely the only way is up, right?
I've also painted the body in red oxide since last time:

Weight has also been added internally.
I suddenly feel like this might get done quicker than I expected, although I do need to source some appropriate brake gear. I'll be at the York show on Saturday so I'll see what's available there...
- James
Liver & Fry
Western Thunderer
Whilst digging out the soldering iron the other day, I managed to find the box for the Slaters D.299 I previously built which contains the transfer sheet with Midland numberplates on. As such, one of my Bank Holiday Monday modelling jobs has been to finish off the Mousa kit I recently built:
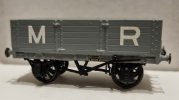
The number was selected on the basis that that's the one they used on the box!
- James

The number was selected on the basis that that's the one they used on the box!
- James
Liver & Fry
Western Thunderer
The main focus for the day however has been Highland stock - plural!
I've made a good amount of progress over the weekend on the Jones van, having picked up some wagon springs and (cosmetic) drawhooks at the York show on Saturday. These have been fitted, along with the axlebox covers provided in the kit. I've then painted all the ironwork black accordingly:
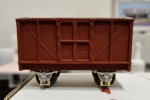
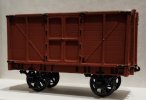
It's really starting to look the part I think! There's just a few areas to work on:
- A roof (presumably plasticard curved to shape)
- Brake gear, which I will source from the Highland Society once I'm able to sort my membership
- Buffers; a set were supplied with the kit but these are the later Drummond type. I'm not sure if buffer shanks would have been swapped during a wagons lifetime so I'm trying to source something that looks representative of the earlier Jones style, and then I'll compare and decide which I prefer. I had brought some buffers with this in mind at York but they weren't quite right.
All this talk of buffers made me realise I may have made a mistake on my open wagons - It would appear buffer shanks are meant to be black, not red like the body (and not red like I'd painted them...) so all six came out today for correcting!
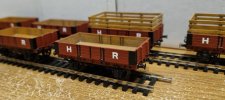
It was nice to have them all out and to see the van beginning to look the part alongside them. Still need to source a brake van though...
- James
I've made a good amount of progress over the weekend on the Jones van, having picked up some wagon springs and (cosmetic) drawhooks at the York show on Saturday. These have been fitted, along with the axlebox covers provided in the kit. I've then painted all the ironwork black accordingly:


It's really starting to look the part I think! There's just a few areas to work on:
- A roof (presumably plasticard curved to shape)
- Brake gear, which I will source from the Highland Society once I'm able to sort my membership
- Buffers; a set were supplied with the kit but these are the later Drummond type. I'm not sure if buffer shanks would have been swapped during a wagons lifetime so I'm trying to source something that looks representative of the earlier Jones style, and then I'll compare and decide which I prefer. I had brought some buffers with this in mind at York but they weren't quite right.
All this talk of buffers made me realise I may have made a mistake on my open wagons - It would appear buffer shanks are meant to be black, not red like the body (and not red like I'd painted them...) so all six came out today for correcting!

It was nice to have them all out and to see the van beginning to look the part alongside them. Still need to source a brake van though...
- James
Liver & Fry
Western Thunderer
I found a fourth job to do on the Jones van:
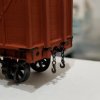
Safety chains! Spares handily sourced from the detail pack of a non-skirted Rapido C53 (which I should probably post my repaint of at some point?).
I drilled two small holes in each bufferbeam, ran my adhesive through with a thin bit of wire and gently pushed the lug of the eyes through once I'd correctly orientated the hooks. I think they'll make for a nice finishing touch once the build is complete!
- James
Liver & Fry
Western Thunderer
Liver & Fry
Western Thunderer
Final entry on this build for now until I can source some appropriate brake gear.
Today the focus is buffers:
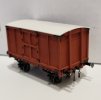
I managed to source an appropriate looking set to represent the earlier Jones style (51L - NE 4 bolt fitted wagon buffers) and now the wagon looks far more complete! Especially as there's no evidence I've seen of the Highland applying H R lettering to the sides of these earlier vans, so that's one less job!
Now, question is, more Highland stock or something else for the next build?
- James
Today the focus is buffers:

I managed to source an appropriate looking set to represent the earlier Jones style (51L - NE 4 bolt fitted wagon buffers) and now the wagon looks far more complete! Especially as there's no evidence I've seen of the Highland applying H R lettering to the sides of these earlier vans, so that's one less job!
Now, question is, more Highland stock or something else for the next build?
- James
Liver & Fry
Western Thunderer
After hinting at this project, having borrowed the spare safety chains from its detail pack for the HR Jones van, I figured I'd best share my repaint of a Rapido J70 as a GER C53:
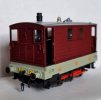
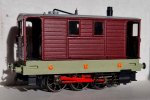
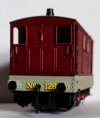
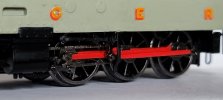
This is, as you can tell, GER No.126. One of a batch of three C53s built in 1921 and therefore released into traffic carrying the unusual combination of a crimson body and grey tanks/bufferbeams. The GER switched to using French Grey (previously an undercoat colour) as their topcoat for locos during The Great War, whilst carriages switched to crimson post-war. As the bodies of the trams fell under the carriage and wagon department, these were painted crimson, giving this unusual combination which, I confess, despite preferring the blue era of the GER, I couldn't resist modelling...
The grey used is GER light freight grey by Phoenix (which was the same French Grey as the loco departments undercoat) whilst the crimson is actually Phoenix's North British carriage crimson, but I feel it captured the desired effect. Transfers are by Fox and are of the later GER styling.
The only thing missing is a pair of etched numberplates for the bodyside but these are a work in progress.
- James
Liver & Fry
Western Thunderer
A brief interlude whilst I look at something different!
A few weeks back I had a strangely specific and targeted advert on one of my social media pages for 'Three Peaks Models' - A company that appears to specialise in 3D printed products, but I confess I had never heard of. The advert was for an L&Y Dia.3 covered van, available to pre-order. I sat on this for a bit, intrigued but wanting to see more once the product released at the start of April I've since decided said kit isn't for me, however, I had also noticed that they produce kits for a Dia.1 "low goods wagon".
Approximately 9000 of these were built and they were by far and away one of the most common wagon types on the L&Y network. It makes sense to have at least one... (Is what I tell myself!).
At £10 (plus P&P) I figured it was worth a shot. You get the option of pre-1903 and post-1903 brake arrangements - I went with post-1903 (both brake levers right hand end). Upon placing the order I was informed that they were currently out of stock, but more would be printed so allow a few extra days for delivery. This was Sunday night, so imagine my pleasant surprise yesterday morning when I received an e-mail informing me the kit had been shipped and today when I arrived home from work to see it had been delivered! Can't knock them for quality of service...
This is what I have received:
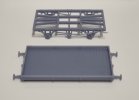
The kit comes in two parts - A body and a chassis. Both sections are neatly printed and slot together beautifully!
My job tonight is to clean them with IPA and then tomorrow I shall begin...
I must stress, I'm not affiliated or sponsored, but I wanted to highlight how impressed I am so far! It'll be a quick build, but I'm looking forward to it. Later this week I should receive parts to make brake gear for the HR Jones van so this will fill the gap between nicely!
- James
A few weeks back I had a strangely specific and targeted advert on one of my social media pages for 'Three Peaks Models' - A company that appears to specialise in 3D printed products, but I confess I had never heard of. The advert was for an L&Y Dia.3 covered van, available to pre-order. I sat on this for a bit, intrigued but wanting to see more once the product released at the start of April I've since decided said kit isn't for me, however, I had also noticed that they produce kits for a Dia.1 "low goods wagon".
Approximately 9000 of these were built and they were by far and away one of the most common wagon types on the L&Y network. It makes sense to have at least one... (Is what I tell myself!).
At £10 (plus P&P) I figured it was worth a shot. You get the option of pre-1903 and post-1903 brake arrangements - I went with post-1903 (both brake levers right hand end). Upon placing the order I was informed that they were currently out of stock, but more would be printed so allow a few extra days for delivery. This was Sunday night, so imagine my pleasant surprise yesterday morning when I received an e-mail informing me the kit had been shipped and today when I arrived home from work to see it had been delivered! Can't knock them for quality of service...
This is what I have received:

The kit comes in two parts - A body and a chassis. Both sections are neatly printed and slot together beautifully!
My job tonight is to clean them with IPA and then tomorrow I shall begin...
I must stress, I'm not affiliated or sponsored, but I wanted to highlight how impressed I am so far! It'll be a quick build, but I'm looking forward to it. Later this week I should receive parts to make brake gear for the HR Jones van so this will fill the gap between nicely!
- James
Liver & Fry
Western Thunderer
A preliminary coat of grey has gone on the wagon thus far:
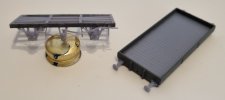
To elaborate further on how it goes together, the underside of the body has two lugs that slot in nicely to the underframe, as seen below:
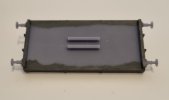
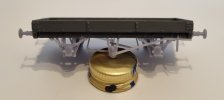
I've not actually attached these yet, just fitted them together for the purposes of demonstration. I'm going to use the opportunity to paint both sections first as this will be easier r.e the underframe.
- James

I stumbled across this van quite recently. I'm not familiar with Three Peaks Models either so, I'll be watching how you get on with your low goods wagon.
To elaborate further on how it goes together, the underside of the body has two lugs that slot in nicely to the underframe, as seen below:


I've not actually attached these yet, just fitted them together for the purposes of demonstration. I'm going to use the opportunity to paint both sections first as this will be easier r.e the underframe.
- James
Liver & Fry
Western Thunderer
I've had a busy week or two so there's not been a huge amount of progress until now, however, parts for brake gear assembly did arrive and I was able to, ahem, bodge a solution...
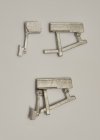
The brake shoes are Highland but the brake pushrods are a North British design, however, these were the closest match to what I could turn into something that looks Highland in style. Some cutting, bending and glueing later and I had what I needed. The finished item is slightly longer than would be prototypical, but it still works for me.
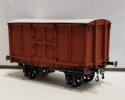
Fitted, painted, and finished with a 51L brake lever, this marks the wagon as done, as they don't appear to have carried H R lettering.
I have to say, this one was a fun build!
- James

The brake shoes are Highland but the brake pushrods are a North British design, however, these were the closest match to what I could turn into something that looks Highland in style. Some cutting, bending and glueing later and I had what I needed. The finished item is slightly longer than would be prototypical, but it still works for me.

Fitted, painted, and finished with a 51L brake lever, this marks the wagon as done, as they don't appear to have carried H R lettering.
I have to say, this one was a fun build!
- James
Liver & Fry
Western Thunderer
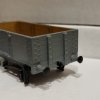
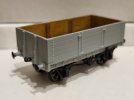
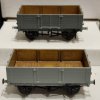
Progress has also been made on the L&Y Dia.1, with the two halves being fitted together and weight added underneath, as seen below:
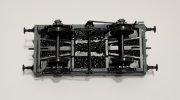
There was, however, a heart stopping moment whilst fitting the wheels. I figured I'd try fit bearings to the model to make it run smoothly, but it seems the waisted bearings didn't sit fully home in the axleboxes, as when I tried to fit the axle, the extra stretch required to get the axle in past the rim of the bearing caused on of the W-irons (and a portion of the solebar) to snap off!
I cautiously attempted to fit the other axle without bearings (just hear me out here...) and it went in much better. I then test fitted the broken portion of solebar and it fit so well that I took the decision to glue it back in place, but with the axle fitted (again with no bearing).
Such was the fit of the broken portion that you now cannot tell it was ever damaged:
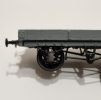
And more remarkably, despite a lack of bearings and the aforementioned incident, the wagon probably runs smoother than some I've seen that have! I do question the longevity of the model, but then again, I'm unlikely to run this so frequently in the future that I wear out the mould...
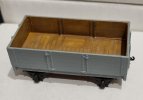
Finally, I've finished the painting by doing the wood planking inside:
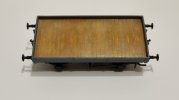
All that remains is to add lettering!
- James

There was, however, a heart stopping moment whilst fitting the wheels. I figured I'd try fit bearings to the model to make it run smoothly, but it seems the waisted bearings didn't sit fully home in the axleboxes, as when I tried to fit the axle, the extra stretch required to get the axle in past the rim of the bearing caused on of the W-irons (and a portion of the solebar) to snap off!
I cautiously attempted to fit the other axle without bearings (just hear me out here...) and it went in much better. I then test fitted the broken portion of solebar and it fit so well that I took the decision to glue it back in place, but with the axle fitted (again with no bearing).
Such was the fit of the broken portion that you now cannot tell it was ever damaged:

And more remarkably, despite a lack of bearings and the aforementioned incident, the wagon probably runs smoother than some I've seen that have! I do question the longevity of the model, but then again, I'm unlikely to run this so frequently in the future that I wear out the mould...
Finally, I've finished the painting by doing the wood planking inside:

All that remains is to add lettering!
- James

