John’s workbench - a miscellany.

Kitchen table modelling
  • John57sharp

    Western Thunderer
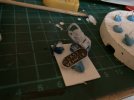
    Time has moved on apace and my work tray has landed on the kitchen table for the time being…
    3A6DCC6A-953C-4054-9B56-BCAC406E0536.jpeg

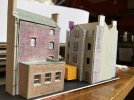
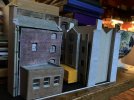
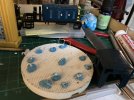
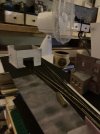
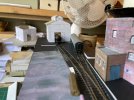
    My 2mm efforts have concentrated on getting some Scalescenes buildings up to a quality I am happy with, and now that I have, I’m looking for places to put them and thinking about how to the landscape would have looked before this little twig of the railway arrived and cut into it. So I’m mocking up a scene with a old stonebuilt warehouse perpendicular (roughly) to the railway which had previously adjoined another building in terrace style, but which was demolished to make way. The gable end was then repaired in brick (cheap) and painted white to (sort of) much the stone.

    In front of this a brick warehouse with a more modern extension, wedged into the available space, possibly to be extended, still thinking about that.

    Behind all this I noticed that a wooden box poking over the rooftops might be a larger warehouse again, taller, maybe set on a natural rise, looming slightly larger, blocking even more of the distance beyond might work.
    925E1CBE-E5C7-4A06-9024-C08749689202.jpeg
    The black card they rest on is the edge of the railway property. This is the closed in kind of effect I’ve been hoping to create, so now we move to more mock-ups and get down to making these real.

    The local van drivers hate this area, and many a scarred wing tells witness to the sharp, bends and narrow cobbled lanes.

    Let’s get down to it!

    John
     
    Designing the buildings
  • John57sharp

    Western Thunderer
    This “layout“ is now officially known as Twig One - its two small to be a branch. I’ve set about designing a building or two for the left hand end - I had a number of ideas in my head but no prototypes, just mental mood boards.

    Before that hough, a major boost to my confidence and a number of well timed posts on here and over on the mm part of the other place led to some leaps forward and I have build and had locos running over the Easitrac turnout. Yes!! So thanks to the various contributors who have unknowingly helped and spurred me on. (Since had to make a couple of improvements so it looks unfinished in the pics)

    The first building needed to be an industrial one with a through road for a wagon or two to be shunted through. This itch has been waiting to be scratched for many years, in fact so long that I have forgotten where the original picture was published, but I’m sure it will turn up - probably the day after the building is glued to the layout.
    0DA4891F-A9D8-448D-8D0B-3D456D20E764.jpeg
    I’ve no access to CAD so I started drawing something on an A sheet of paper, this became the mood board for this building, with lots of scribbles added as I went along. A copy was taken on the printer, and a paper version cut out and plonked, photographed and pondered over.

    The drawing was updated and copied again and this time a card version was made, pondered etc and repeated several times.

    The latest version shown below was supposed to be narrower than the last, its about 4mm wider… I think I missed a change made with the knife and not noted on the drawing. Anyway the roof line is one I like and it’s different to any other I have in mind so far so I think I’m getting there. 7DE5A305-9951-4719-817A-3969D49E7F28.jpeg991C46EA-7853-4CDA-A2DD-9ECECC366C5A.jpeg
     
    Gronk 1 - Wheels turning - mostly
  • John57sharp

    Western Thunderer
    This makes me very happy indeed! After 2 chassis builds and a great deal of trying, I finally have an 08 chassis that runs under power in both directions.

    One way runs great and smooth, the other is more juddery and prone to jamming. I think the latter is due to one stub axle being loose in the muff and I’ll look into that tomorrow.

    BTW the rods are not held on at all one side and just one plastic wire sleeve.

    Here‘s a short video of the running, I’d appreciate any observations and comments that might assist going forward, or indeed in reverse!


    Cheers!

    John

    edit 16/10 new YouTube link
     
    Last edited:
    Confessions of a bodger
  • John57sharp

    Western Thunderer
    How we laughed…. Having achieved the previously I reached heights of a working chassis, under power, and sorted out the loose stub axle/muff issue, I moved onto the next glaring issue: most of the time the motor needed a gentle prod to start up.

    I looked at this for ages yesterday and came To the learned decision that the motor seemed to be unsteady in the Association mount and that it must therefore be needing to realign slightly to start…

    So I gently freed the motor from the mount and slid it out of the gearbox. Yes the retaining glue was rubbery and ineffective, but was now obvious to all was that one of the wires supposed to supply power, and in fairness to me, the one that looked perfect, wasn’t actually soldered to the motor, each tiny poke made a connection and the gummy glue must have held it for a while… I’d used a very rigid wire in a C shape to do this and it looked fine…

    All fixed now!

    John
     
    EM Query
  • John57sharp

    Western Thunderer
    I’ve decided to put the 2mm work into the loop for a short time and have an EM express go by. See above for more.

    A change is as good as a rest they say, so I’m hoping to have a bash at something slightly bigger. First up will probably be a High Level 03 chassis under an eBay rescue body, and a few wagons.

    First wagon will be a Cooper Craft loco coal wagon. I’m hoping some kind soul could advise me of the correct wheels for this wagon as mine has none at all?

    I‘ve A few ideas floating around but nothing definite yet.

    Cheers
    John
     
    EM progress 03 query
  • John57sharp

    Western Thunderer
    I got the wheels thanks for the info above, Wizard Models very quick.

    Turning to the 03, the body is being prepared for detailing and an order list being prepared. Does anybody know of a source for these tanks on the footplate and the forward cabinets at all?

    Pictures soon.

    Cheers
    John
     
    • Like
    Reactions: AJC
    Progress report
  • John57sharp

    Western Thunderer
    Well there is some! I’ve finished checking and cleaning a myriad of handrails for the 03, now they have a white primer layer.
    5C53E47C-4430-4AE2-B69F-58F9CFDB37D7.jpeg
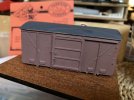
    Theres a Parkside 12T fruit van body done, chassis to follow, but it will be a testbed for my first attempt at OPR weathering. This is @jonte ’s fault for posting the Warbonnet YouTube links. These struck a major chord for me and, a big plus, I have almost everything needed in stock, the one extra arrives tomorrow all being well, and we’ll get going. OPR is oil paint rendering and it’s all very subtle. I’m Not expecting to crack it straight away, but I have done a very little of this before and have high hopes. Huge thanks for the nudge, I’ve been immersed in his otherYouTubes ever since, except for when I’ve been watching SpaceX pulling a new design out of the hat this week.

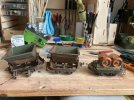
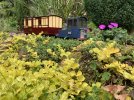
    oh and a few bits to go on the garden railway’s new brake.

    Friday night is music, no, Indian takeaway night so must dash

    cheers
    John1FAEB13E-39CF-4D09-881E-AE60A1134ABC.jpeg9D1386B4-4ABF-4CBD-8D7D-6EFE284E55D5.jpeg
     
    Picking up the 2mm threads
  • John57sharp

    Western Thunderer
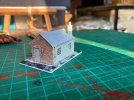
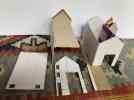
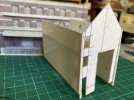
    Think I’ll be posting more on here even just as an aide memoir. I got out the 2mm buildings I’ve been avoiding for ages and sat staring at them trying to recall where is was up to. This particular building had 2 mock-ups and some production parts in card, some in white plastic and some in plastic brick card, so I couldn’t decide what I had last decided to do! So today I made a decision to continue with the white plastic card (especially after some quality control on the others) and between gardening and a little SM32 action came up with a bit of progress - second photo.
    359F6B84-20E3-412F-9AB9-8E297185F0AD.jpeg222DDE9D-C054-41A1-B3BC-E73B861350EB.jpeg
     
    Nothing ever changes….
  • John57sharp

    Western Thunderer
    When Gilly suggested I move up a scale to save me from the struggles of 2mm scale bits being universally tiny, I'm not sure we had really thought it through. This knitting is the brake gear for a 21t wagon, Rumney Models chassis. The wires are .3mm and while this isn't a la instructions, I'm getting there slowly and with the constant aid of magnifiers. I've broken one which is why it's stretched out like this on a jig, I'll try and mouth it correctly once I've got it all loosely in place.

    My hats off to you talented folk who do inside valve gear and indeed outside ones too….

    3426AF02-35DE-40F0-873E-AA3BBDDE0905.jpegJohn
     
    A very steep learning Curve
  • John57sharp

    Western Thunderer
    Curve is the new name for the new version of the “leading” vector drawing tool that a) runs on my aging ipad and b) is free. All good. Previously Vectornator I think.

    I couldn't get to grips with the previous version but after a semi-sleepless night put to good use and some more hours today I have managed to get this card mockup of what I'm calling Building 9 in my attempt to model Coales Mill in Newport Pagnell to 2mm scale. I've a few good photos, though not enough, so it may mean guesswork, but I'm delighted to have got this far and now it's onward to adding details and the rather interesting not parallel twin ridge6B661C92-A0F0-4DDE-8872-E9D9FA3B692A.jpeg roof.

    I'm grateful for all the inspiration I get from this forum and especially to Michael who is building Chandwell. I don't think he is on here (yet) but his YouTube channel is a one of several that keep me going with this.

    Cheers
    John
     
    More grist to the mill
  • John57sharp

    Western Thunderer
    Yesterday’s progress: a first guess at building 8 and a coloured block view of 7 and 6 behind. Even in 2mm it’s going to be a large structure. Breaking it down into bits has helped me progress in a less daunted fashion.
    The doors and windows on 8 are in need of adjustment, I'm not sure yet if there is a third storey, but the lowest should all be roughly at platform hight as they are served by a siding which allowed wagons to be accesses directly through the openings, no platform was provided.

    To add further interest, the whole frontage is curved like a threepenny bit, as is the road behind (Broad St. In Newport Pagnell) but I have little evidence relating to this side so far.

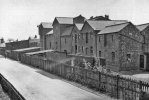
    The prototype photo was kindly provided to me by the NPHistorical Society for reference. I've numbered the building left to right so 8 and 9 are the nearest to the camera. It only come obvious from an old aerial view that the 2 ridges of 9 diverge, leaving a flat triangular area between them. The photo is taken from the main station area.

    F0987A47-3526-4E08-AF4E-C087D62536E1.jpeg6FBCB506-15AF-432F-BBCD-E2664DE5F2D7.jpeg
    Pleased with the general trend so far, I'm learning fast.

    On other fronts, some EM wheels arrived today from Wizard, so the minerals can progress further too….

    Onwards!

    John
     
    Works in the works
  • John57sharp

    Western Thunderer
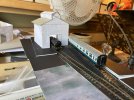
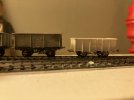
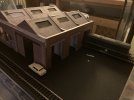
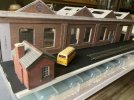
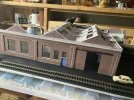
    Continuing with Gilly’s great idea of trying something bigger, I've been putting together a diorama idea in 4mm these last few weeks, between assorted chores and duties. This is a inspired by the fantastic models of assorted stations and works by Mark, and will provide a parking area for anything I finish in EM. Meantime I've thrown down some old Hornby straights and that's my Grandad’s Dublo class 20 sat in the doorway doing clearance checks. It's about as old as I am.

    Today I have been looking hard at these photos and I think the roof layers are too thick, so I'll probably redo them. This is all based on a ScalesScenes low relief kit that I'm deepening? It needs to be dirtier too. I can see a few details that need crisping up and many more to add.

    The who thing sits in a plastic box turned upside down, like a cake box, thanks Gilly for that idea again, which is all the space we have at present, so gives me a defined shape to work within. The hope is to have light streaming through the various windows and doorways and plenty of photo ops. I may may some of the roof removable too.

    Coales Mill in 2mm is creeping slowly forward too. More on that story later.

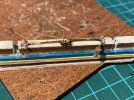
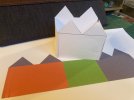
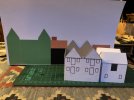
    BAD175C7-DE04-42DA-A913-1E02776E4035.jpeg784631B7-0F7F-4F92-902E-B259D25D7C4F.jpeg28BA6A19-0C17-4DDA-A5E2-58DD94A18175.jpegCF23C051-CCBA-40C8-B9C8-9F7C6415D870.jpeg

    Neighbours cat came to inspect yesterday.
    Thanks for looking
    John
     
    Last edited:
    Ouch! Don't worry, no pictures New
  • John57sharp

    Western Thunderer
    So things will be a bit slow for a while following my unfortunate decision to pick up my 80w soldering iron by the wrong end. Don't do this folks….
    Fortunately it was my left hand and I realised the error of my ways extremely fast and dropped it pdq.
    Lots of cold water seemed to be the best treatment, and I got away with minimal damage, just need to look after it now.
    The irons survived the fall too.
    Most annoyingly I had spent ages getting the parts set up for the brief heat application, only for the whole lot to be scattered everywhere..

    John
     
    Top