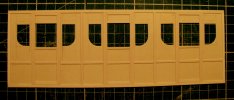
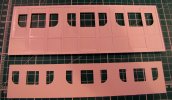
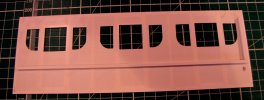
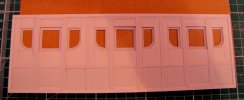
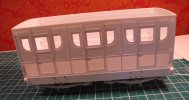
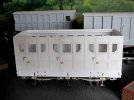
Early LSWR 1st Class Carriage

Ian@StEnochs

Western Thunderer
Ian
Not sure why but I've only just seen your post and read of your idea. The trouble is, I've already made two new sides!

Jon
Jon,
No problem, I miss things all the time as it’s not always easy to remember where you last looked on a thread.
Now you have two sets of sides you could always make two coaches!
Ian.
 

Jon Nazareth

Western Thunderer
Here's the first side with the strips added. I've given it a bit of a clean up but probably needs another. It hasn't turned out as good as I would have wanted but, i intend to try harder with the other side piece. I've had weights on it overnight to try to stop any bending as the solvent dries out properly but the side still wants to cup. If I can find some straight pieces of styrene, I may apply these to the inside to straighten it up. I intend to make the ends thicker and this will sort out any curving in that area but it will most likely need something in the middle.

Jon
 

Attachments

  • IMG_5147.JPG
    IMG_5147.JPG
    155.8 KB · Views: 15

Jon Nazareth

Western Thunderer
Work on the body of the First Class carriage has stopped for the time being until I take delivery of some grab handles. I've made the ends but didn't want to put it all together until I had marked out and drilled the holes for the handles. I felt that it would be much easier while everything was still in the flat.
So, I've turned my attention to the leaf springs. I did have a go at making some but that turned out a disaster and so, I looked around for some ogg the shelf version. Well, they don't exist but Mike Williams has some that, for me, would pass muster. The parts duly arrived and then I had to think up a way of joining the spring to the hanger. Initially, I was going to have a go at cleaning back the parts and then drilling a 1mm hole through the end of the spring and the hanger and inserting a pin. While cleaning up the parts, I thought to myself that the chances of drilling a holes in white metal castings and have them all line up was a bit of a long shot and so, I decided to simply glue them together with an epoxy. However, when the first one was all cleaned up and ready to be glued, I thought that it may just be worth having a go at drilling and if that failed, I could just glue as per my first plane. I put a new 1mm drill into a pin vice and after a bit of twiddling and checking that all was going true, I ended up with some holes. I then tried a piece of 1mm nickel wire through the hanger and the eye of the spring and it went through no problem! Now that was a surprise but, I have another eleven springs to sort out as yet. I'm just hoping that that wasn't first time lucky.

Jon
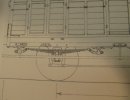
IMG_5179.JPG
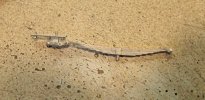
This is the type of spring that is required.
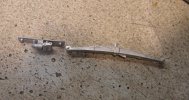
IMG_5177.JPG
This is what I'm working with and is the closest that I could get.
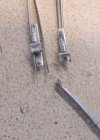
IMG_5181.JPG
The mount on the hanger has been cut back, the spacer between the cheeks(?) cut away and the eye of the spring drilled out.
IMG_5182.JPG
The finished spring with 1mm dia nickel rod roughly in place
 

Jon Nazareth

Western Thunderer
Here is the body sitting temporarily on the underframe. I must have had an aberration as I've permanently fixed the window section to the side of the coach. My original thinking was to paint this part separately to have a colour contrast between the coach body and the window frames. My brush painting isn't that good and so the frames and the body colour will now be the same, heigh ho.

Jon

IMG_5241.JPG
 

Jon Nazareth

Western Thunderer
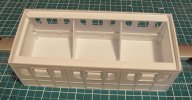
The sides and ends were so bowed that I had to fix in some pieces of styrene in to straighten out the body. I started off with the four right angles pieces, only two can be seen in the picture. That wasn't enough and so the long rectangular strips were fixed in place along the sides together with pieces for the ends. I used much thinner styrene for the body of this coach than I have used for other builds. It was much easier to cut etc., but it bowed terribly.

IMG_5290.JPG

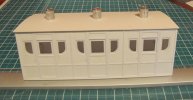
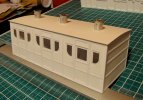
Here is the body with it's roof and oil lamps temporarily fitted. The roof is a thin sheet of aluminium and this time, I pasted on a sheet of watercolour paper. The paper that I used is slightly more textured than the drawing paper that I used for the lantern roof of the brake van.

IMG_5287.JPGIMG_5288.JPG
 

michael mott

Western Thunderer
The coach is looking very nice Jon. I keep thinking that I want to move up to the larger scale every time go through one of your builds.
Michael
 

Jon Nazareth

Western Thunderer
Michael
Go on, give it a go! I’d never go back to a smaller scale. Some parts are quite small but still handleable. Although, it’s always said that if one ups the scale one should up the detail. From what I’ve seen of your work on WT that wouldn’t be a problem for you as your work is always excellent.

Jon
 

michael mott

Western Thunderer
Michael
Go on, give it a go! I’d never go back to a smaller scale. Some parts are quite small but still handleable. Although, it’s always said that if one ups the scale one should up the detail. From what I’ve seen of your work on WT that wouldn’t be a problem for you as your work is always excellent.

Jon
Hi Jon I was thinking about the little V2 parcel van that I have been working on with the working clasp brakes, would make a decent place to start. This weekend I began working on some Mansell wheels.
Thanks for the encouragement. As I get older I am finding the smaller work to be that much more challenging, because I like to make everything I can. Go me the making is the best part of the hobby.

Michael
 

NickB

Western Thunderer
I would second what Jon says. I scratch built about 20 locos in O gauge before moving up to G3, and I've never regretted it. Twice the detail and half the frustration.

Nick
 

Jon Nazareth

Western Thunderer
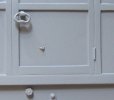
It absolutely bucketed down this morning and if I hadn't had to go out to get my hair cut, I would have stayed at home. The strange thing is though, by midday the rain had stopped, the clouds cleared away and the sun came out. It was still a little breezy but I though it a rare opportunity to get some primer onto the body. All is not as simple as it seems sometimes in this world and Mr Sod decided to put his law into play. The only fly that thought that it would go out and stretch it's wings landed on the side of the coach! :headbang: I'll have to give it a week to let the paint harden off properly and then I'll gently sand off the offending creature.
Jon

IMG_5315.JPG
 
Top