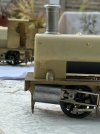
Crymlyn A Shop Techniques. GWR 1366 class.

davey4270

Western Thunderer
It looks a lot better than some I’ve seen…. The bunker looks good, how were the awkward corners?
The preformed inner rear was almost perfect with just a bit more curve required at the start of the bend and then making the top vertical again. I liked the half etched cut outs on the edges of this panel which locate the sides.
 

davey4270

Western Thunderer
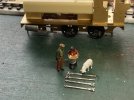
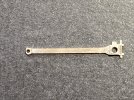
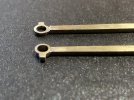
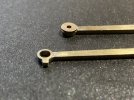
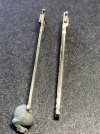
The Crymlyn A Shop foreman inspects the 2 newly delivered pairs of connecting rod blanks for the 1366 class contract. The big ends have already been machined.
Orla Board, who still has a contact on Martin Wood, keeps our foreman company with one of her girls from the local leisure centre.
Some progress on the 1366 contract can be seen in the background.

IMG_4637.jpg
 

davey4270

Western Thunderer
No.7.

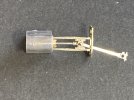
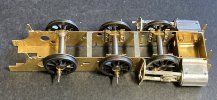
The first cylinder constructed has caused some head scratching. I usually build my frames with the cylinders, slide bars and slide bar support brackets soldered in place. It is usually possible to arrange for the cross heads to slide past the support brackets thus making masking and painting easier. Unfortunately this is nor feasible here due to the protruding detail on the face of the crossheads (these are slightly different on each side and not mentioned in the instructions) and the support brackets being in cast brass which is an extremely hard material to fettle. Anyway, the first one has been assembled with the piston rod shortened to suit along with the slide bars. These are of an angular concave shape as per the prototype and shortening the excess from the support bracket end will allow the wider part of the bar to close the gap between them and jam the cross head so I shortened mine a fraction at the cylinder end after a dry assembly run. I hope this makes sense. Straighten the cast brass piston rod and shorten to 22mm as suggested in the instructions and remember to fit the cast brass packing gland. There are 2 x 6BA threads in my cylinder blocks so they can be bolted in place and if aligned correctly the support bracket will also be held in place. Of course the main consideration here is that the cross head will slide smoothly to the each end of its travel under the effect of gravity with the absolute minimum of slop!

IMG_4651.jpg
The first complete cylinder assembly with a trial fit of the conrod. Some fettling was required for the 12BA screw to pass through. More on this in a later picture. The casting still requires more cleaning and a small casting fitted to the front which I haven't been able to yet identify. Hopefully this will become easier as less parts remain in the box!

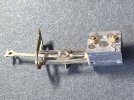
IMG_4652.jpg A rear view showing the fixing nuts and also that I have made a countersink in the back of the crosshead to make more clearance on the conrod pivot screw the face of which is now flush with its back. The 2 holes underneath are for the drain cocks.

IMG_4653.jpg
The inside front of the cross head needed filing to clear the con rod. Unfortunately this was not possible so the end of the conrod had to be shortened. I am not happy with this although hopefully wear won't ne a problem. This also shows the small overlay at the big end representing the bearing which was not mentioned in the instructions.
 

davey4270

Western Thunderer
No. 8. Fitting the Tank.

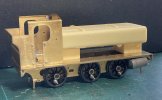
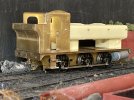
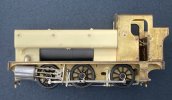
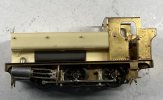
Little work has been done over the last few weeks mainly due to family commitments. However I've managed to get to the stage of a rolling chassis with the main body components assembled and fitted. The instructions suggest soldering the rear spectacle plate in position along with the window protection bars. This is all well and good except that several paragraphs later they suggest that the tank/cab retaining screws can be accessed through the windows in the rear cab spectacle plate!!! The method of holding the tank in place with these screws "while the adhesive sets" is pretty much the method I usually use to allow removal and reattachment of this component to help painting so these screws will be used to hold it permanently in place hopefully without glue. Erecting the bunker and then adding overlays seems like making extra work especially as the cab sides/front spectacle plates are a single etch. However this was done and the component soldered in place although getting it to sit flush on the footplate was considerably easier after the side locating tabs were filed flush. I hope to assemble the second cylinder over what's left of the weekend.
I will fit the rods and tow it around Pantyffynon Junction a few times before bringing the second class member to this stage.

IMG_4720.jpg
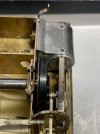
A view inside the cab showing the self tapping screws holding the resin tank against the cab front. As you can see access is considerably easier without the rear spectacle plate in position. This will be added later as access to the screws is just possible through the cab side doors.

IMG_4721.jpg
A view underneath the smokebox showing the two self tapping screws. Also visible lower is the chassis retaining screw and note that large clearance holes have been made around the tank retaining screws. This will allow the chassis to be removed without removing these screws. The left hand cylinder can be seen bolted in place with the right hand cylinder fitting holes visible.

IMG_4725.jpg
The etched hole for the front plunger pickup is inline with the rear cylinder block. I have drilled a new hole behind the axle (at top of the picture) and must remember to enlarge it the next time I drop out the leading wheel set.

IMG_4723.jpg
The resin tank (screwed) and cab/bunker assembly soldered to the footplate. I have drilled out the marks (dimples) for the handrail knobs but have not yet soldered the cab tank handrail knob in place as I wanted to check the alignment. I needn't have worried as it is spot on. I painted along the rivet lines with Carr's Metal Black for brass which stops the spread of solder onto them. I also soldered from the inside to minimise cleaning up which, in this case, was completely unnecessary.

IMG_4722.jpg
A rear three quarter view this time giving a glimpse of the tricky GWR style bunker which you have to form twice! Some traces of the blacking are still visible but these will soon disappear with subsequent cleaning.
 

davey4270

Western Thunderer
Another update before moving on to the sister locomotive sees the cab steps fitted along with the cab side handrails. The steps are designed to be soldered to the frames with a butt joint and thus be removed attached to the chassis. I wasn't happy with this arrangement and soldered them beneath the cab floor removing a few millimetres to clear the chassis and soldered a small piece of scrap brass vertically against the inside of the step to brace it. The tank handrail knobs were superglued to the resin tank and the cab side knob soldered from the inside of the cab. A discussion with a friend showed some concern over the bonding of these materials so I drilled the holes a FRACTION over size which should leave a film of the glue on the knob which was cleaned with a fibreglass stick. If the hole has zero clearance surely the glue would be wiped off when it's inserted? I also moistened the hole with a bit of spit inserted on a piece of wire before pressing home the knobs which were aligned with a piece of handrail wire. Apparently, moisture helps the glue stick on smooth surfaces. Perhaps this is why it prefers to stick to your fingers. Time will tell if this works!

IMG_4735.jpg
 

daifly

Western Thunderer
If the hole has zero clearance surely the glue would be wiped off when it's inserted?
If there was zero clearance, there would be infinite friction and you wouldn't get the knob in the hole. The glue only needs to be microns thick to do its job so a very snug fit is fine and everything will stay perfectly aligned.
Dave
 

davey4270

Western Thunderer
If there was zero clearance, there would be infinite friction and you wouldn't get the knob in the hole. The glue only needs to be microns thick to do its job so a very snug fit is fine and everything will stay perfectly aligned.
Dave
Perhaps zero clearance wasn’t the correct engineering term but I hope people will get my drift. I think the knob measured 1.44mm and I used a 1.5mm drill bit.
 

davey4270

Western Thunderer
A quick update on the second model sees the bunker constructed but while waiting for a replacement L/H cab side work has moved onto the chassis. New holes have been drilled for the front wheel plunger pickups and the two sets of cylinders/slide bars/cross heads/slide bar support brackets have been assembled and fettled to allow the cross heads to fall freely under their own weight with as little slop as possible. Any resistance here will obviously have a detrimental effect on the smooth running of the model.

IMG_4784.jpg
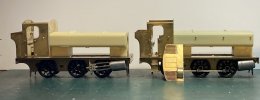
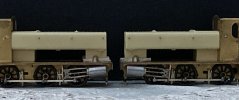
The second model to the left showing the R/H cylinder with a tube cast as part of the slide bar support bracket onto which will be mounted the vacuum pump. The cross head, note it differs from the L/H one in the next picture, has slid down against the support bracket and is in no way attached to it. On the first model, to the right, the cast hand brake shield (is this the correct term?) has been soldered in place on the cab rear spectacle plate.

IMG_4785.jpg Some care was taken to square up the slide bar support brackets with each other across the frames. The brackets also need to be at 90' with the inner surfaces of the slide bars (the outer faces are shaped and not parallel) which leaves them at an angle and not vertical. A 0.8mm drill bit passed through the vacuum pump mounting tube aligns perfectly parallel with the crosshead. They look angled to each other in this picture, but it is down to camera distortion. The cylinders are only bolted on at present as I haven't decided on whether to permanently attach them. The new holes for the plunger pickups can be seen although they still need enlarging but may interfere with the fit of the slide bar support brackets. The jury is still out on whether to proceed with them!
 

davey4270

Western Thunderer
9. Progress.

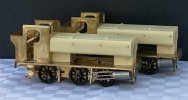
The second "twin" is now at a similar stage with work on the tank, cab and chassis. I progressed slightly with this model so the other one will have to play catch up.

IMG_4867.jpg
The "twins" with the nearest model having the cylinders fitted. There is absolutely no clearance for the leading crank pin against the back of the cross heads even with half thickness nuts fitted. I don't know how Scaleseven modellers will manage but Baldrick has another cunning plan! Perhaps slightly narrower sidebars and crosshead to match would be an idea?

IMG_4865.jpg
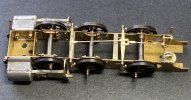
The brake gear has been fitted to the second twin along with the hand brake and vacuum brake cams. The lack of clearance on the lower leading crank pin is plainly visible. The short tube protruding from the lower slide bar support bracket is the mount for the vacuum pump. The smaller rearmost hole on the front frame spacer is for the chassis fixing screw while the other two larger holes will clear the two self-tapping screws which hold the tank assembly to the footplate. The cast brass brake blocks had to be significantly reduced to clear the wheel rims, probably filing off the best part of 1mm.

IMG_4861.jpg
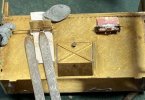
A second attempt at mounting the fold down seats was more successful. The fold down brackets on the seat were removed and it was soldered directly to the wire hinge. The existing pivots on the seat were almost a perfect match for the pivots on the small bracket soldered to the bunker front when they should have fitted inside, and the position of the seat's pivots also prevented them from folding down. This pair work perfectly and I'll have to work out a way of modifying the other set which will not be easy as the cab is soldered to the footplate. These will be almost invisible once the cab doors and roof are fitted so I might not bother. Hopefully the picture describes how this was done, the piece of paper being a spacer to allow for various coats of paint.
 

simond

Western Thunderer
Dave,

on my CRT version, I recessed the front faces of the coupling rods ( Premier Components) and made special short crankpin bushes to suit. Will post pix later
 

davey4270

Western Thunderer
10. Baldrick's Cunning Plan.

So simple it's unbelievable! No, I don't mean Baldrick, the Crymlyn A Shop gofor, I mean his cunning plan.

IMG_4904.jpg
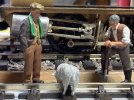
Seen here with the foreman and one of the girls from the local leisure centre, they discuss the Boyos work on fitting the result of Baldrick's cunning plan. The technical bit follows:

IMG_4900.jpg
Baldrick wondered why 3 laminations at the front boss were necessary while the rods pivoted on the centre crank with 2 laminations on one rod and 1 on the other rod. Surely the front boss could be reduced to 2 laminations and the bearing suitably reduced. This rod was simply cut through the first lamination close to the boss and the soldered laminations separated with a scalpel before cleaning up.

IMG_4901.jpgThe slater's crank pin bearing shortened, I use a piece of 5 thou Plasticard as a spacer, and the bush reversed. On final assembly it will be held in place with a spot of threadlock.

IMG_4902.jpg
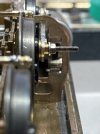
The exposed crank pin thread showing how much clearance has been gained. The nut and thread will eventually be removed.

IMG_4903 (1).jpg
A view forward from the centre crank pin showing a lack of clearance against the slide bar support bracket which will need to be modified. This is also visible in the leading picture. The reversed crank pin bush will be hidden behind the motion for most of the wheel revolution and if replaced with a steel or nickel silver bearing, or even a spot of steel paint, will be virtually invisible especially when the locomotive is working.
Well done Baldrick, Top Man!
 
Last edited:

WM183

Western Thunderer
This is a great build step-by-step. I am currently bulding the decades old "Majestic Models" kit of this same engine, but the kit is pretty terrible. The stretchers that set the width of the cylinders are not wide enough for the crosshead and guides to clear the crankpin and nut, so I am going to have to do some large-scale redoing, I suppose.

Wish I'd bought this kit instead.

Watching eagerly!

Amanda
 

davey4270

Western Thunderer
This is a great build step-by-step. I am currently bulding the decades old "Majestic Models" kit of this same engine, but the kit is pretty terrible. The stretchers that set the width of the cylinders are not wide enough for the crosshead and guides to clear the crankpin and nut, so I am going to have to do some large-scale redoing, I suppose.

Wish I'd bought this kit instead.

Watching eagerly!

Amanda
Can you do Baldrick's cunning plan and remove a lamination from the leading coupling rod boss? I managed to retro modify this by cutting into the first lamination just behind the boss, you don't have to cut right through. Clamp the rod right next to the cut in a vice and press a sharp knife into the joint of first lamination. Flex this until it snaps off and clean up. The vice stops delamination of the rod and then you can shorten the crank pin bearing.
 

WM183

Western Thunderer
Sadly I don't think it will get enough clearance. I'm likely going to just sell this thing and let someone else sort the mess. I need a good 1 to 1.5mm more than I have. It's BAD. Like, the guy obviously never tried to actually build his own kit bad, or he did and just didn't care.
 

davey4270

Western Thunderer
A quick update on the Crymlyn A Shop twins sees all cylinders assembled and fitted along with the coupling rod modifications. Small brackets have been fitted to support the vacuum brake cylinders and the outside steam pipes fitted after centralising the smoke box. Only one twin needed this, it was only 0.5mm out but noticeable when checked as 2 x 0.5 = a 1 mm offset. The outside steam pipes will now centralise the smoke box and were Araldited in place with a paper shim to prevent them sticking to the smoke box and giving a minute gap for a few coats of paint. I would have preferred to solder these but the instructions gave grave warnings of the effect of heat on the resin tank assembly!

IMG_4914.jpg
 

davey4270

Western Thunderer
Some minor work on one of the twins today involved cleaning up the outside steam pipes, fitting the lower boiler and some thoughts on the con rods.

IMG_4916.jpg
The tank/boiler moulding was easily removed from the footplate, the paper spacers doing their job. The remnants of the Araldite were carefully removed and the surfaces cleaned up. The resin moulding is extreme soft with even the gentlest touch leaving a mark. Be warned, it’s as soft as chalk but I suppose it has its advantage in not having to form the tank. The black background to this picture doesn’t clearly show the grey boiler bottom.

IMG_4917.jpg
A white background showing the grey lower boiler. This is made from rather soft plastic and a tad deformed. Some time was spent attempting to persuade it into a batter shape and removing the moulding feeds. A “flange” is moulded on one end which I suspect would attach to the smoke box end. What should have been an easy task wasn’t helped by a lack of location aids and an extremely soft component. Trying to hold it in position without further distortion while the Araldite set was a chore.
The front of the firebox moulding above the lower boiler moulding was removed to allow future access for additional weight if necessary.

IMG_4915.jpg
Baldrick’s cunning plan in removing one lamination from the coupling rods set me thinking. The con rods are made from 2 laminations with the outer lamination half etched and look decidedly puny compared to the coupling rods. I soldered an extra lamination to the con rods and re profiled them. Unfortunately, some instructions on the scrap etch show on the inside of the rod which will need further attention to disguise this. The modified rod is shown on the right while an original rod is to the left with Blutac needed to keep it upright. What are your thoughts on this?
 

davey4270

Western Thunderer
Not much progress on the twins this week due to many other distractions. However, a chat with 1369’s owner about the way forward to fit dcc operation provided fairly easy solutions. The model will be completed and run in as dc with all the dcc paraphernalia retro fitted. Allowance for this being made in the build.
Work done has been to modify the seats on the first model to the method used on the second model. This was difficult due to the cab being now fitted to the model while this was initially done before the cabs were fitted. Access was a nightmare! One pair of slide bars were found to angle slightly in to the frames and these were corrected without affecting the free movement of the cross head. One chimney has been hollowed out and Araldited in position after correcting a slightly oval casting and opening out the hole beneath it through the tank/smoke box casting.

9FA11517-B7B4-41D0-AD8D-44465BF1B3BA.jpeg
The front end of 1369 showing the adjusted slide bars. I was fortunate in that there was a fraction of clearance between the bars and the support bracket allowing just enough movement to correct the inward angle. I applied some flux to each bar holding the bar against the “L” bracket with a tweezers while gently pushing it outward with a hot iron. Once the solder melted it moved outward a fraction with a satisfying click with the tweezers holding the bar and bracket together while it set.
The view also shows the vertical line through the centres of the the cylinders, steam pipes, smoke box and chimney on GWR 2 cylinder locomotives. The may be slight distortion in the iPhone picture.

284EBCB1-1EE4-4ABF-B844-A1706A72BEBE.jpeg
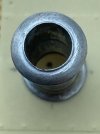
The fettled chimney showing the hole through into the smoke box as requested by my customer. As the resin tank is easily damaged, scraping off any excess Araldite is difficult. A tip I use that might help is to wait 5 or so minutes until the Araldite has taken and is the consistency of chewing gum then pick it off with a cocktail stick.
 
Last edited:

davey4270

Western Thunderer
Both locomotives’ chimneys have been fitted along with an abortive attempt to Araldite the rear tank supports to the footplate. My understanding is that GWR painting policy is all vertical surfaces above the footplate other than the smoke box were green. This means, can anyone confirm this, that these brackets would be green and difficult to mask off if attached to the footplate. I plan to fix these to the tank only and spray with the tank.
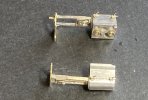
IMG_4962.jpg
The motion was dismantled, and the cylinder assemblies removed. Drain cocks were fitted and the cylinder attachment bolts shortened which will give a few more millimetres space should my customer decide to fit another speaker in this space.
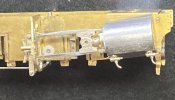
IMG_4960.jpg
I reamed out the relocated plunger pick up holes to test fit the insulation bushes, one of the etched holes for these is just visible above and behind the rear drain cock. This corresponds nicely with the fold down steam chest rear/chassis spacer so was of no use. Interestingly, the remaining etched holes are larger than the insulation bushes. I wonder these can be provided in black. The picture shows that the bush just fits in its new location tight against the slide bar support bracket.
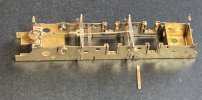
IMG_4961.jpg
The stripped-down frames were given a good scrub with a toothbrush and “Shiny Sinks” which removes 99% of all known germs, sorry, I meant flux. This also removes any bits that aren’t properly attached, hence the small chassis spacer which will be reattached.
IMG_4963.jpg
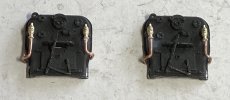
A start on the backheads sees the oil shelf, door operating mechanism and clack valves attached. I cut off the straight cast brass pipe on these and drilled a shallow hole to insert copper wire for the feed pipe. The injectors for this class fed through the cab front curving immediately upwards to the clacks. The copper looks more authentic than the cast brass extension to the clacks which would have been impossible to bend to the correct contour.
IMG_1905a.jpg
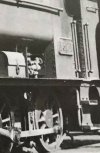
This picture of 1371 shows the outlet of the injector hard up against the cab front. Also discernible is that the drain runs through the footplate and not over the side as with the preserved 1369. I wonder if this was modified and when? The picture also shows the tight confines where the injector is fitted and that the water inlet valve from the tank faces backwards towards the cab.
 
Last edited:
Top